- Home
- /
- Article

Thanks for your feedback.

How to raise a service request
 In this article
 Feedback?
Open a service request to get the service assistance for DNS Entry, Firewall updates, Firmware upload from the control Hub to set up the dedicated Instance.
Overview
You can raise a Service Request from Control Hub for the following service assistance types, to setup a Dedicated Instance:
- DNS entry
- Firewall updates
- Firmware Upload
You can create and view the status of the Service Requests in the Control Hub under, Calling > Dedicated Instance > Service Request.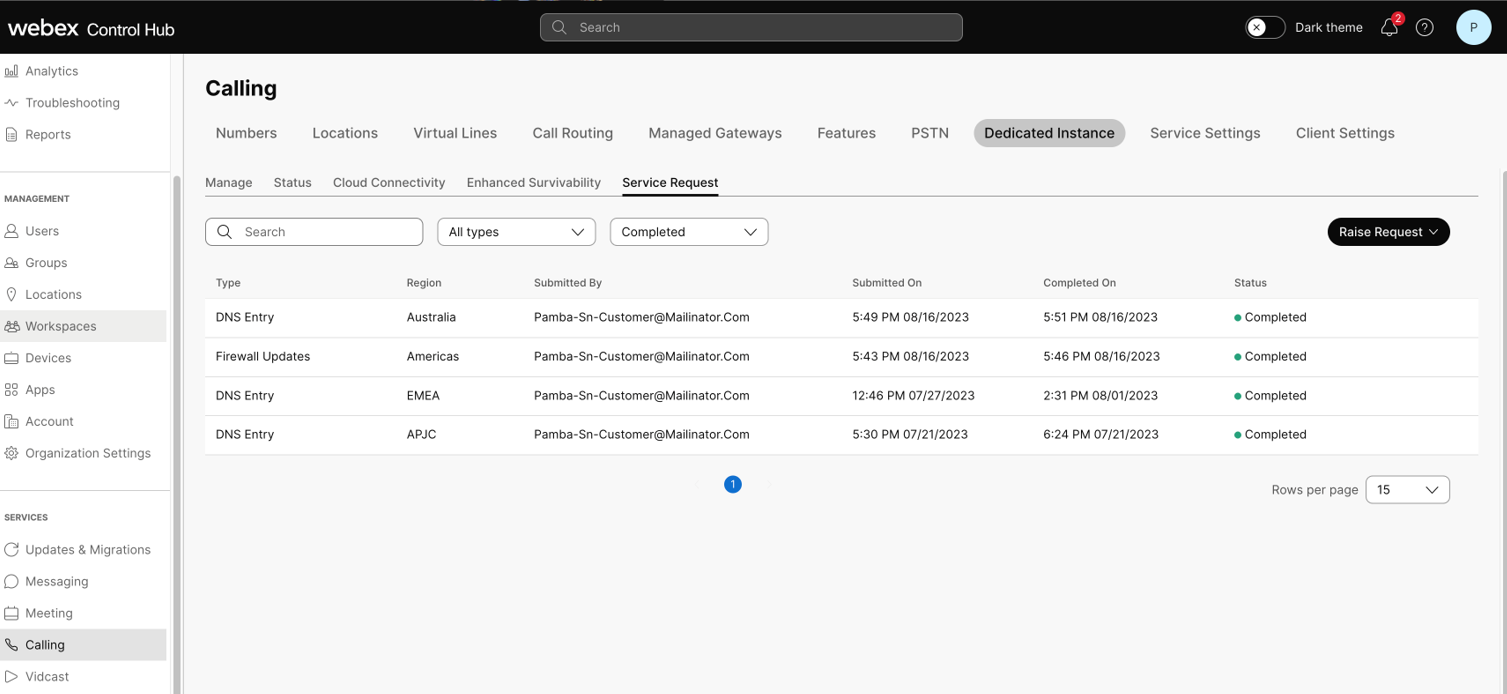
You can see the following fields in the Service Request page:
- Type: Service request type
- Region: Dedicated Instance region for which the service request was submitted.
- Submitted By: Name of the Service request submitter
- Submitted On: Service request submitted date and time.
- Completed On: Service Request completed date and time. The field is empty when the status is in “In Progress”.
-
Status: Status of the opened service request:
- In progress: Raise request type is in progress. You can click on more information to view the Estimated completion date and time.
- Completed: The raised request type is completed.
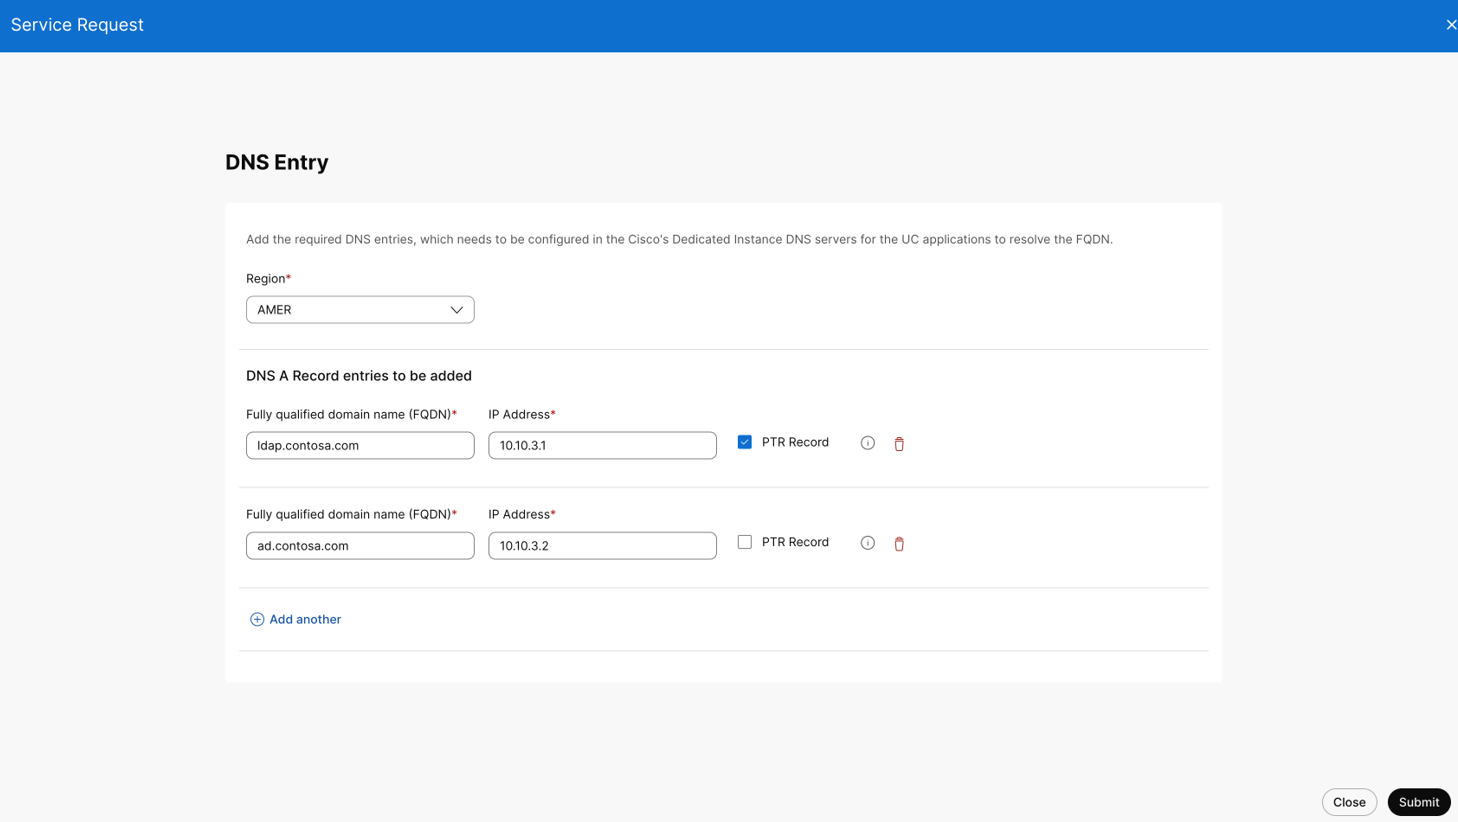
DNS Entry
| 1 |
Navigate to Calling > Dedicated Instance > Service Request. |
| 2 |
Go to Raise Request and choose DNS Entry. |
| 3 |
Choose the Region in Select a Region for which the DNS entries need to be configured. |
| 4 |
Enter the Fully Qualified Domain Name (FQDN) and IP address in the Fully Qualified Domain Name (FDDN) and IP address field. The provided values are configured in the DNS servers in Dedicated Instance that uses the UC applications. |
| 5 |
Select the PTR Record checkbox, if you need a reverse lookup of the FQDN and IP address provided. |
| 6 |
Click Add another to add multiple DNS entries. |
| 7 |
Click Submit and review the DNS entry request details. Once you submit the service request, it cannot change. |
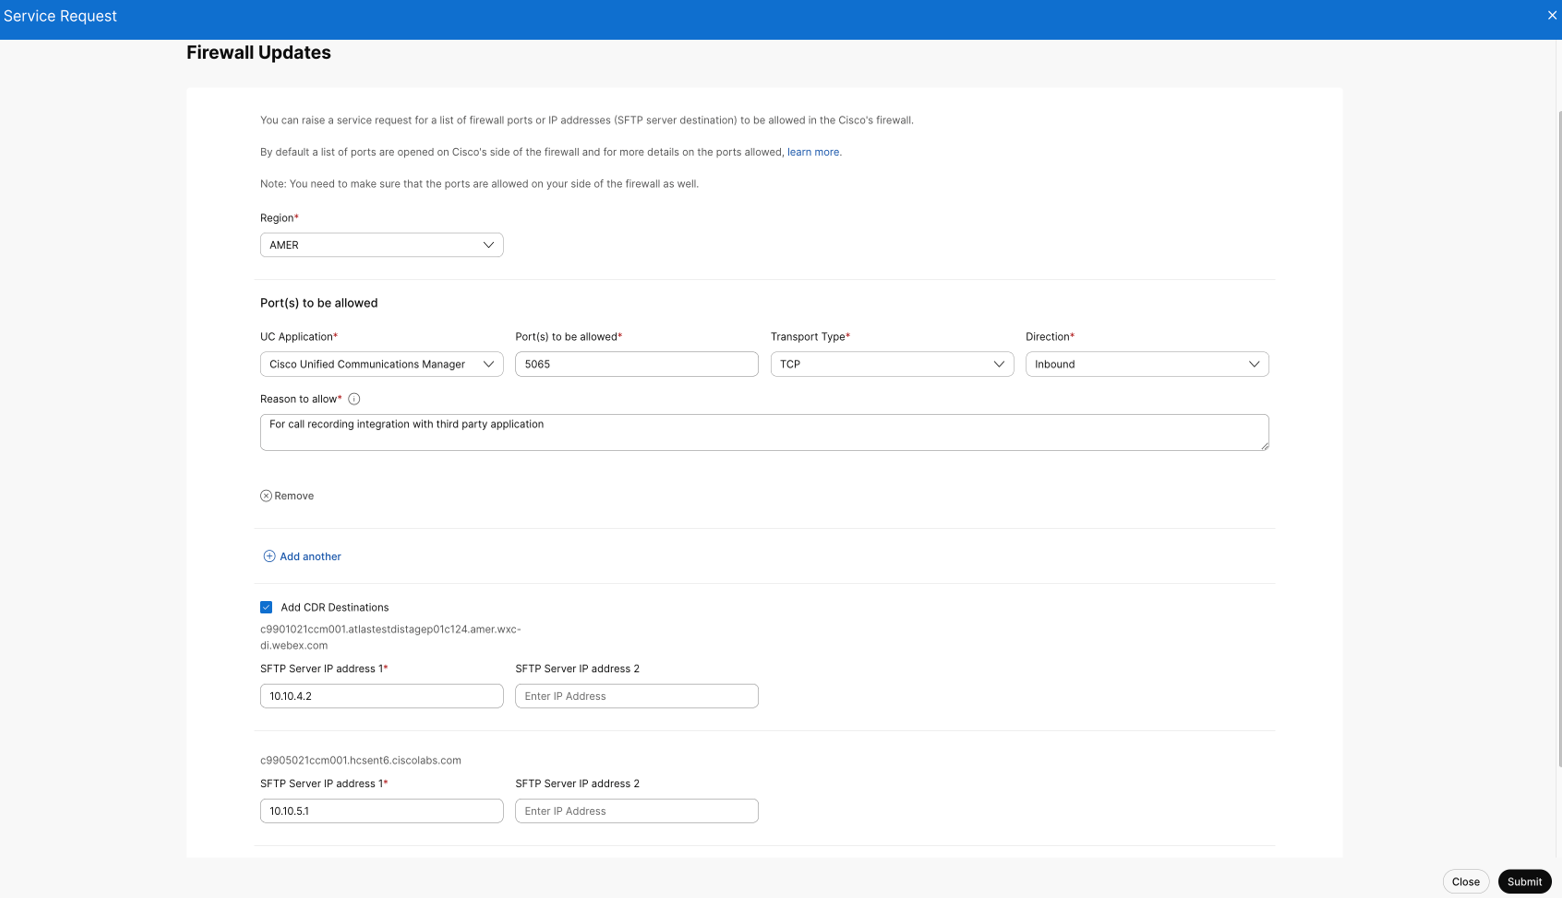
Firewall Updates
| 1 |
Navigate to Calling > Dedicated Instance > Service Request. |
| 2 |
Go to Raise Request and choose Firewall Updates. |
| 3 |
Choose the Region in Select a Region for which the Firewall updates needs to be done on the Cisco firewall. |
| 4 |
Choose the required UC application from the UC application list. The port opens specifically for the UC application type selected from the list. If you require to open the same port for multiple UC applications, you need to add multiple rows with the UC application type and the same port number. |
| 5 |
In the Destination Port, enter the port number to allow in the firewall for the selected UC application. The values for the Destination Port can be single or a range, for example, 5080 or 15000–17000. Make sure to allow the mentioned ports on your side of the firewall as well. SMTP port (25) is allowed only for Cisco Emergency Responder and Cisco Unity Connection applications. It is mandatory to provide the IP address to be allowed in "Reason to allow", as the port will be allowed only to that specific IP address. |
| 6 |
In the Transport Type and Direction, enter the type as TCP or UDP and choose Inbound or Outbound respectively. If you require a port to allow Inbound and Outbound, add separate entries (rows) with the same port number and different Direction type in the service request. |
| 7 |
In the Reason to allow mention the exact reason on why you need to allow the ports in the Dedicated Instance firewall. It’s important for us to review the request and decide whether to allow or reject. |
| 8 |
Click Add another to add and configure multiple UC applications. |
| 9 |
Select Add CDR Destinations (optional) and enter the IP Address of your SFTP server to be allowed in the Dedicated Instance firewall. This request won’t configure CDR settings in the Unified Call Manager and it’s your responsibility to do the same. |
| 10 |
Click Submit and Review the Firewall Update Request details. Once you submit the service request, it cannot change. |
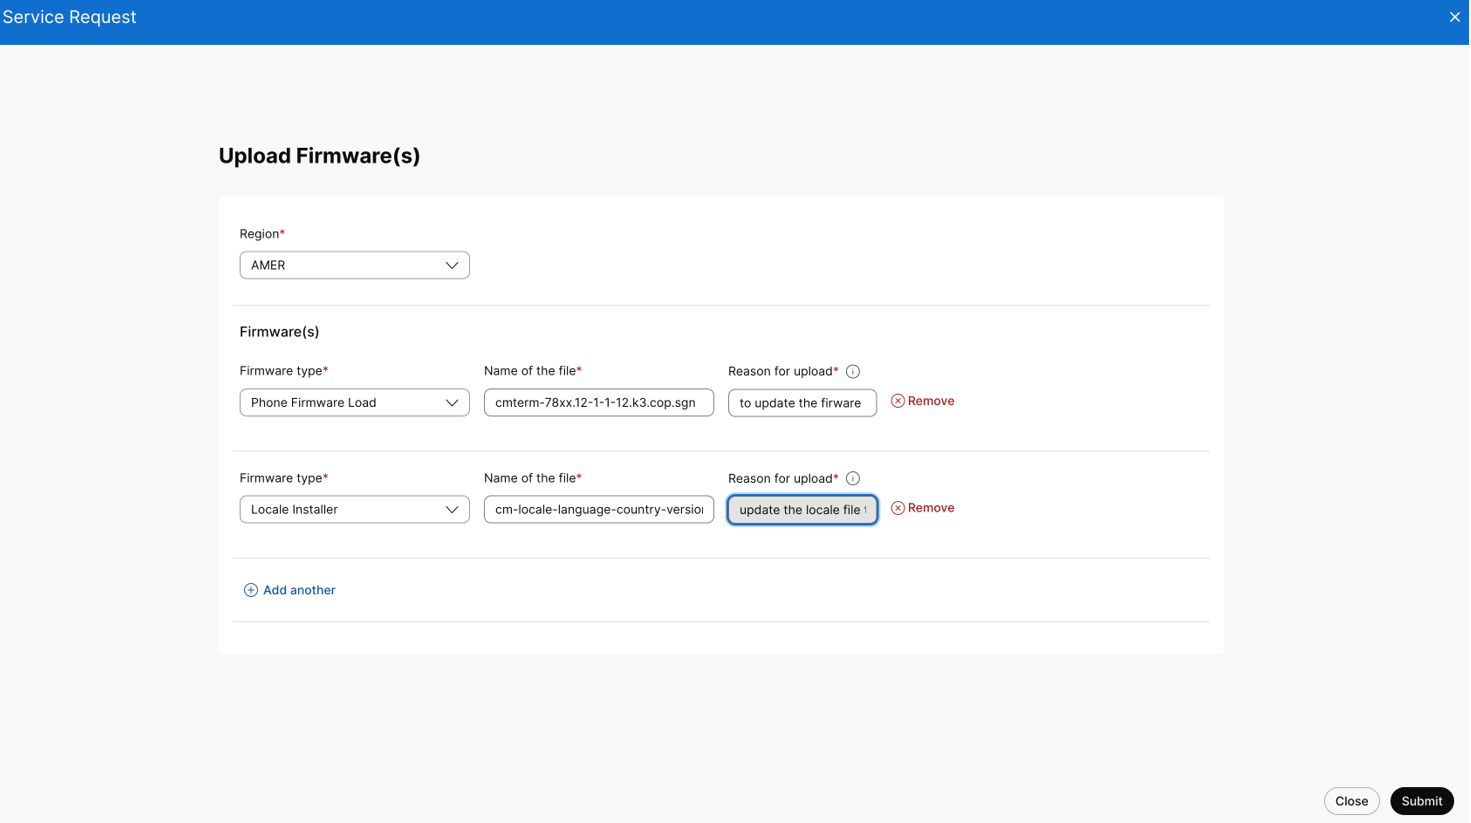
Firmware upload
| 1 |
Navigate to Calling > Dedicated Instance > Service Request. |
| 2 |
Go to Raise Request and choose Firmware Upload. |
| 3 |
Choose the Region in Select a Region for which the firmware needs to be uploaded in the SFTP server. |
| 4 |
Enter the following fields for the firmware uploading request:
|
| 5 |
Click Submit and Review the Firmware Upload Request details. |
| 6 |
You can view the SFTP server details in the Control Hub, once the request is moved to Completed state. Navigate to Calling > Dedicated Instance > Service Request and click on the Firmware Upload request. You can view the below SFTP server details:
Using the information, you can install the COP files as per your convenience in the UC application. To know the reason for rejection, hover over the reject icon. Cisco supports only publicly available builds and Engineering Special (ES) builds won’t be uploaded. Service Request raised for ES builds will be rejected by Cisco. |