- Home
- /
- Article

Thanks for your feedback.

Get started with the Attendant Console
 In this article
 Feedback?
The Attendant Console is a web-based tool that combines the Webex Calling service, Webex App, or desk phone with a desktop interface to process calls within or outside your organization. You can screen incoming calls, manage calls and contacts, and monitor calls in a queue.
Provisioning the Attendant Console license
Attendant Console is a next generation client that addresses the needs of front office and reception personnel. An administrator can set up users as telephone attendants to screen all incoming calls to certain people within your organization. Provision this client through the Control Hub.
The Attendant Console requires a license. Use the Cisco Commerce website (CCW) to order the licenses as an add-on to a Webex Calling or Webex Suite order.
Order an Attendant Console license in the following ways:
-
With the Flex-3 purchase order
-
With Webex Calling new subscription order
-
Change order with an existing Webex Calling subscription
Network requirements for Attendant Console
The Webex Attendant Console is compatible with the following operating systems and their minimum requirements:
| Product | Configuration |
|---|---|
|
Operating System |
Windows 10 or later |
|
MacOSX 13 or later |
|
|
Processor |
Four physical cores or more |
|
Memory |
4 GB or more of RAM |
|
Disk |
Minimum of 5GB of free disk space recommended |
Use this information to configure the corporate firewall so that the applications are not blocked.
TCP Port: 443 (HTTPS) for all outgoing connections.
Domains and URLs for Webex Attendant ConsoleHere are the top-level domains and subdomains that the application uses:
| Domains | Description | Apps using the Domains / URLs |
|---|---|---|
|
imagicle.cloud |
Access to Imagicle cloud communications network |
Webex App |
|
imagicle.com |
Access to Imagicle cloud communications network |
Webex App |
|
webexapis.com |
Access to Cisco Webex Platform, which is used by Webex microservices to manage your applications |
Webex App |
|
webexcontent.com |
Webex storage for user generated content and logs |
Webex App |
|
login.microsoftonline.com |
For MS teams Presence and Calendar integration |
Webex App |
|
graph.microsoft.com |
For MS teams Presence and Calendar integration |
Webex App |
Here are the fully qualified domain name(FQDN) and IPs that the Webex App connects to on the Imagicle Cloud network:
| FQDN | IP | Supported region |
|---|---|---|
|
ac.wbx.imagicle.cloud |
(1) |
All regions |
|
eu.api.imagicle.com |
(1) |
All regions |
|
actions-eu.console.imagicle.cloud |
18.196.9.252 |
Europe |
|
events-eu.console.imagicle.cloud |
18.195.152.104 |
Europe |
|
us.api.imagicle.com |
(1) |
United States |
|
actions-us.console.imagicle.cloud |
3.216.35.123 107.21.150.121 |
United States |
|
events-us.console.imagicle.cloud |
3.216.35.123 107.21.150.121 |
United States |
|
au.api.imagicle.com |
(1) |
Australia |
|
actions-au.console.imagicle.cloud |
54.253.32.29 52.64.249.210 |
Australia |
|
events-au.console.imagicle.cloud |
54.253.32.29 52.64.249.210 |
Australia |
|
ca.api.imagicle.com |
(1) |
Canada |
|
actions-ca.console.imagicle.cloud |
3.96.230.11 15.156.172.181 |
Canada |
|
events-ca.console.imagicle.cloud |
3.96.230.11 15.156.172.181 |
Canada |
|
uk.api.imagicle.com |
(1) |
United Kingdom |
|
actions-uk.console.imagicle.cloud |
35.178.34.119 3.11.199.94 |
United Kingdom |
|
events-uk.console.imagicle.cloud |
35.178.34.119 3.11.199.94 |
United Kingdom |
|
jp.api.imagicle.com |
(1) |
Japan |
|
actions-jp.console.imagicle.cloud |
54.65.182.69 54.168.26.80 |
Japan |
|
events-jp.console.imagicle.cloud |
54.65.182.69 54.168.26.80 |
Japan |
(1): This endpoint serves many IP addresses and the address may change.
Start a Webex Attendant Console trial for new customers
Start a trial for your customers so that they can try out Webex Attendant Console services before purchasing a subscription.
Before you begin
Use Partner Hub to add, remove, extend, or cancel service trials for customers, and learn how to convert a trial to a paid order. See Start and Manage Webex Enterprise Trials in Webex Partner Hub for details.
| 1 |
From the partner view in https://admin.webex.com, go to Customers, and then click Start Trial |
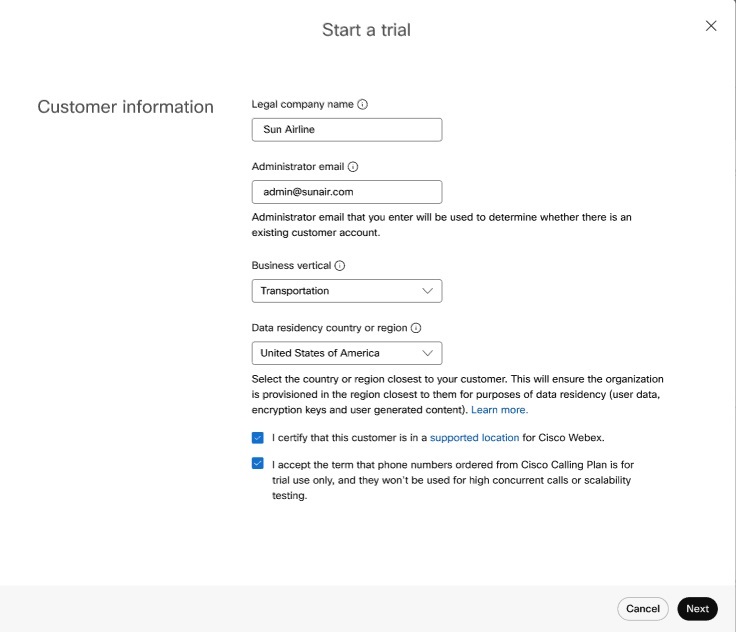
| 2 |
On the Start New Trial page, fill out the customer's company name, administrator email, and business vertical. If you can't find the exact business vertical of the company, then select the next best option.
|
| 3 |
Choose a country from the Country for determining data residency region drop-down list. This information helps choose the appropriate region to store your customer's data. If the company has multiple locations, choose the one with the most users. To maximize user experience and minimize latency, store data in the data centers closer to most users. To find out which region a country maps to, see Find the Data Locality Region That Maps to a Country.
|
| 4 |
Acknowledge that the customer is in a supported location for Webex services. See Where is Webex Available? for more information. When you're ready, click Next. |
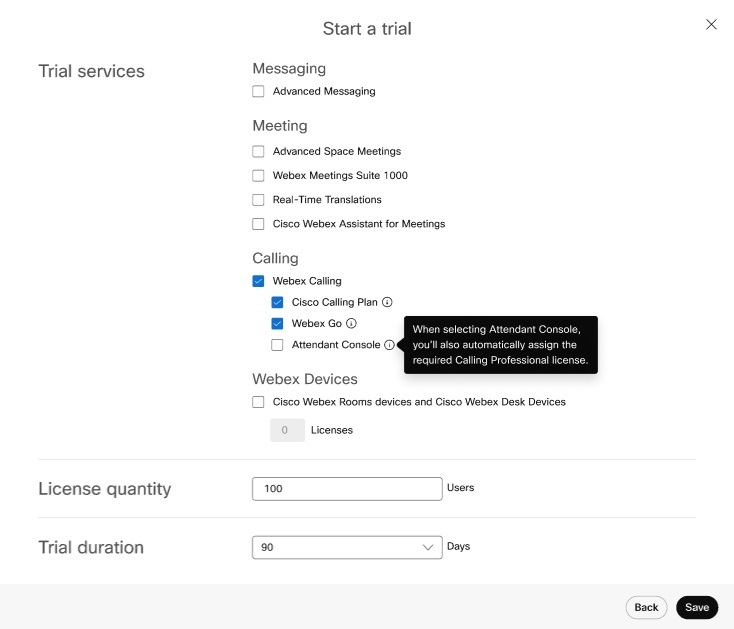
| 5 |
Choose the following for the new customer trial, and then click Next:
|
| 6 |
If you selected Webex Devices, choose the devices that you want to ship to the customer, or skip this step. You may want to skip in the following cases:
You can process only one shipment for each type of device. For example, if you choose to ship 2 phones, you can't go back later and ship 3 more phones. Phones do not include power supplies. Contact the Webex Enterprise trials team if your customer can’t support POE. |
| 7 |
Click Save and then choose one of the following actions:
|
Sign into the Attendant Console
Before you begin
-
Webex Attendant Console uses an embedded app framework to show the App inside Webex. Ensure you restart the App to enable the embedded App.
Refer to the Embedded apps in Webex article for steps to set the embedded app toggle to On.
-
Disable the Call pop-ups in your Webex App for the best user experience.
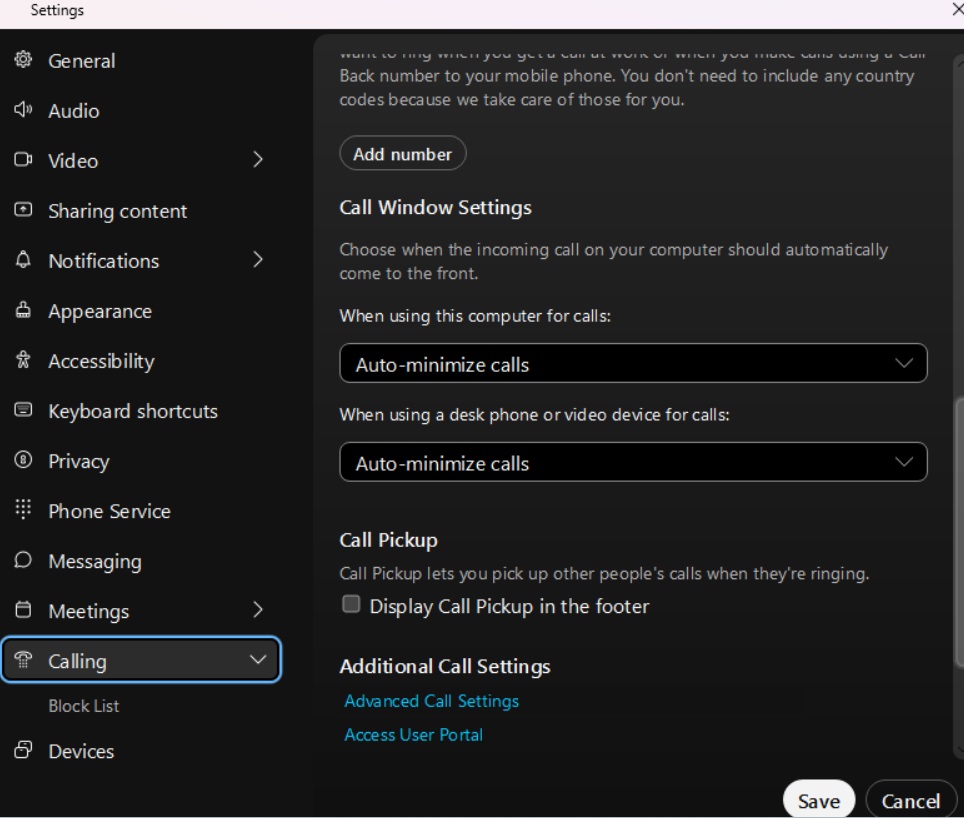
Disable the Multi-Call window for Windows users:

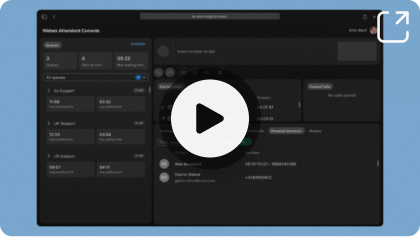
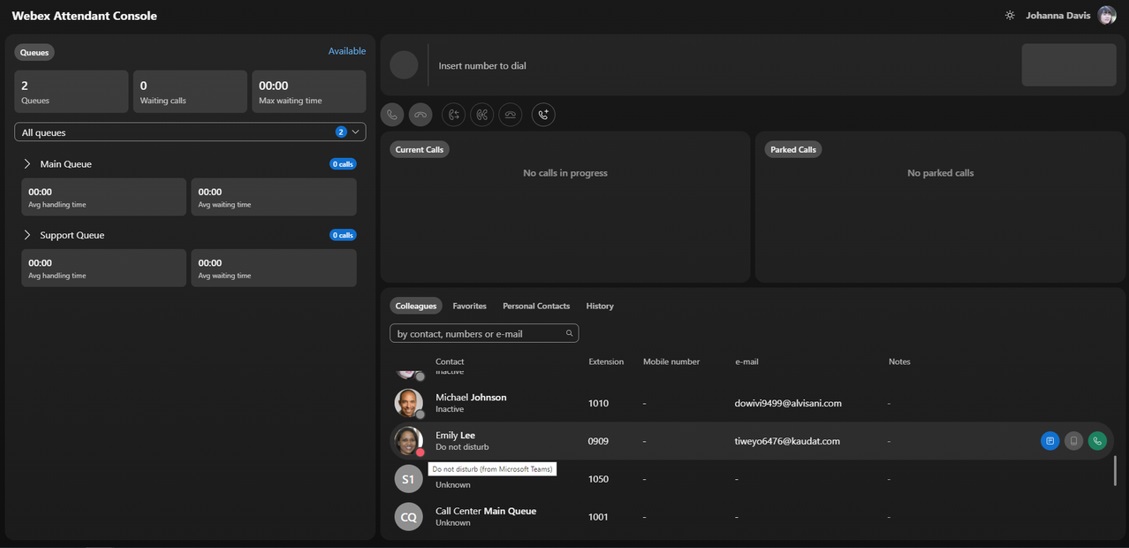
The Webex Attendant Console provides a simple and intuitive user interface, without requiring complex training processes. See the representation of the main panels and their functions, for an initial overview of what you find in the Webex Attendant Console.

Access the Webex Attendant Console
You need a Webex App to access the Webex Attendant Console.
-
Open the Webex App and click on the WxAC Gadget.
If you don’t see the WxAC Gadget icon, logout and restart the Webex App.

-
Enter your credentials.
If your organization has single sign-on (SSO) enabled, enter the credentials, and you’re directed to the log-in page of the provider.
Accept the following Webex Attendant Console permissions at the first login:
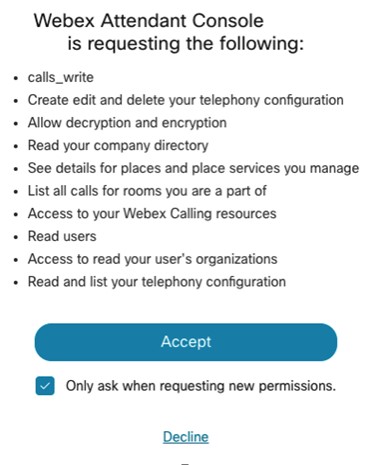
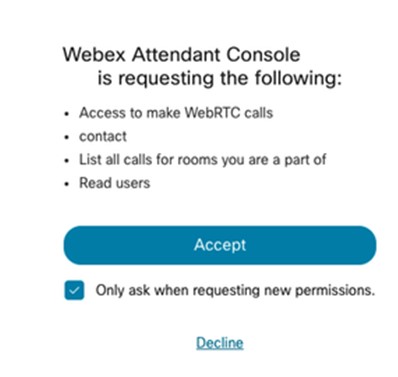
This permit allows the Webex Attendant Console to control the Calling device.
Enable the Attendant Console
You can manually assign a user to access the Attendant Console. See Add users manually in Control Hub for details.
You can edit an individual user’s license to access the Attendant Console. Select the user with the Calling Professional license and then select Attendant Console. See Edit service licenses in Control Hub for individual users for details.
The user must have a Webex Calling Professional license to access the Attendant Console.
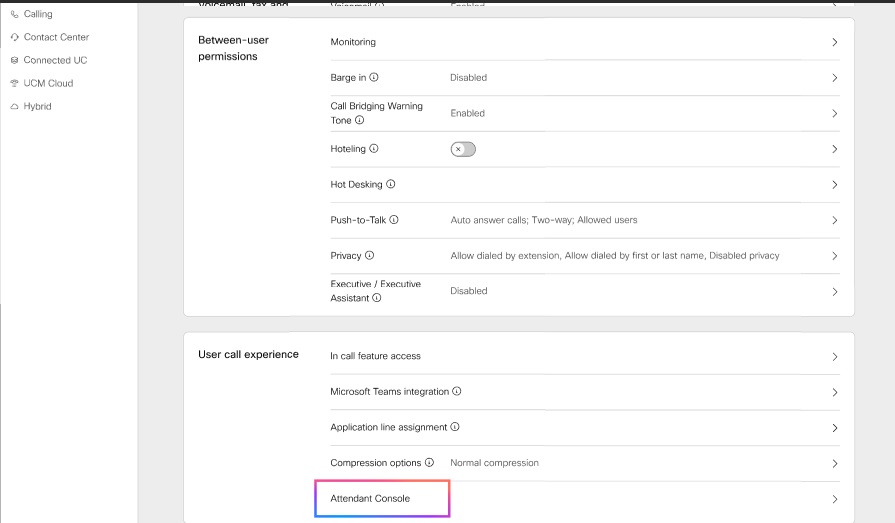
From the Control Hub, Go to Userand select the user to enable the Attendant Console.
Click Calling and scroll to User Call Experience > Attendant Console to turn on the Attendant Console.
On licensing a user with the Attendant Console, the administrator can use the Attendant Console features.
To create a favorite list for a user, go to Control Hub, navigate to the Services > Calling > Features tab.
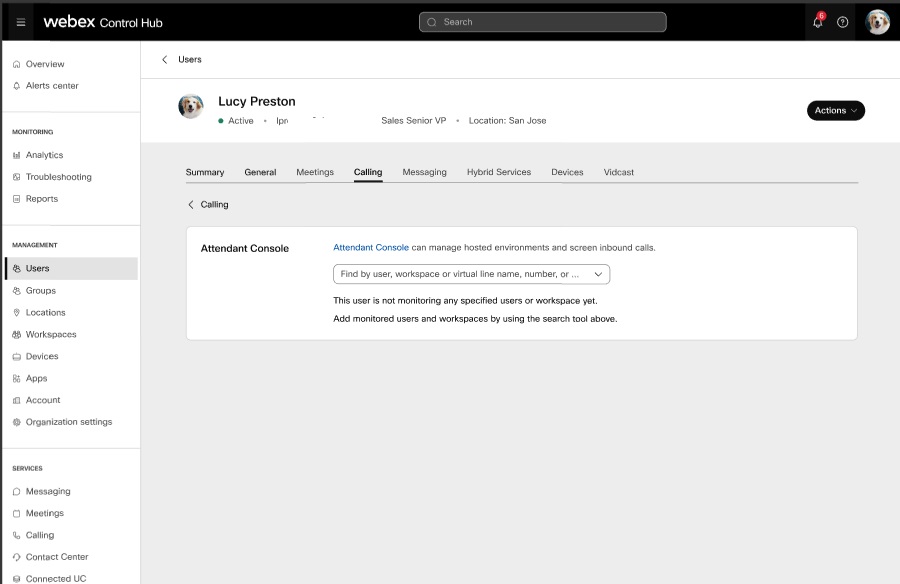
View the Attendant Console
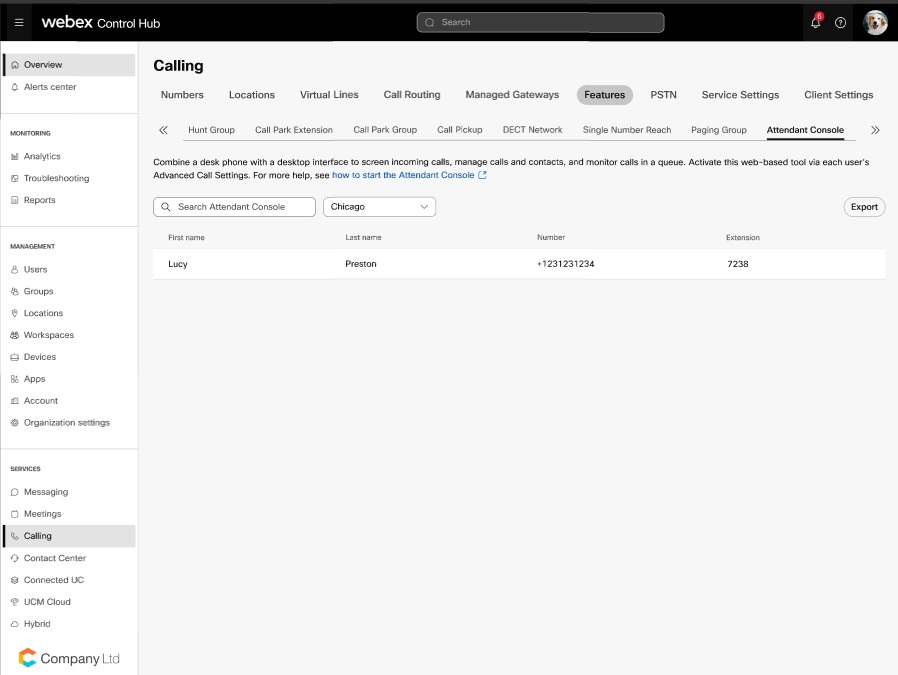
As an administrator, use the Attendant Console to view the list of configured users for the console.
- From the Control Hub, go to Services > Calling > Features > Attendant Console, select Attendant Console.
- Choose a location and then click OK.
By default, the Webex Attendant Console integrations are enabled. However, if the customer administrator has disabled the App/Integrations, enable the App/Integrations using the Integration ID. From the Control Hub, go to Management>Apps and enter the Integration ID.
- Search for the people or workspaces that you want this user to monitor and then click Save.
- You see the first and last name of the person assigned as a receptionist and their phone number. Click Export, if you'd like to export this list.
Want to know and understand the features in the Webex Attendant Console, watch Get Started with Webex Attendant Console
Experience for existing Receptionist Client users with the trial
If you use the existing Receptionist Client feature and plan to migrate to the Webex Attendant Console, note these pointers:
-
You can continue to use the Receptionist Client feature along with the Attendant Console trail subscription. You see the Attendant Console option in the Webex App. During trial, the feature tab for Attendant Console isn’t visible and the existing settings of Receptionist Client is used for favorites.
-
On purchasing the license for the Attendant Console, you no longer see the Receptionist Client and the user's calling settings under the User Call Experience on Control Hub. However, you can access the Receptionist Client using the link https://apps.broadcloudpbx.net/receptionist/login/cisco/?authorize=cisco until the end of feature support. There’s no loss of configuration data such as the favorites.
For organizations that don’t use the Receptionist Console, you can’t enable the Receptionist Client from the Control Hub.
Contact management
Fast search
The Fast Search feature offers a streamlined approach to locate contacts within the console, enhancing your productivity. You can access the Fast Search modal using any of these distinct actions within the system:
-
Start a new call: Initiating a call.
-
Start a Consultation Transfer: Launching a consultation transfer.
-
Start a Blind Transfer: Commencing a blind transfer.
For an overview, watch
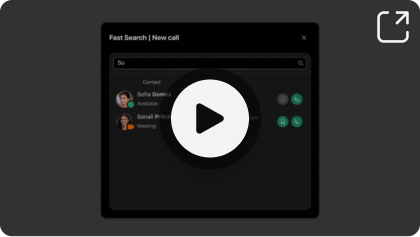
Open the Fast Search modal to search across various directories. To initiate a search, follow these steps:
| 1 |
Enter your search query in the designated field. Queries can include names, phone numbers, or email addresses. |
| 2 |
Press Enter or click on the magnifying glass icon to search. If your query fails to yield any matching contacts, a notification displays for the same. If the search is successful, the associated results display beneath the search field. Personal contacts matching your query takes precedence over contacts from other directories. |
Each search result displays with the following details:
-
The avatar of the contact along with their current presence status.
-
Associated notes (if available)
-
Action buttons that vary depending on how the Fast Search modal was initiated. For instance, if you accessed the modal through the Start a new call action, you find buttons enabling you to initiate a call for each matching contact.
To load additional results, scroll down using your mouse.
If you’re on a call and try placing another call through the Fast Search Panel, the current call is placed on hold.
Search in colleague's directory
The Colleague tab is designed to streamline your access to essential information about your colleagues within the organization. You can quickly and efficiently retrieve contact details, presence updates, extension number, mobile number, and other information such as email or personal contact notes.
Do you want to see how it's done, watch:
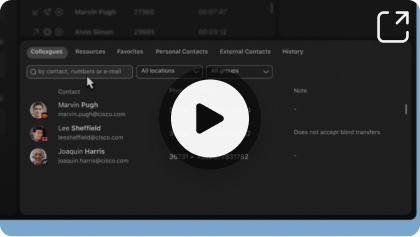
To navigate through the directory, enter their name, number, or email in the search bar and click enter or the search icon.
Use the Colleagues tab to search all the users in Control Hub, and not restricted to the Webex Calling users. You can filter users by specific location or group.
Hovering over a contact reveals specific actions, such as:
-
Add to favorites
-
Adding or editing a note
-
Calling the mobile number
-
Calling the extension
You can also find a description of the presence status for the contact. If configured, this description includes both Webex and Microsoft team presence.
Search the favorite directory
The Webex Attendant Console allows managing two types of Favorites contacts:
-
Self-managed favorites- managed by each receptionist persona
-
Admin-managed favorites-managed by an administrator for the specific receptionist
Do you want to see how it's done, watch:
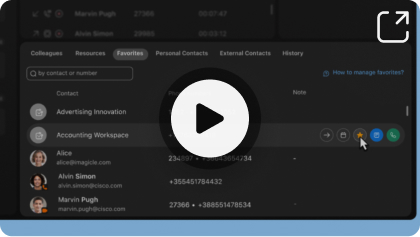
Self-managed favorites
These favorites are flexible as the receptionist users can add and remove the contacts.
To add a new contact to the Favorites tab, click the star icon against the contact from the Colleagues or the Resources tab.
You can search your favorites contacts, see their presence information, and call their associated numbers.
To remove a contact from Favorites, click the star icon against the contact on the Favorite tab, or from the Colleagues and Resources tab.
Admin-managed favorites
Only administrators can add, delete, and manage these favorites, while the receptionists can see the contacts listed in the Favorites tab.
Only administrators can add and manage contacts in your favorites list using the Control Hub, using these steps:
| 1 |
Sign into the Control Hub. Navigate to Users> Management.
|
| 2 |
Select the receptionist user that you want to configure favorites. |
| 3 |
Click Calling and scroll to User call experience, click Attendant Console. |
| 4 |
Enter the name and number of the favorite contact in the search field.
|
| 5 |
You can choose to Add or Delete a favorite. |
| 6 |
Click Save. |
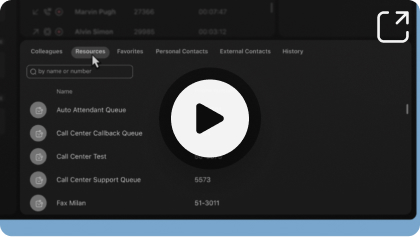
Search using the Resources contacts
Use the Resource tab to search across the following Webex Calling resources:
Do you want to see how it's done, watch:
-
Call queues
-
Hunt groups
-
Auto attendants
-
Workspace-Ensure the Hide from Search option is not enabled in the corresponding configuration in Control Hub for a Workspace.
-
Virtual extensions
-
Virtual Lines-Ensure to enable the Directory Search option in the corresponding configuration in Control Hub for a Virtual Line.
You can add resources contacts to favorites.
-
Phone and rich presence is not available for resources.
-
For some resources, an administrator can explicitly hide a resource and also prevent it from appearing in the search results.
Search using external contacts
Use the External contacts tab to search the Control Hub corporate contacts as a centralized address book.
Do you want to see how it's done, watch:
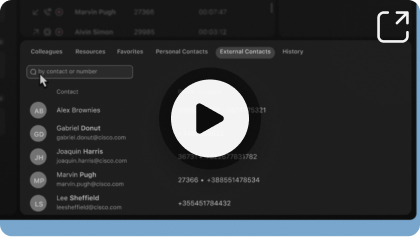
The contacts sources can be:
-
Local (manually loaded to Control Hub)
-
BroadWorks
-
Lightweight Directory Access Protocol (LDAP)
-
Cisco Unified Communications Manager
Manage the personal directory
You can add contacts who aren’t part of your organization using these steps:
Do you want to see how it's done, watch:
-
Use the Personal Contacts tab and then click Create.
-
Enter the name and phone number of the person that you want to add, and click Confirm.
-
You can edit, delete, and place calls to the contacts you created. Hover on the contact table row, and click on the button corresponding to the required action.
On adding the Personal contacts, the same contacts appear in the contact list on the Webex App and inversely.
For an overview, watch Using the Personal directory.
Add a note
Use the Attendant Console to add notes to colleagues and favorite contacts. Hover over the contact row and choose the contact, click on the Add note option.
Notes are private and have a character limit of 255 characters.
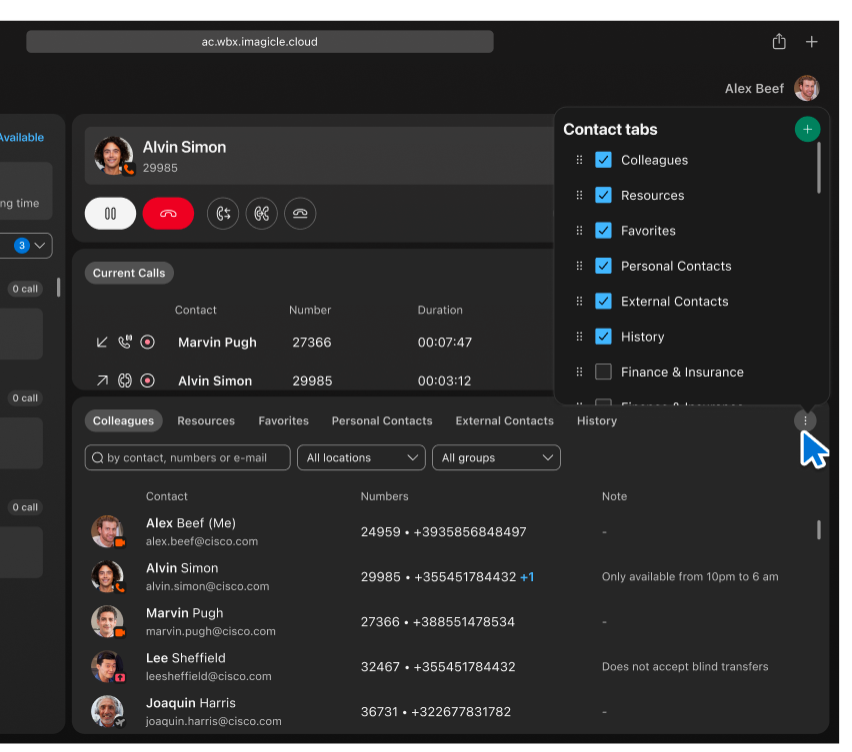
Customizable Tabs
Manage your contacts using customizable tabs
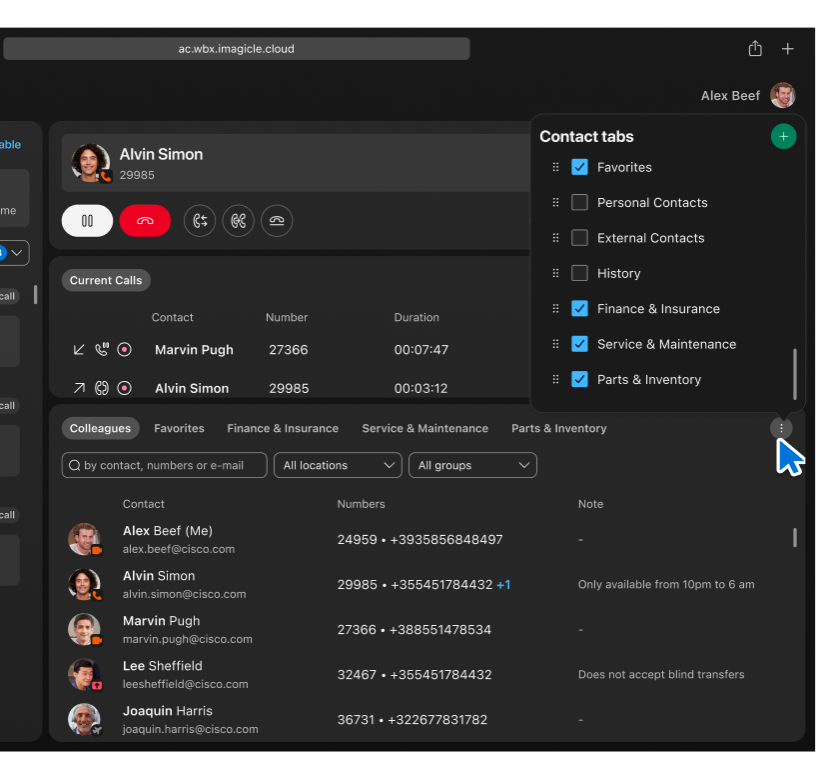
The Customizable Tabs feature introduces a flexible and user-driven way to organize contacts within the Webex Attendant Console. It enables you to define, rename, reorder, and assign contacts to tabs based on personal workflows or organizational needs.
The tab management pop-up is accessible from the right-hand corner of the contact panel interface. Click the new icon to open a menu where you can:
-
Show or hide existing tabs using check boxes.
-
Add new custom tabs by name.
-
Reorder tabs through drag-and-drop within the pop-up.
This interface gives you complete control over your contact layout, supporting use cases from department separation to contact prioritization.
Creating and organizing custom tabs
You can create new tabs such as Finance & Insurance, Service & Maintenance, and Parts & Inventory that appear alongside the default ones (like: Colleagues and Favorites), making navigation clearer and more intuitive.
You can toggle the visibility of these tabs at any time using the same menu.
Assigning contacts to tabs
You can assign a contact to one or more tabs. When you click the star icon or the contextual menu for a contact, a pop-up appears that allows multitab assignment through check boxes.

Benefits:
-
Full customization—Define as many tabs as needed for any workflow.
-
On-the-fly management—Add or assign contacts during live operations.
-
Visual clarity—You can clearly see all tabs and switch between them easily.
-
Scalability—Ideal for users managing multiple departments, customers, or regions.
Call Management
Call from the keypad
You can call using the Colleagues, Favorites, Personal Contacts, or the History tab. Scroll to the contact and the contact highlights allowing you to make a call.
To place a call from the keypad.
| 1 |
Insert a valid number and press Enter on your keyboard or Click on the Call button. |
| 2 |
Alternatively, Click on the Telephone handset icon to perform a fast search and call a memorized contact. To call directly without receiving and answering an inbound call, set a Preferred device in the device preferences. |
Call from the fast search
The Start new call functionality provides a swift and efficient means of initiating calls through the Fast Search modal. This feature simplifies the process to reach your contacts. To get started, follow these steps:
| 1 |
Click on the Start new call button. The Fast Search panel displays streamlining the call initiation process. |
| 2 |
Within the Fast Search panel, enter your search criteria to locate the desired contact. You can search by name, phone number, or extension. |
| 3 |
Identify the contact you wish to call, select one of the available contact numbers, such as mobile, telephone, or extension. |
| 4 |
Click the Call button associated with the chosen contact number to initiate the call. |
Manage call
Receive a call
To answer a call, click the Answer call button on the keypad or use the Current Calls Panel. Also, ensure you select a preferred device in the device preferences.
Hold/Resume
Use the Hold /Resume feature to control the active calls, allowing you to pause and resume the conversation.
-
Place a Call on Hold—To place an active call on hold, click the Hold button. This action pauses the call, and the status icon next to the call entry in the Current Calls panel updates.
-
Resume a Held Call—To resume the foreground call that's currently on hold, click the Resume button. This action resumes the held call, allowing you to continue your conversation.
You can resume a call from the Current calls panel. Double click on the call or click the Resume button that appears on hovering the call.
Transfer a call
Use one of these methods in the Webex Attendant Console for transferring a connected call:
-
Blind Transfer
-
Attended Transfer
-
Fast Transfer
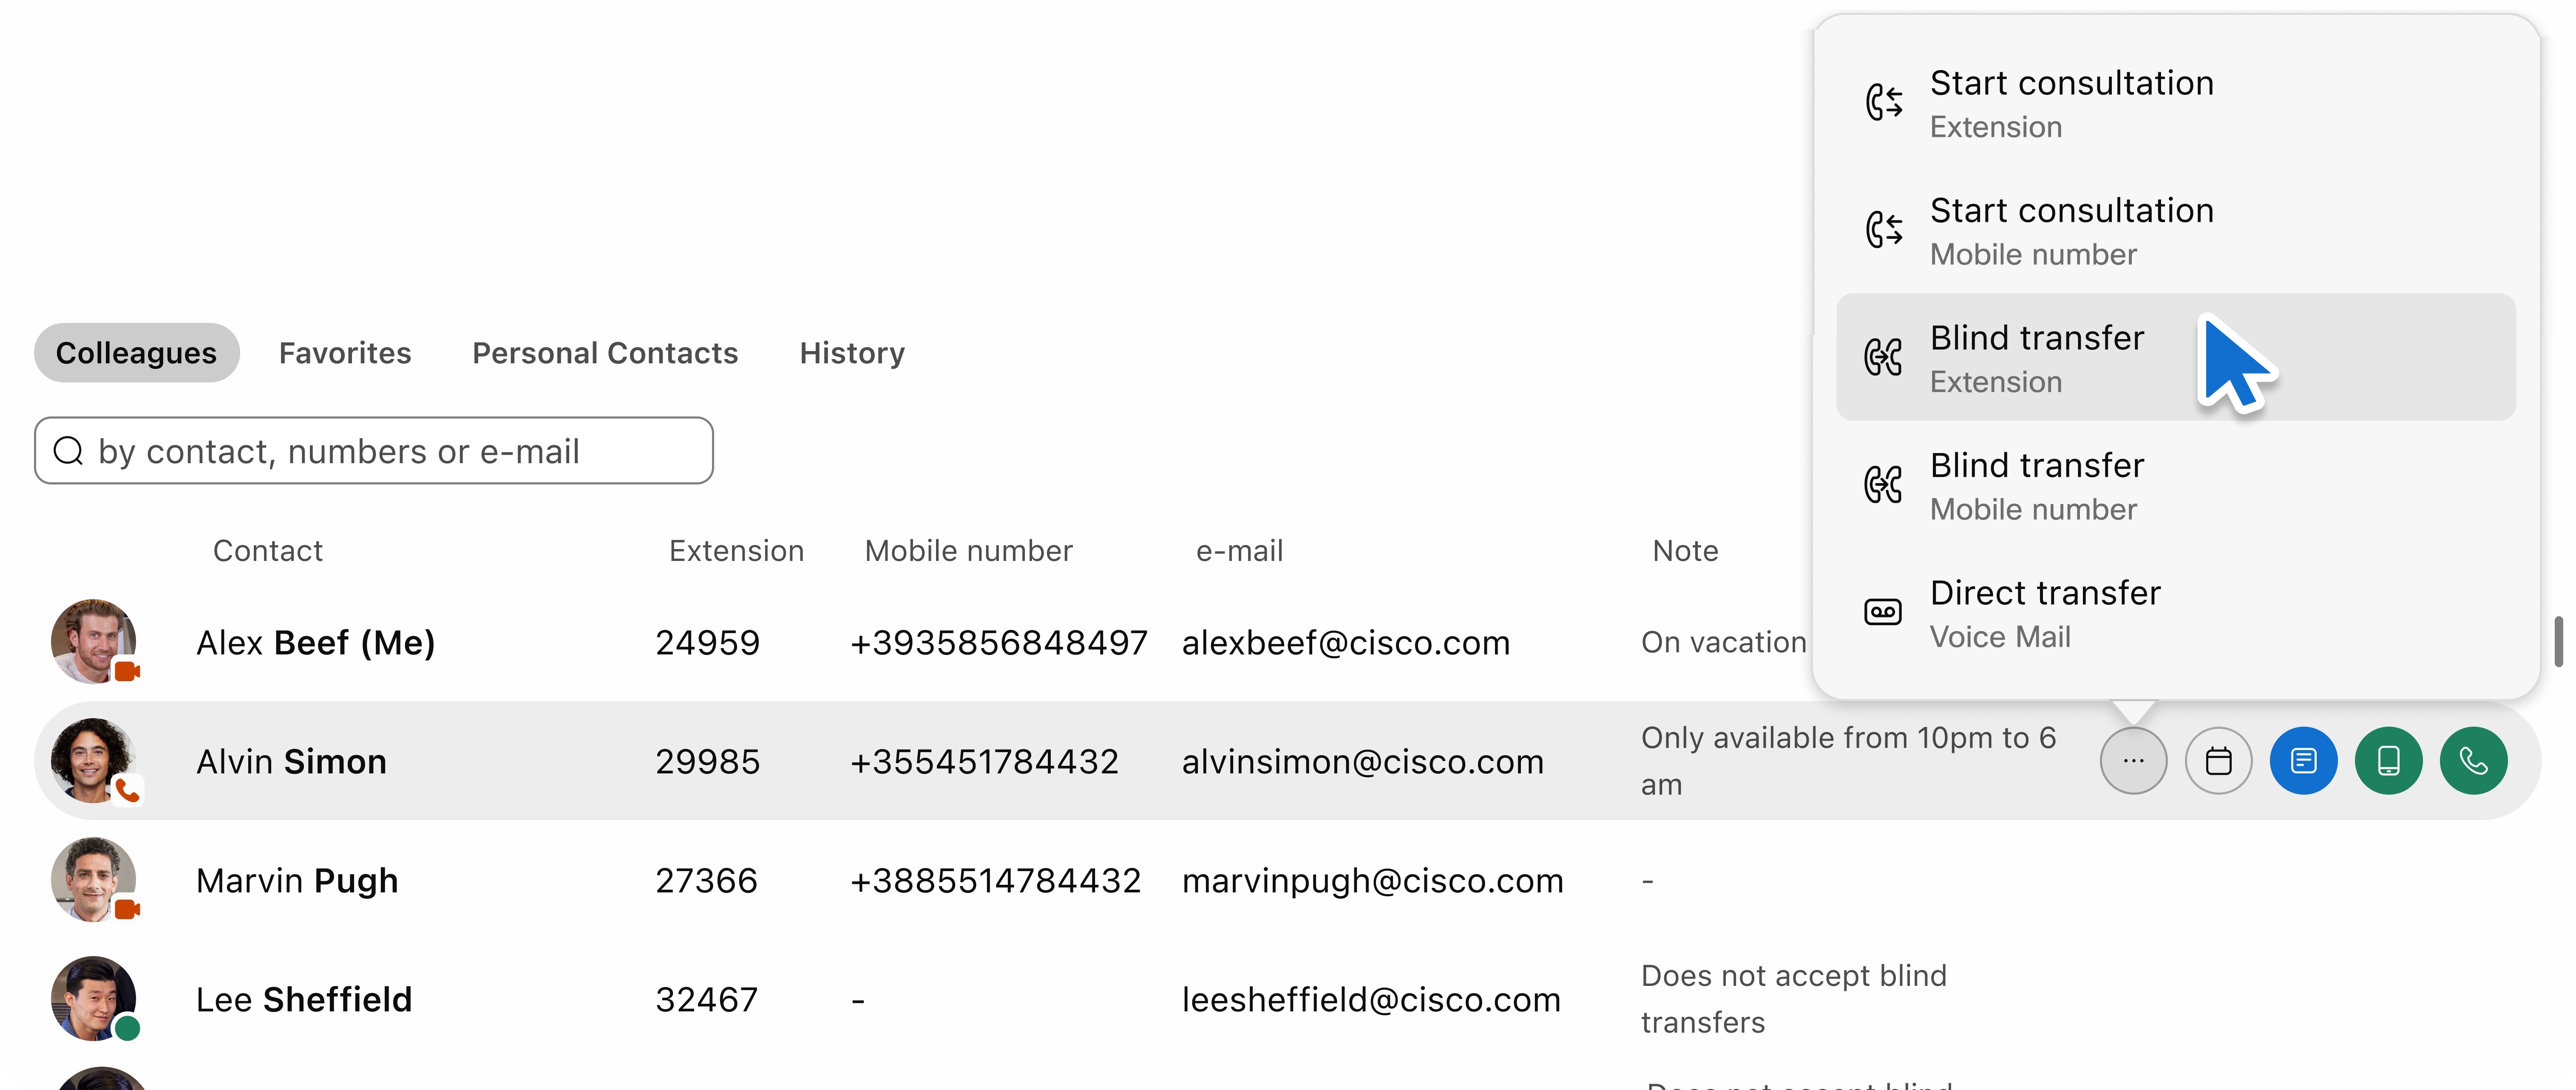
Blind transfer
Blind Transfer also referred to as an unattended or cold transfer, redirects a connected call to a new destination without any prior consultation with the recipient. Use this method to transfer a call to another agent, a different department, or an external contact.
To initiate a Blind Transfer, follow these steps:
-
Click on the Start Blind Transfer button located below the keypad.
-
The Fast Search panel displays. Use it to locate the contact.
-
Select whether you want to transfer the call to the contact's extension or mobile number and complete the Blind Transfer.
For an overview, watch Blind Transfer.
Attended transfer
The Attended Transfer also known as a warm or consultative transfer, allows you to consult the recipient before completing the call transfer.
To initiate an Attended Transfer, follow these steps:
-
Click on the Start consultation transfer button.
-
Search for the contact that you wish to consult, and click the designated button to initiate the consultation.
-
Post consultations click the Complete Transfer to conclude the transfer.
For an overview, watch Attended Transfer.
Fast Transfer
Webex Attendant Console allows fast transfer of a call to a relative destination. Select the relative destination on any contact panel, Colleagues, Favorite, Personal Contact or Call History.
This feature provides a convenient way to transfer calls to the frequently used destinations.
To initiate a fast transfer during an active call, use the Blind Transferor Start consultation transfer and transfer the call to an extension number or a mobile number. Select the action button on the relative contact.
Transfer call to voicemail
Sometimes, it's necessary to direct a call to the recipient's voicemail, especially when they are unavailable or after business hours.
-
To initiate a transfer to voicemail, go to the Fast Search panel.
-
Click the Transfer to Voice Mail button to reroute the call to the selected contact's voicemail.
One-click transfer
The One-click transfer feature simplifies transferring active calls with minimal user interaction. Contextual buttons placed next to each contact allows you to initiate a transfer with a single action.
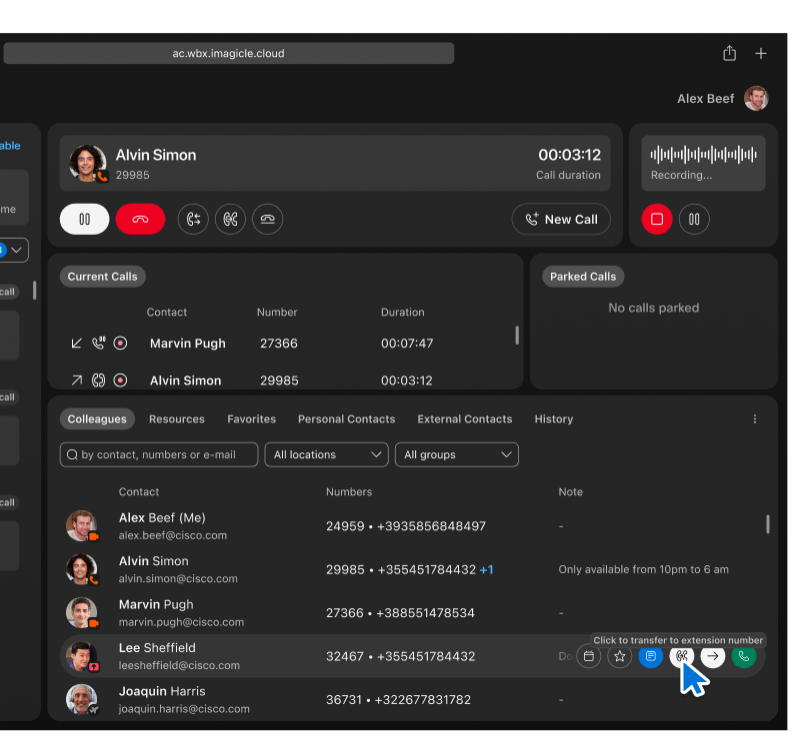
When an active call is in progress in the Webex Attendant Console, action icons appear next to each contact. In the preceding screenshot, you can see how the feature appears during an ongoing call, with contextual actions displayed for each contact. When you hover over the transfer icon for Lee Sheffield, it triggers a tool tip and enables an instant transfer of the current call to Lee’s primary extension.
The highlighted button transfers the call to the contact’s internal number with a single click. You don't need to open dialogs or manually type anything. Icons are context-aware and display hover tool tips for clarity, such as Click to transfer to extension number.
Benefits:
-
Speed—Take immediate action without extra UI steps.
-
Clarity—The visual placement beside contact names ensures easy discovery and use.
-
Usability—Designed for high-traffic environments such as front desks or call dispatch centers.
This feature works across all visible contact views, including Favorites, Tabs and search results, ensuring consistent performance throughout the interface.
View current calls
You can access the Current Calls panel under the keypad section, next to the Parked Call section. It displays the status of ongoing calls. If there are no current calls, then No calls in progress message displays.
Each call entry provides the following information:
-
Direction: Displays the Incoming or Outgoing calls with the corresponding icons and alternative text.
-
State: Displays the Ringing, Paused, or Connected calls with the respective icons and alterative text.
-
Contact Name/Surname: Displays the actual name for colleagues and personal contacts. For unrecognized external numbers, it shows as Unknown User.
-
Phone Number
-
Duration: Displays the duration of the call from the originating event for the dialing calls to the answering event for connected calls.
If a contact name or line is lengthy, it’s truncated with an ellipsis. Hovering over reveals the full name.
In the Current Calls panel, you can manage your ongoing calls in the following ways:
-
Answering a Call: You can answer an incoming call by clicking on the answer icon.
-
Rejecting a Call: If you wish to decline an incoming call, click on the drop call icon.
-
Holding a Call: To temporarily put a connected call on hold, click on the hold icon.
-
Resuming a Call: If you've paused a call, you can resume it by either double-clicking on the call or clicking the resume icon.
-
Hanging Up a Call: To end a call, click the hang up icon.
-
Handling Errors: If there are any operational errors, a generic error modal appears to provide further guidance.
Also, here are some features of the Current Calls panel:
-
Calls within the panel are automatically sorted based on their start time. This ensures that the newest calls are positioned at the top.
-
If there are more than three calls in the panel, a scroll bar appears, allowing you to navigate through the list.
-
Access call history
The Call History panel contains a list of incoming, outgoing, and missed calls. It shows a maximum of 60 records, with a maximum of 20 records for each call type.
The list has four columns: Direction, Contact Name, Number, Date, and Time. It’s initially sorted by date in ascending order, but you can sort the list based on each column.
To initiate a call, hover over each row to access the Make a call icon. When a call ends or a new call event occurs, the call history updates automatically.
Set a preferred calling device
Choose your preferred device to handle calls in the Webex Attendant Console, whether your office phone or the Webex App.
Follow these steps to access the Preferred Device settings:
| 1 |
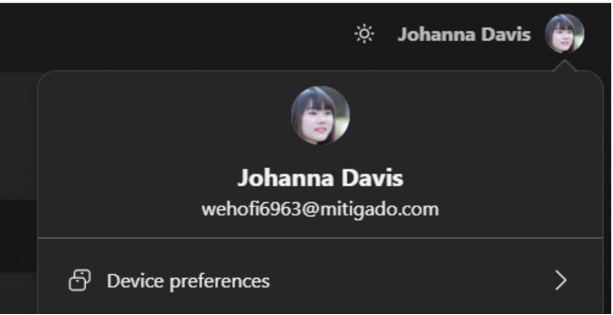
Access Your Profile: Log in to the Attendant Console, locate your profile icon or avatar in the application's header section.
If you've not yet set your preferred device and you have more than one device, you notice a warning badge on your avatar icon. |
| 2 |
Select Preferred Device: From the avatar pop over that appears, select the Preferred Device option. This action opens the accordion where you see the list of available devices.
|
Start a conference call
Use the Conference Call feature to merge calls, allowing two or more participants in a unified conversation.
Follow these steps to initiate a conference call:
| 1 |
Initiate the first call- Call one of the participants. |
| 2 |
Initiate the second call- Call the second participant and the first participant is automatically placed on hold. 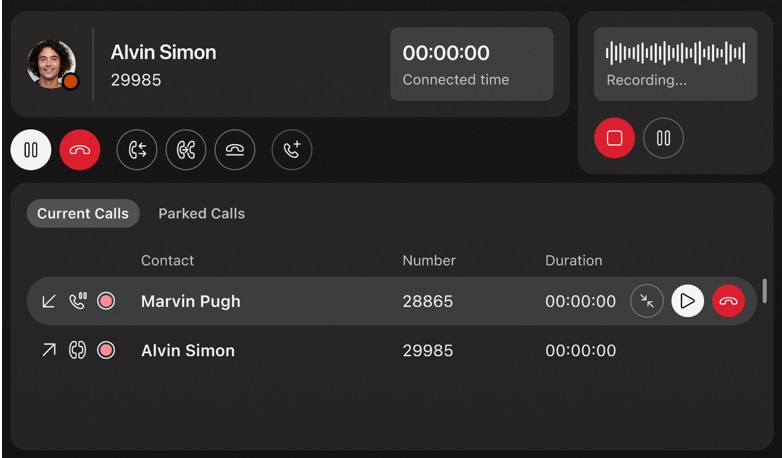
|
| 3 |
Merge calls into a conference |
| 4 |
Managing the conference and participants
|
Park a call
The call parking feature offers an alternative to place calls on hold, with an advantage of enhancing your call management capabilities:
-
Multiple Call Parking: Unlike traditional call holding, you can park multiple calls simultaneously, making it easier to manage multiple conversations.
-
Shared Visibility: On parking a call, it becomes visible and accessible to anyone belonging to the same parking group. This allows seamless collaboration and ensures that no call is left unattended.
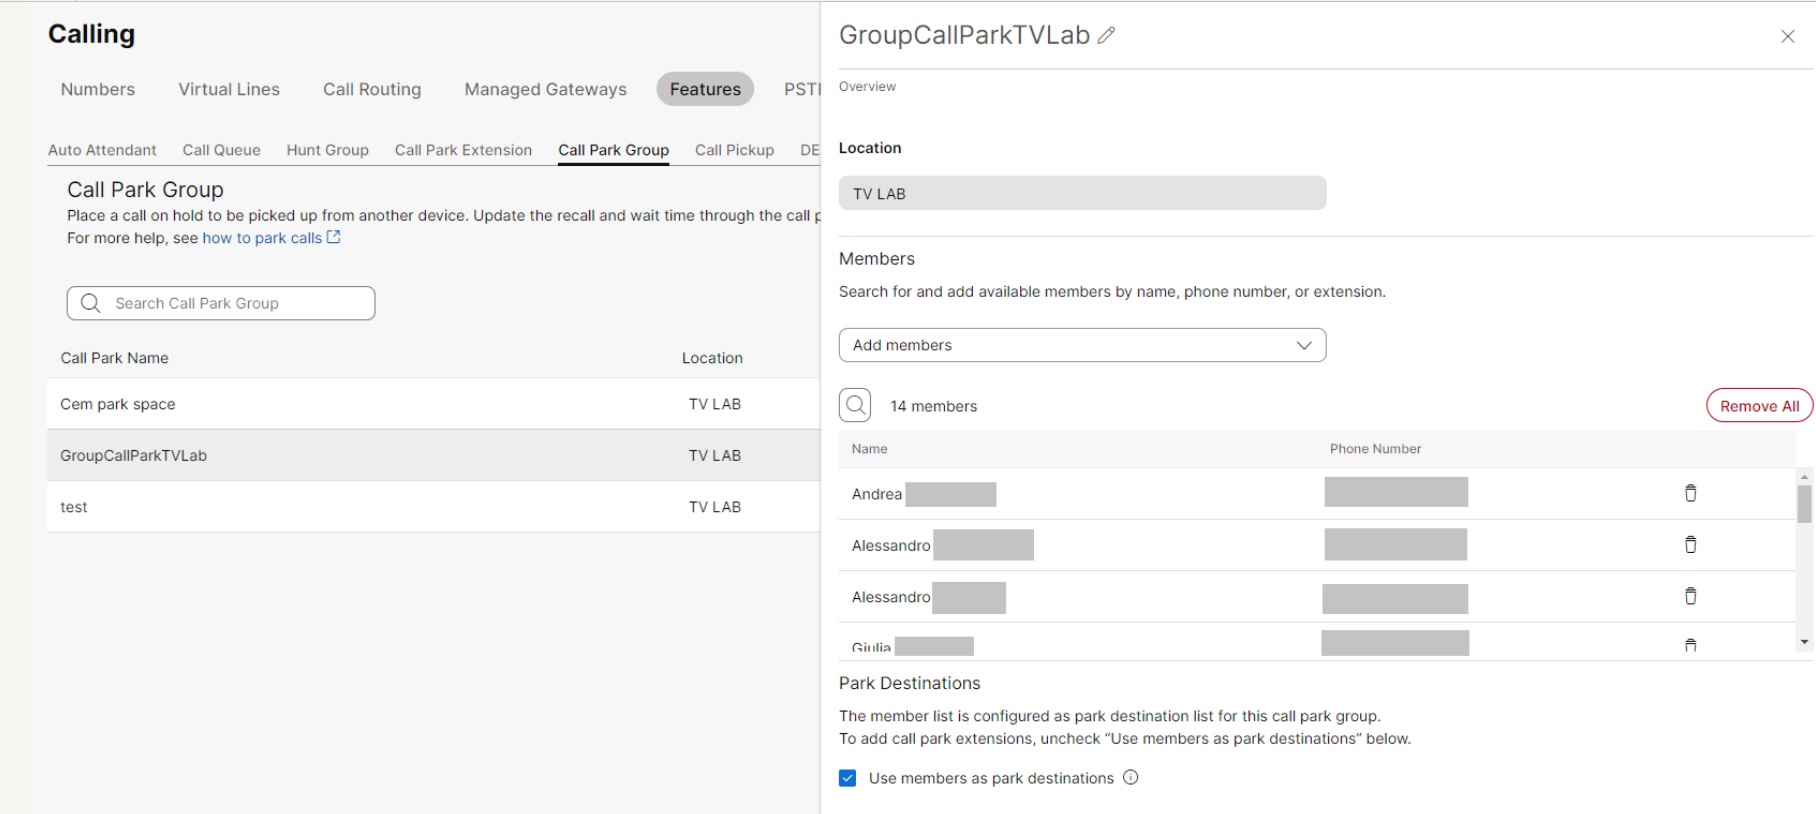
Configure a call park
Enable the Call park feature for the user either Directly (for a person) or as a Group, to assign the user in the Attendant Console. Use Group Park to share visibility between the receptionist and users, and to manage call parking.
Configure Group Park for the location of the receptionist users with members as park destination. Set the Use members as park destination flag. Add all the receptionists of the location as members. You can add more users to the Group Park, to allow a higher number of concurrent parked calls.
Ensure that every user inside a Group park has an extension number.
To park an active call currently in the foreground, click the Park the Call button. This action instantly parks the call within your designated parking group.
Once parked, the call becomes visible in the Parked Calls panel, and is accessible to all members of the parking group. Any authorized user can then pick up the park call, ensuring efficient call handling and collaboration within your team.
Access the queue panel
If your account is authorized to view queues, you notice a panel located on the left side of the application interface. Within this panel, you can see the queues to which you’re subscribed and also view the statistics.
At the top of the panel, you find three informative boxes that provide you with an overview of queue-related statistics. These statistics include:
-
Subscribed Queues: This field displays the total number of queues to which you’re subscribed.
-
Current Waiting Calls: This field displays the real-time count of calls currently waiting in the queues.
The user must enable Call Waiting so that calls appear in the Attendant Console’s Current Calls section.
-
Maximum Wait Time: This metric represents the longest waiting time that a call has experienced in the queue.
Filter Queues
To streamline your view and focus on the queues of your interest, use the All Queues drop down menu. This option allows you to filter and display only the queues that pertain to your current needs while hiding those that are less relevant.
It’s currently not possible to change your agent status or unsubscribe from a queue directly within the Attendant console. To cease receiving calls from specific queues, you must unsubscribe from the Webex App.
Queue-Specific Statistics
Each queue is equipped with dedicated statistics, which include:
-
Average Handling Time: This metric quantifies the typical duration that an agent requires to manage a call from the moment it enters the queue.
-
Average Waiting Tie: Average Waiting Time represents the typical period a caller spends in a queue before an available agent picks up their call.
View queue contents
To view the current calls within a specific queue, you can expand the panel by clicking on it. To return it to its original state, simply click on it again.
Want to see how it's done, watch Access the Queue panel and view Statistics.
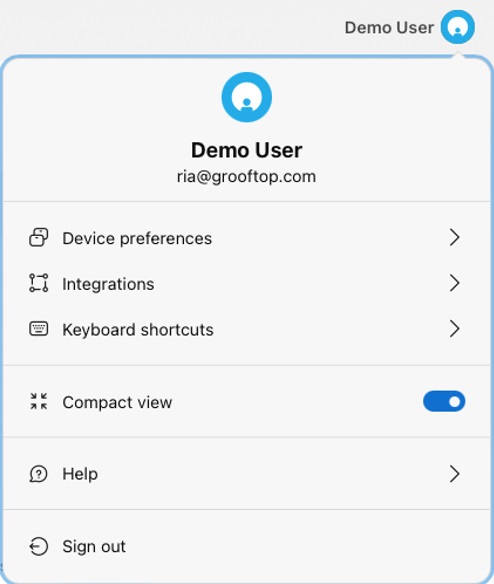
Using the compact view
The compact view reduces empty spaces, table row height, icon size, and font size. Thus displaying more information on the application window.
Press the Personal avatar icon on the top-right corner of the app, to activate or deactivate the Compact view option.
Call recording
The Call Recording option allows users to save audio recordings of their calls. This feature is useful for documenting conversations, archiving important information, and ensuring a reliable record of communication for future reference. It provides a valuable tool for maintaining accurate records and is beneficial in professional or legal contexts where documentation is essential.
Also, certain buttons within the Call Recording section is disabled based on the user's configuration settings on the Control Hub. This ensures that the functionality aligns with the user's specific permissions and settings. The administrator configures the call recording permissions for a user.
User without Recording Service Enabled
For users without the recording service enabled, the recording panel is not displayed.
User with Recording Service Enabled
When there are no ongoing calls, all recording panel buttons are disabled, and the recording in progress animation is not visible.
For users with the recording service enabled, these scenarios apply based on the user’s recording configuration:
-
Recording Mode: Always On—Users with the Recording Mode: Always On configuration experience automatic recording initiation during incoming and outgoing calls. The Stop button is visible yet disabled.
-
Recording Mode: Always On with Pause/Resume—For users with the Recording Mode: Always On with Pause/Resume configuration, both incoming and outgoing calls trigger automatic recording initiation. The Stop button is visible but remains disabled.
In case the user opts to pause the recording while recording is in progress, it temporarily halts and the Resume button becomes visible.
If you deliberately pause a recording, resuming it leads to recommencing the recording
-
Recording Mode: On Demand—For users with the Recording Mode: On Demand configuration, both incoming and outgoing calls do not trigger automatic recording initiation. Press the Record button to start the recording process and the Stop/Pause button are both visible and functional.
-
When a user resumes a paused call, the recording panel displays the recording status of the resumed call.
-
When you record a call, a recording icon is displayed in the Active Calls panel.
-
When an error occurs, a dialog with an error message displays.
Using the keyboard shortcuts
The WebexAttendant Console empowers you to execute actions using the keyboard shortcuts. This feature provides the convenience of performing tasks with a simple keystroke.
Answering a Call
To answer an incoming call, press Alt + A.
Accessing the available keyboard shortcuts
To access the list of available keyboard shortcuts, follow these steps:
-
Click on your Profile Avatar in the top-right corner of the application interface. This action opens the user menu.
-
In the user menu, locate and click on Keyboard Shortcuts to view the list of available shortcuts.
Mastering these keyboard shortcuts helps navigate and perform actions with remarkable efficiency, enhancing your overall user experience.
Integration with Microsoft applications
The Attendant Console allows integration with Microsoft platforms ensuring that you have all the essential information for call handling. You can activate these two integrations:
-
MS Teams Presence integration
-
Office 365 integration
Follow these steps to access the integration settings:
| 1 |
Access Your Profile: Log in to the Attendant Console, locate your profile icon or avatar in the header section of the application. If you have earlier logged into the Microsoft integration and your login has expired, then you see a warning badge on your avatar icon. |
| 2 |
Click on your avatar to view a pop-over menu, and select the Integrations option. This action expands an accordion menu where you can do one of the following:
For an overview, watch Integration with Microsoft Teams Presence and Office 365 Calendar. |
Enabling the MS Teams Presence and Office 365 applications
Use these steps to manage your Microsoft integration within the Attendant Console.
Enabling the Presence feature
You can enable the Presence feature from the main menu under the Integrations setting.
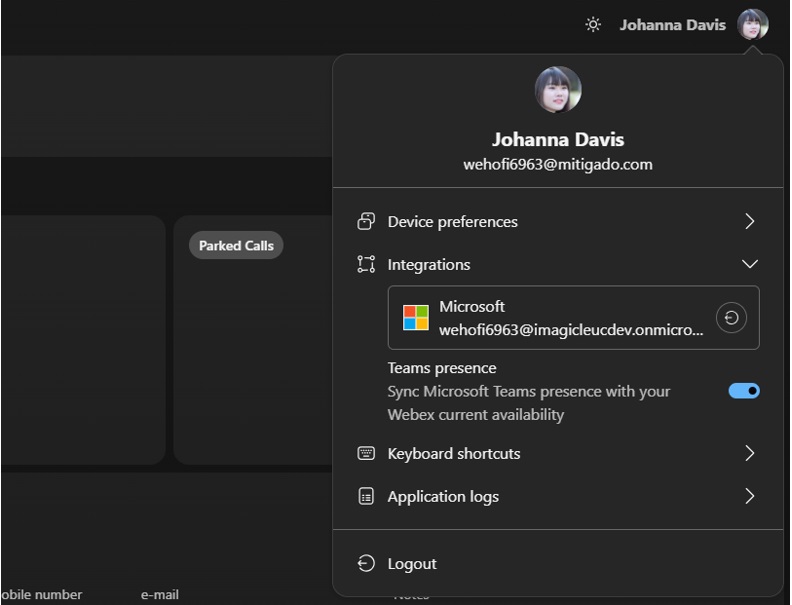
On enabling the Microsoft Presence feature, the Attendant Console calculates the availability status based on the information retrieved by Webex and Microsoft Teams. The Attendant Console displays the status in the presence avatar badge. When the Microsoft Teams retrieve the presence status, the badge tooltip displays this information.
Enabling the Calendar feature
Before you begin
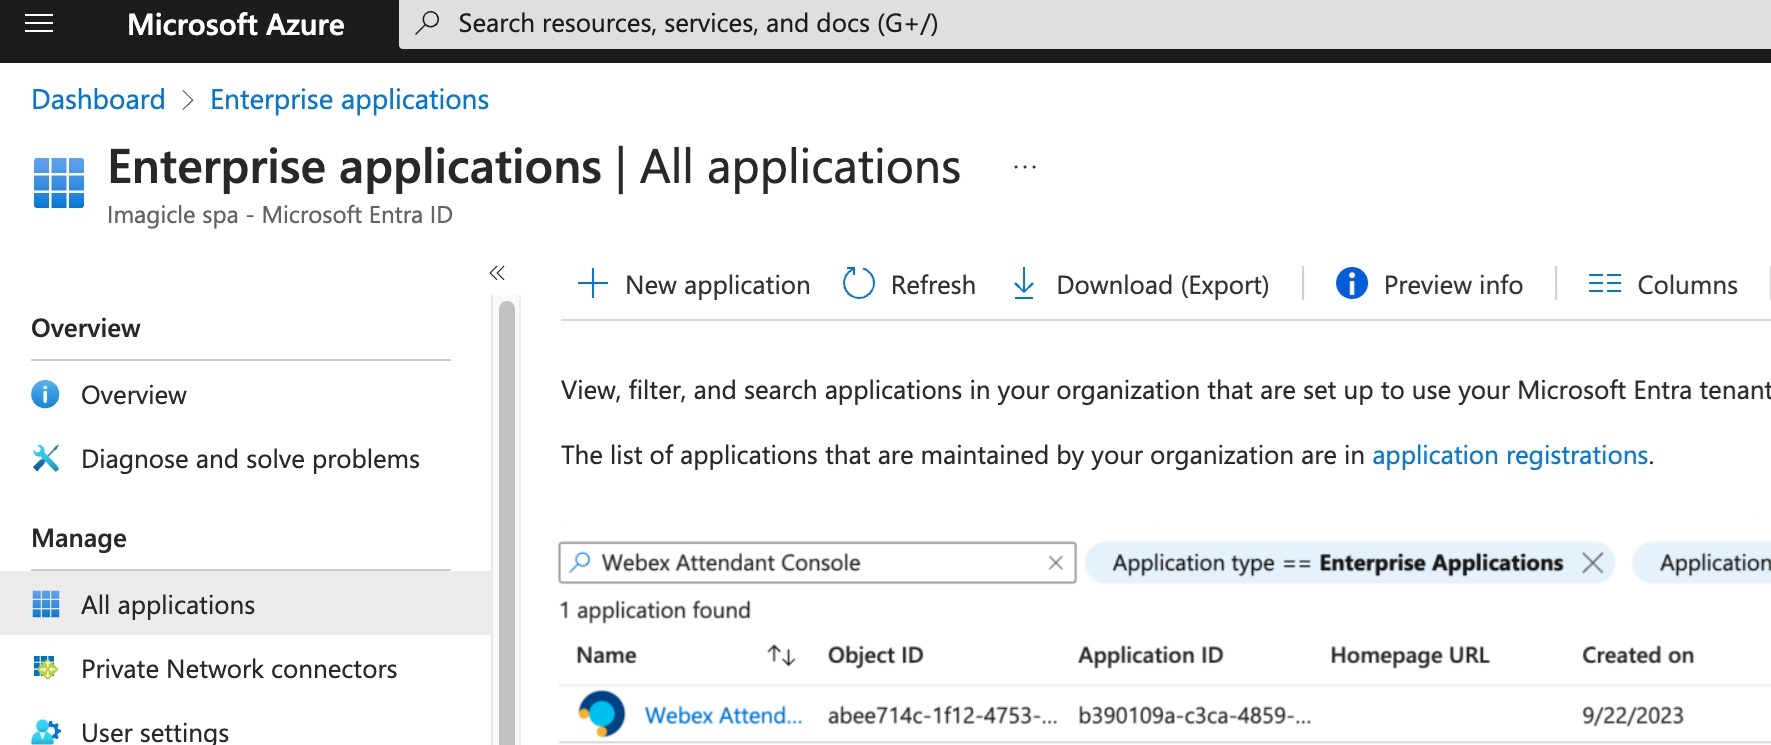
As an organization's Azure administrator, ensure you grant consent to access the Imagicle Webex Attendant Console Connector enterprise application. You can provide the consent on the Microsoft Azure portal. Complete these steps to provide the permission:
-
Launch the Microsoft Azure application and use the search field to find Webex Attendant Console.
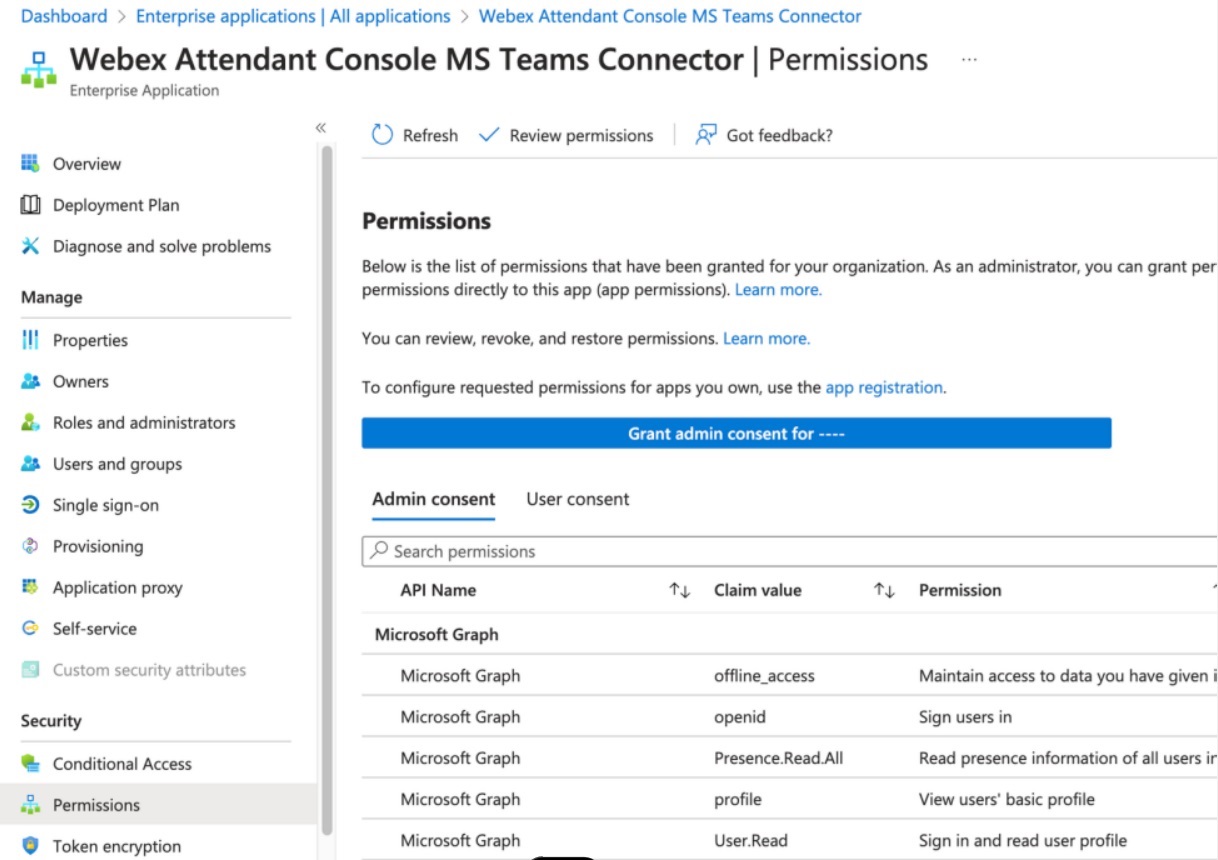
-
Navigate to . Click the Grant admin consent for ... button.
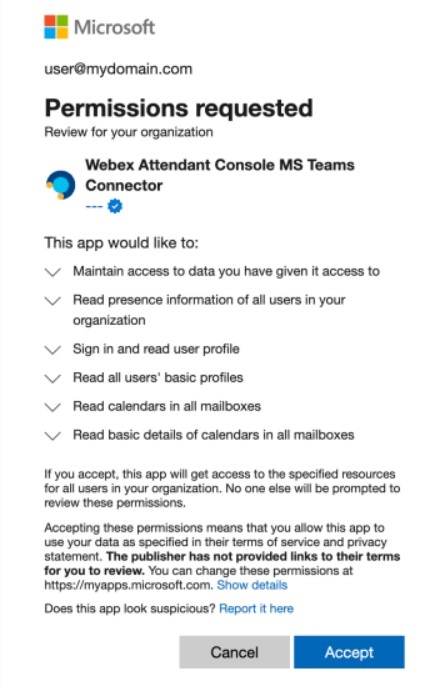
-
The Permission requested window displays. Read the request and click Accept to provide the consent.
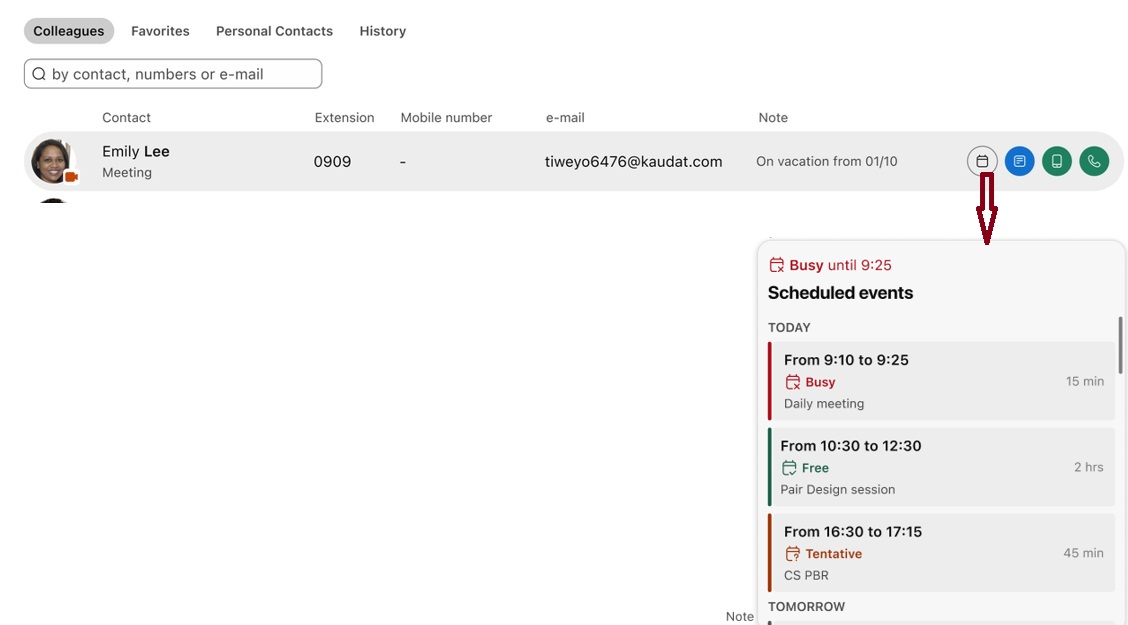
You can enable the Calendar feature from the main menu under the Integrations setting.

On enabling the Microsoft Calendar feature, a Calendar button displays when a user hovers over a colleague or favorite table row. On clicking the Calendar button, a pop-over displaying the upcoming events for the selected colleague (or favorite) appears.