
Thanks for your feedback.
Integrate Webex Contact Center with Freshdesk
 Feedback?
Prerequisites
The CRM connector operates based on the version of the widget specified in the desktop layout JSON. It is extremely important to ensure the widget version within the Desktop Layout is kept updated. As of November 2025, the latest widget version is 2.1.5.
Administrators are expected to ensure all desktop layouts for this CRM connector use this widget version. If the layout is not updated to use the latest version, functionality will no longer be supported and may cease to work correctly.
The minimum supported size for the softphone interface is 500px. Any value lower than 500px may result in display or functionality issues.
Before you integrate Webex Contact Center with the Freshdesk CRM console, ensure that you have the following:
-
Access to Webex Contact Center.
-
Administrator access to the Control Hub at https://admin.webex.com and the Webex Contact Center Management Portal. The URLs for the Management Portal are specific to your region.
-
An agent with access to the Desktop. The URL for the Desktop is specific to your region.
-
Agent access to the following domain that is added to the Content Security Policy Allowed List:
-
*.freshdesk.com
-
-
A valid Freshdesk account login with administrator privileges. To create an account or trial, visit https://freshdesk.com/ and click Start Free Trial.
-
Access to the Desktop Layout (JSON) for Freshdesk at https://github.com/CiscoDevNet/webex-contact-center-crm-integrations/tree/main/Freshdesk.
-
SSO is supported via Webex Control Hub if Freshdesk and Webex Contact Center use the same third-party Identity Provider (IDP).
Agents will need to log in into the Freshdesk Desktop web application first and then launch the Webex Contact Center Agent Desktop.
This Desktop integration supports Voice only (both Inbound and Outbound).
To integrate Webex Contact Center with the Freshdesk CRM console, complete the following tasks:
-
Install Webex Contact Center for Freshdesk
-
Set up Freshdesk Desktop Layout on Webex Contact Center
| 1 |
Sign in to your Freshdesk account. 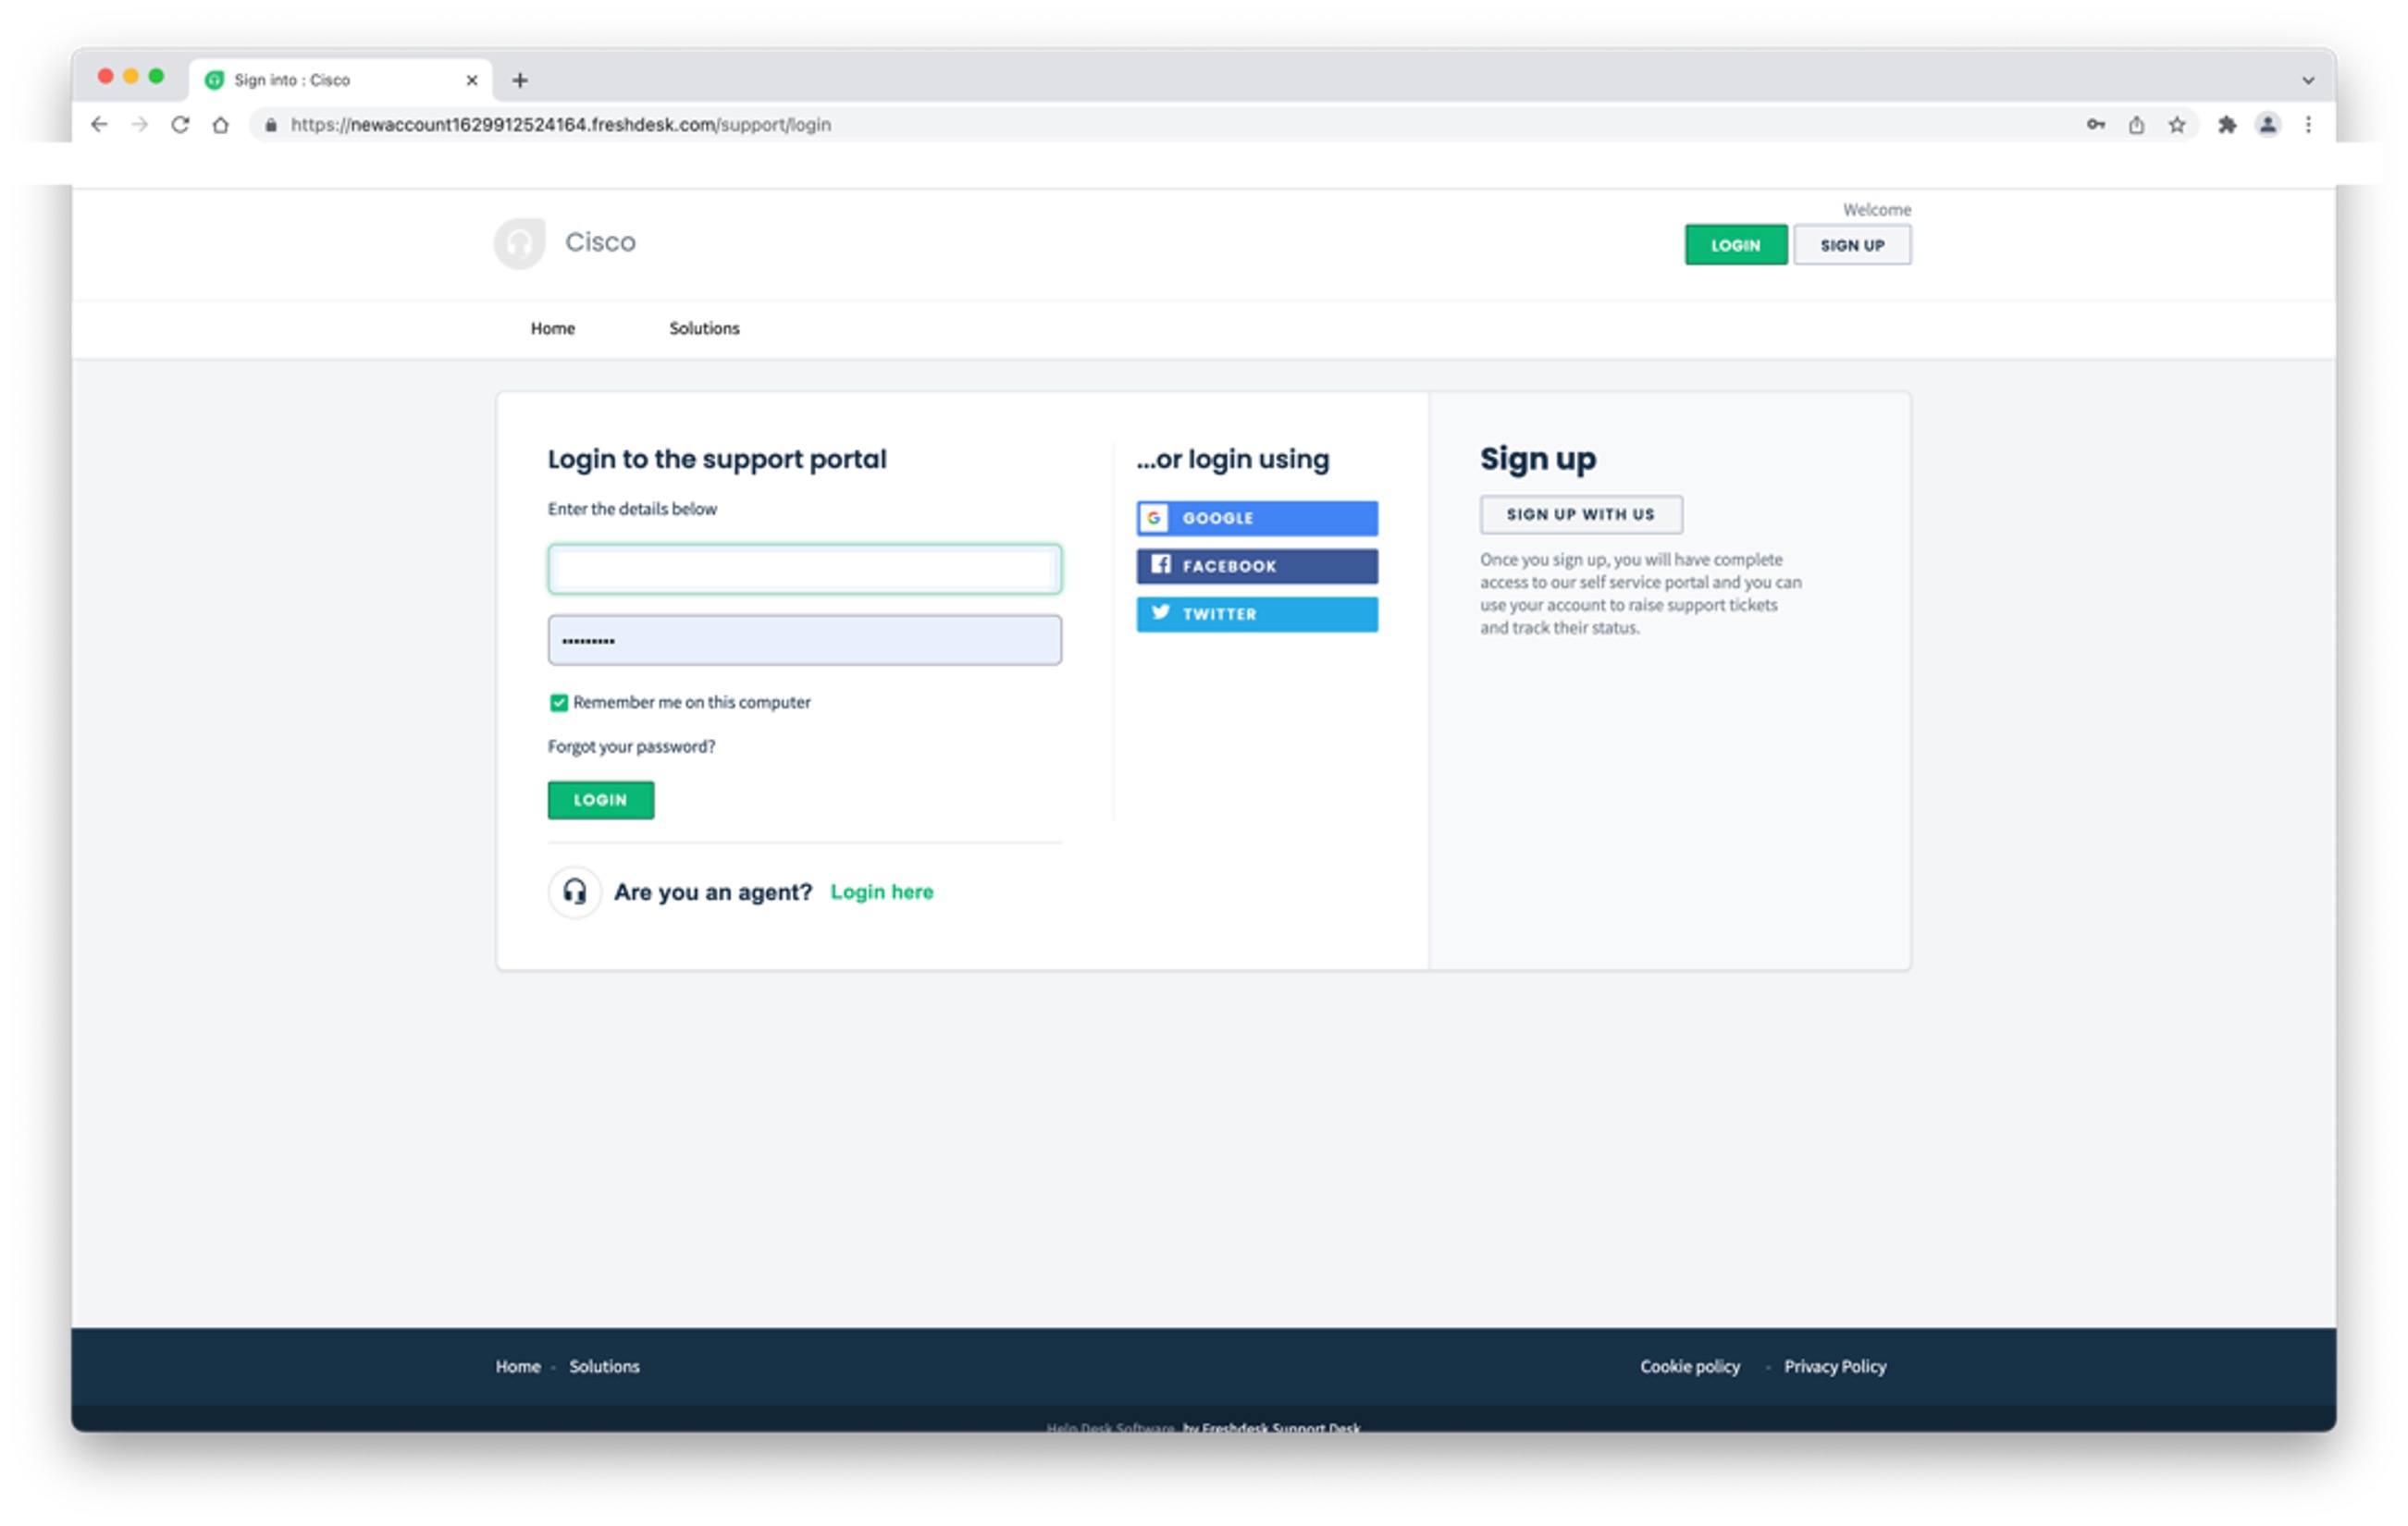
|
| 2 |
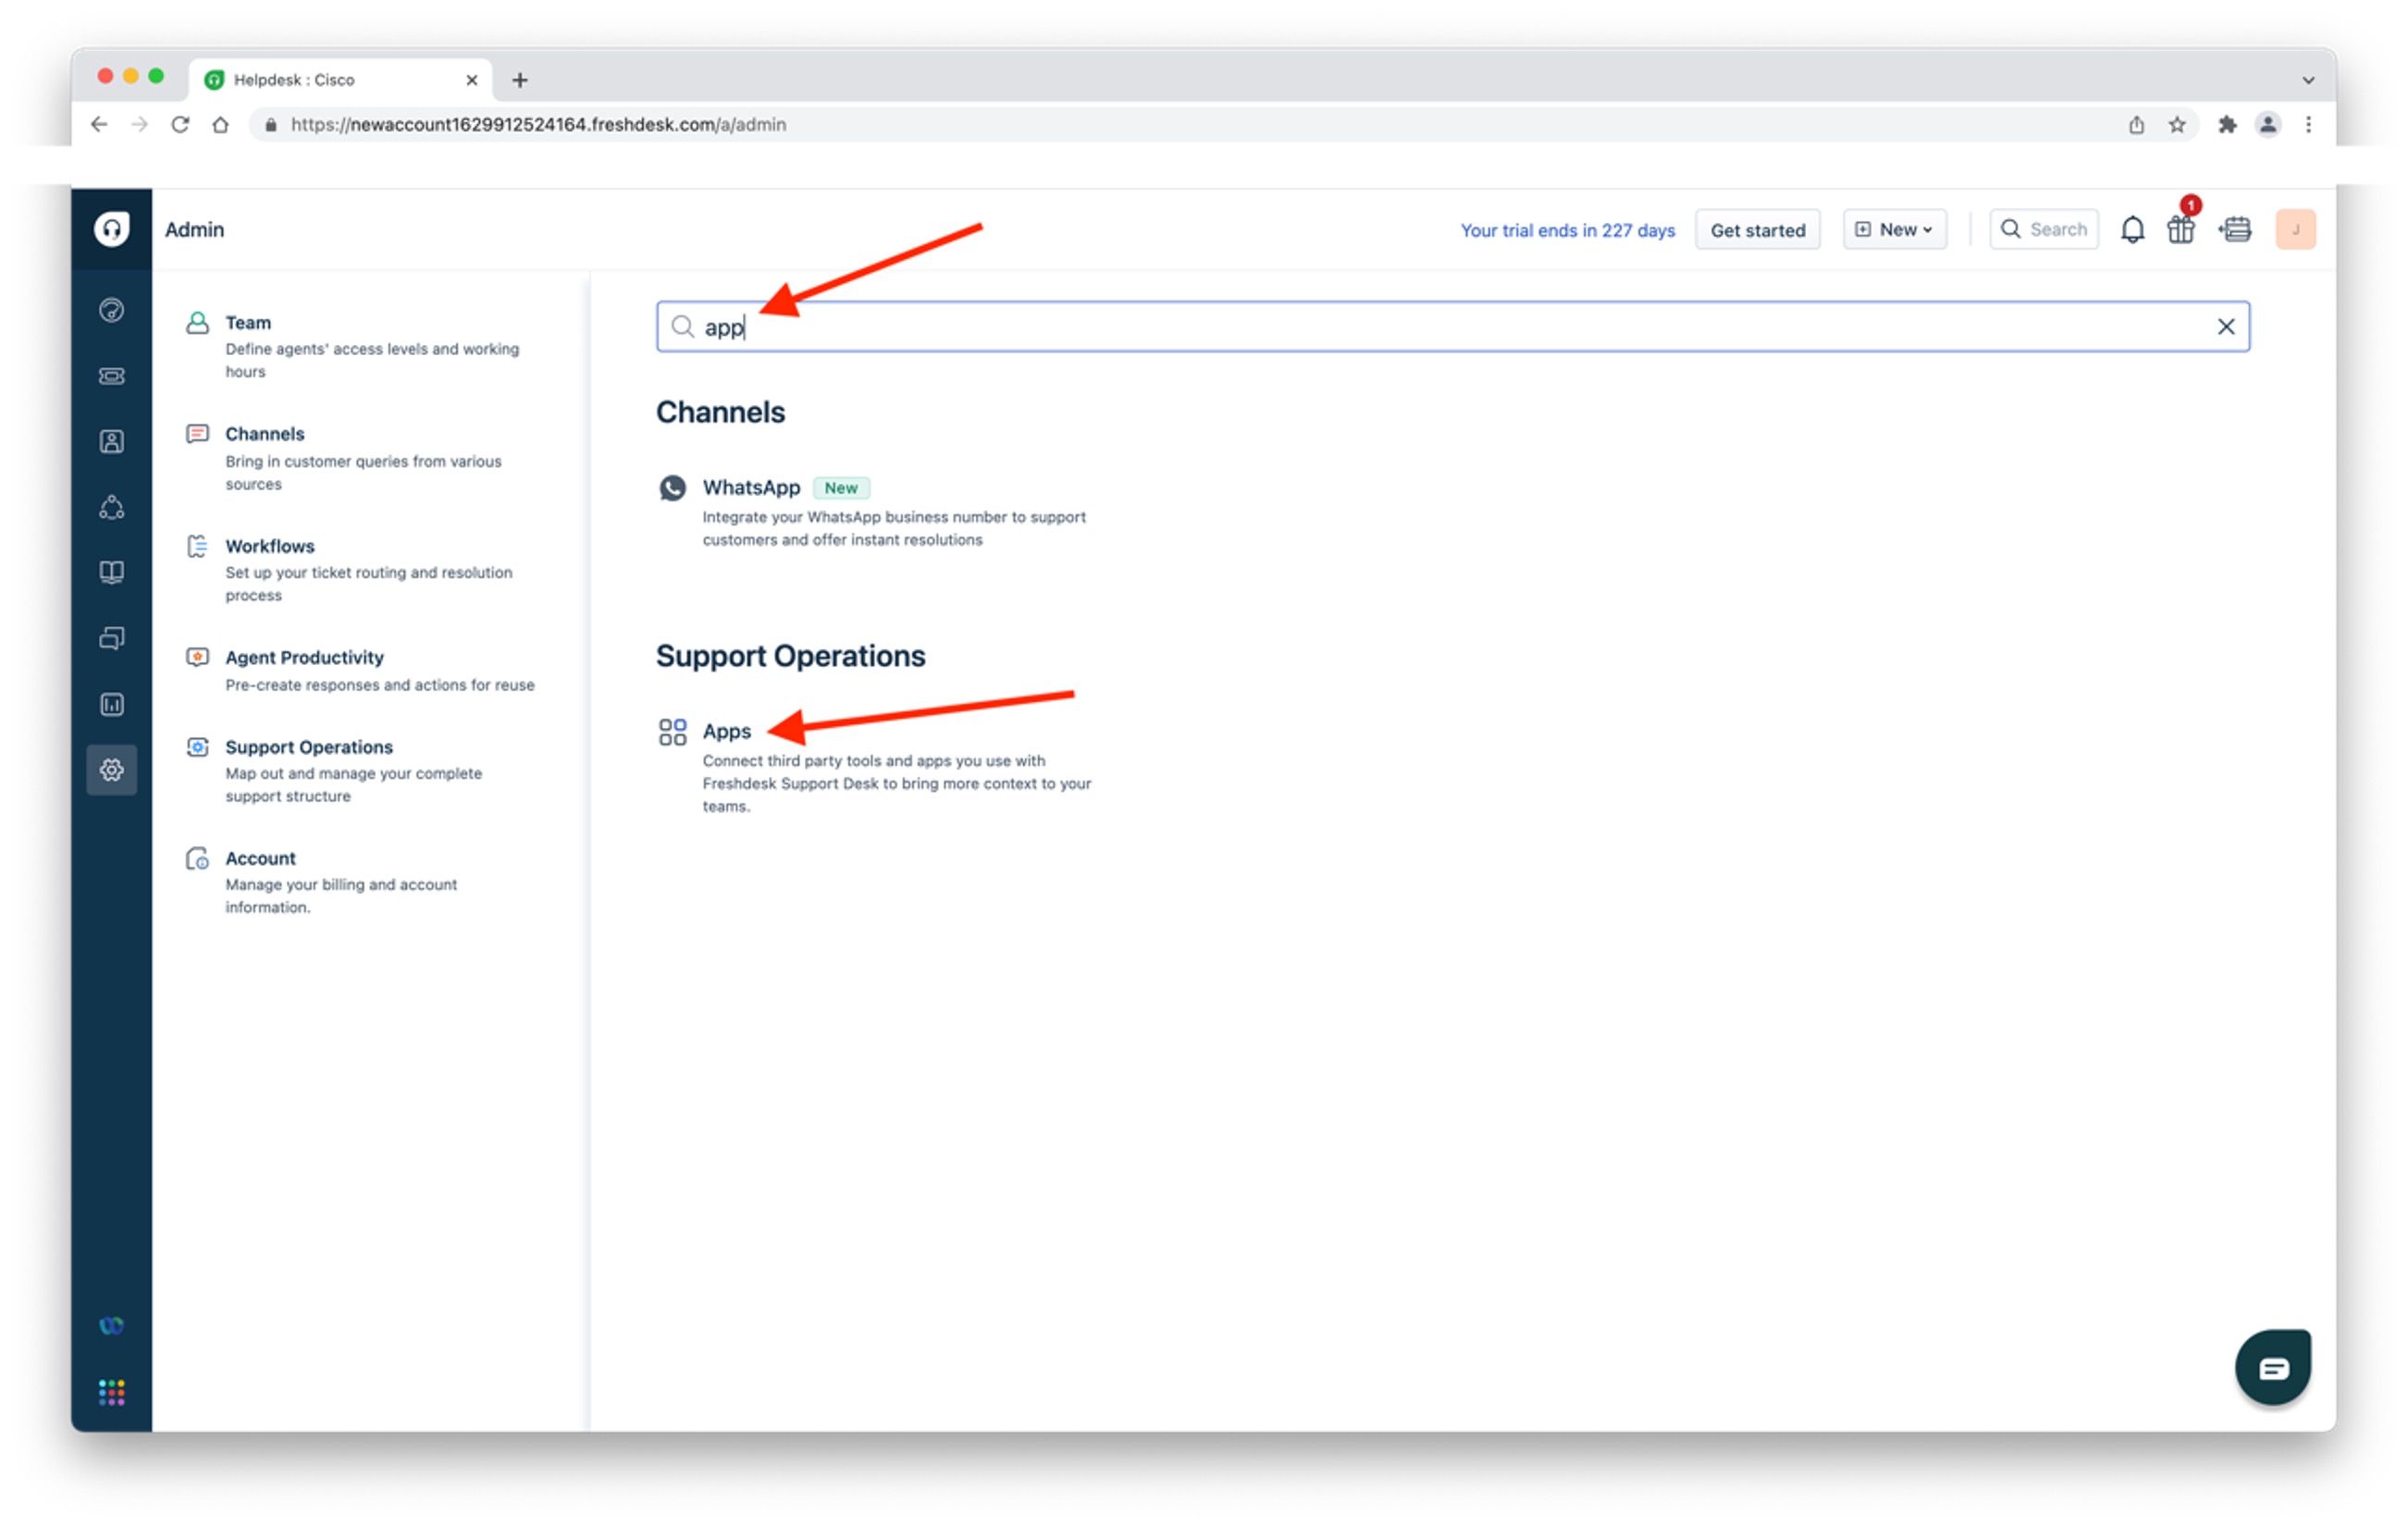
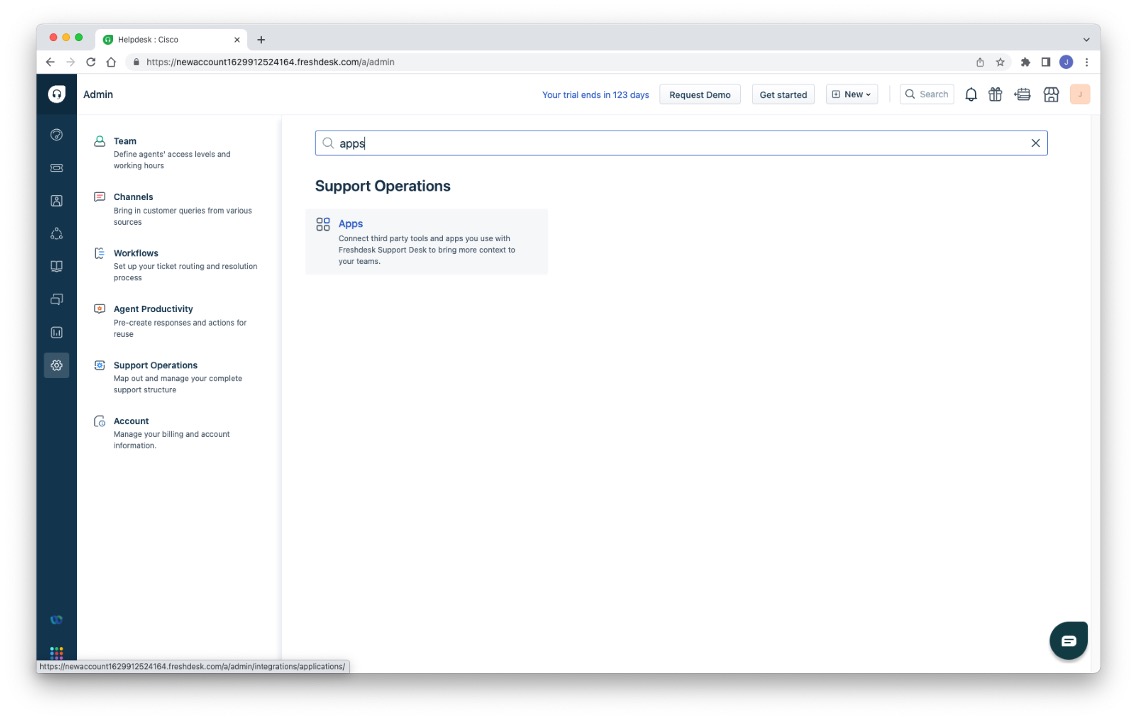
Navigate to the Admin screen. 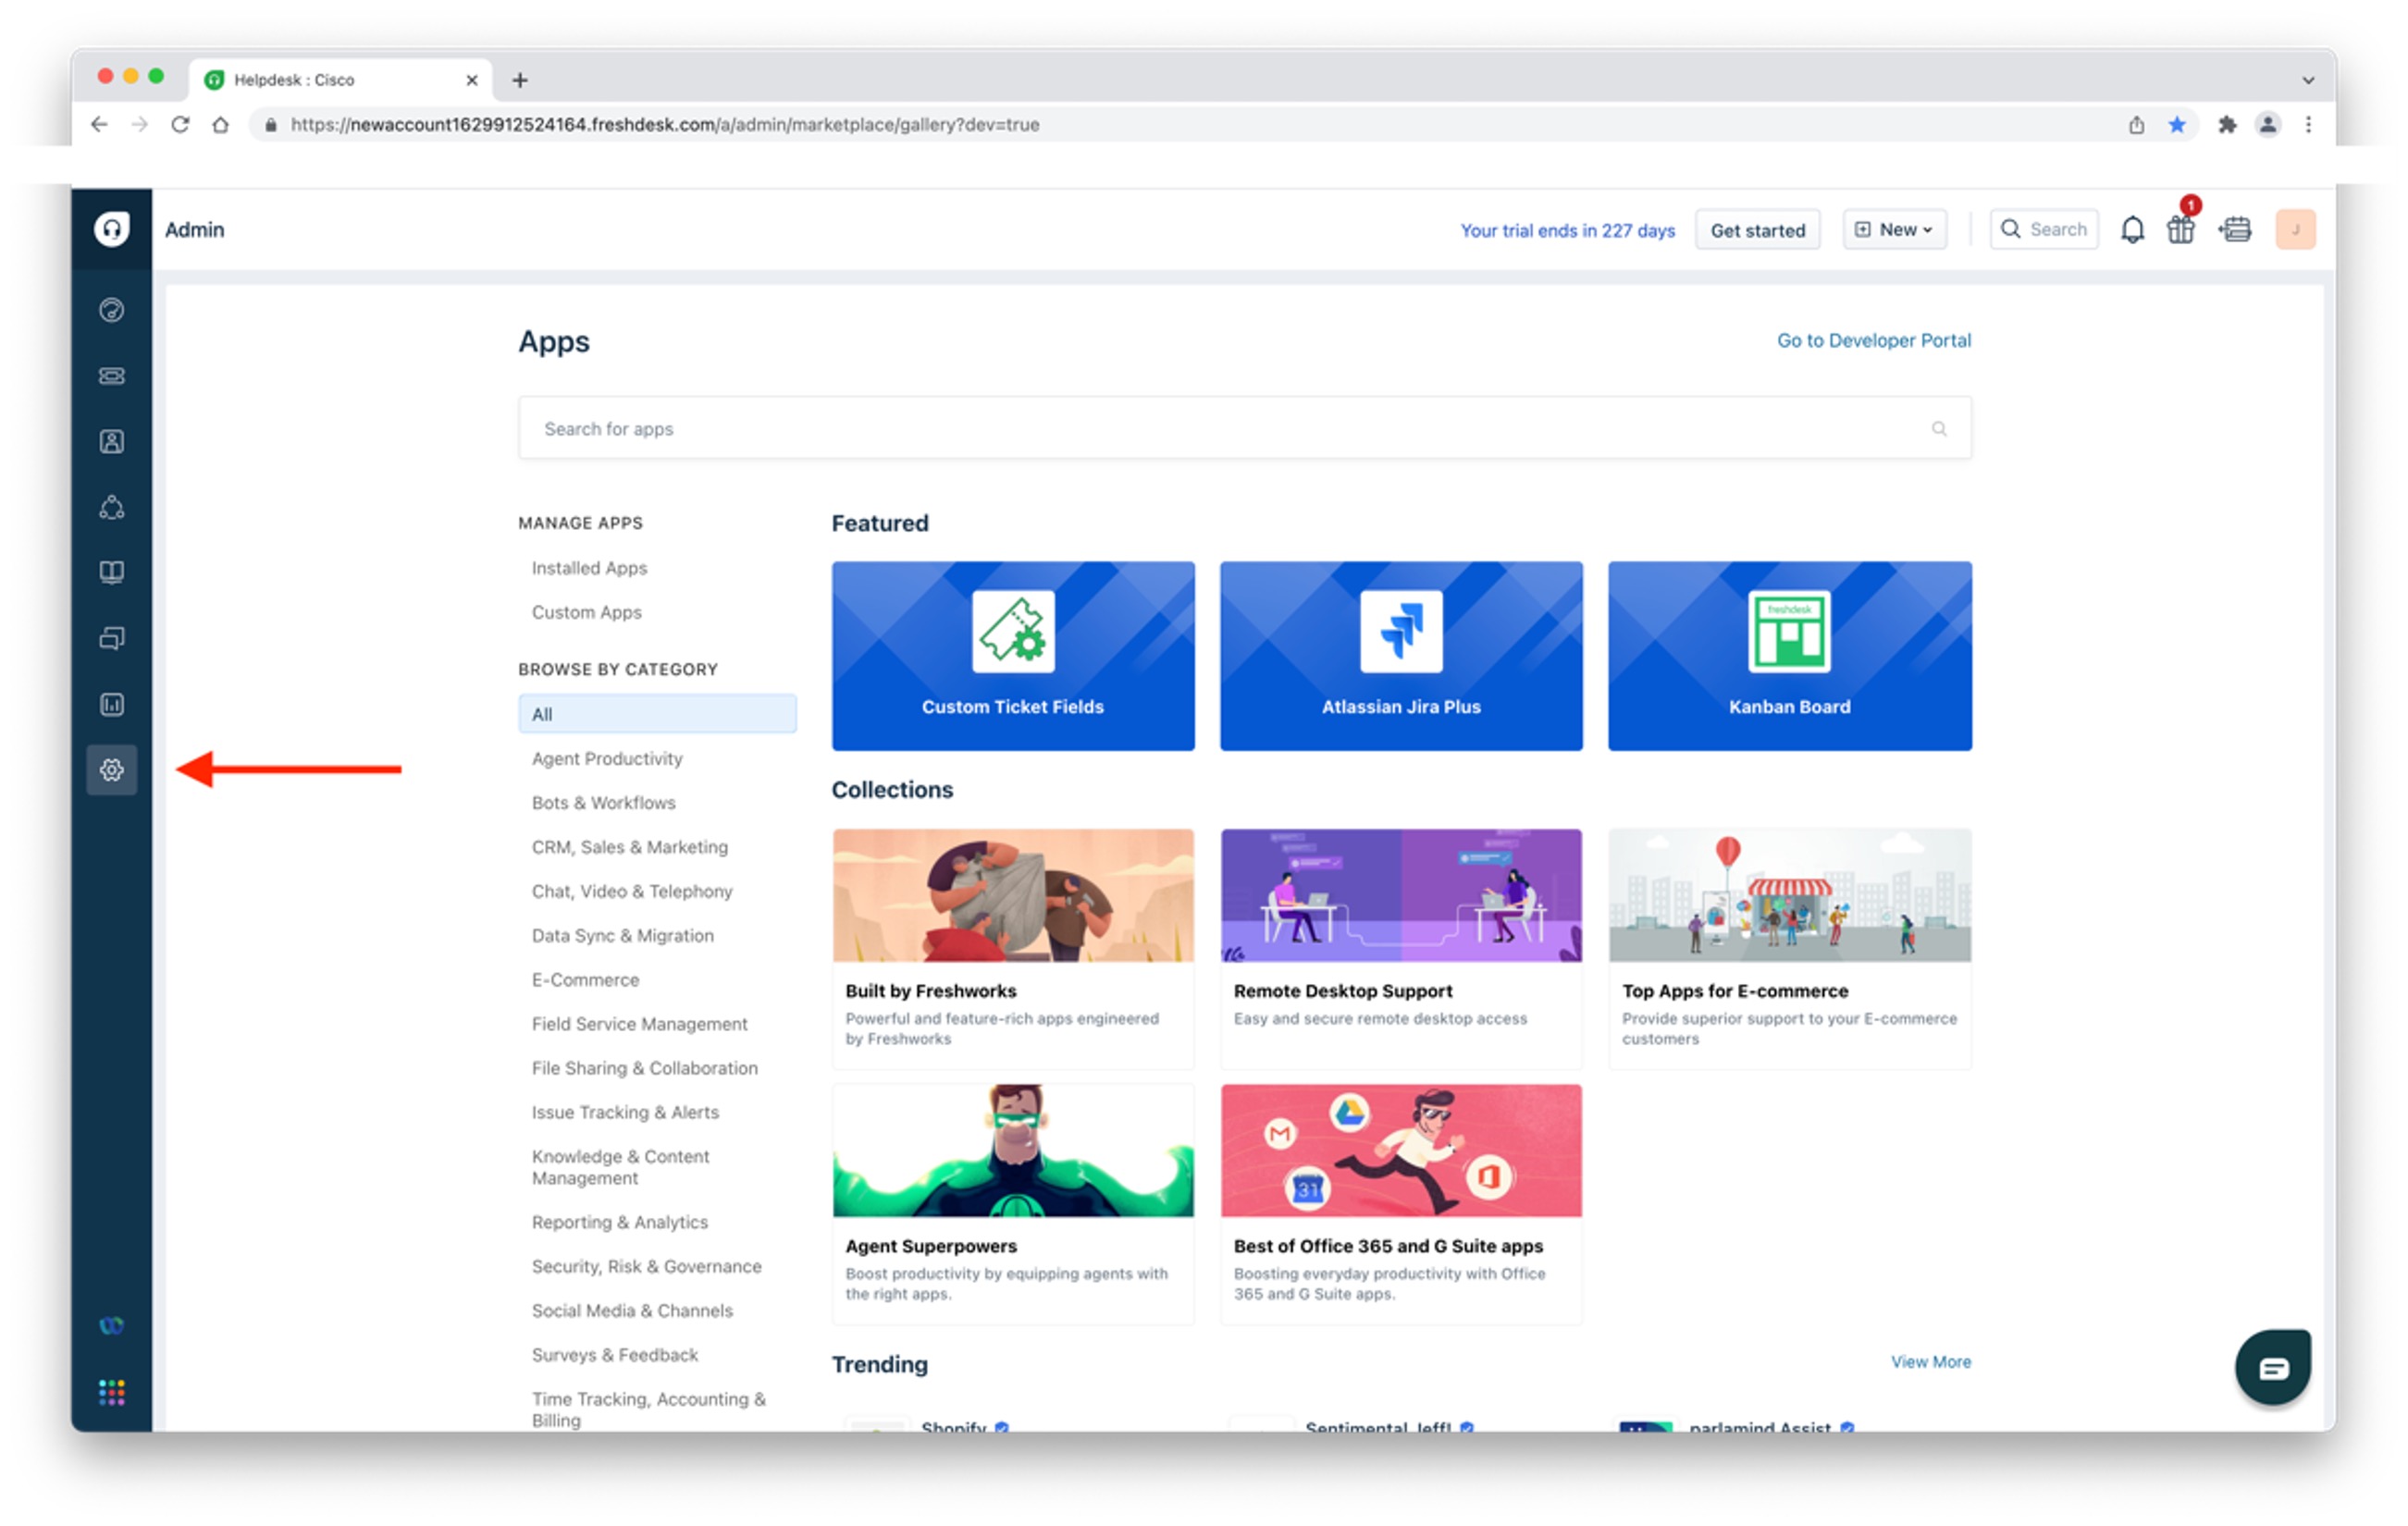
|
| 3 |
Enter
|
| 4 |
Enter
|
| 5 |
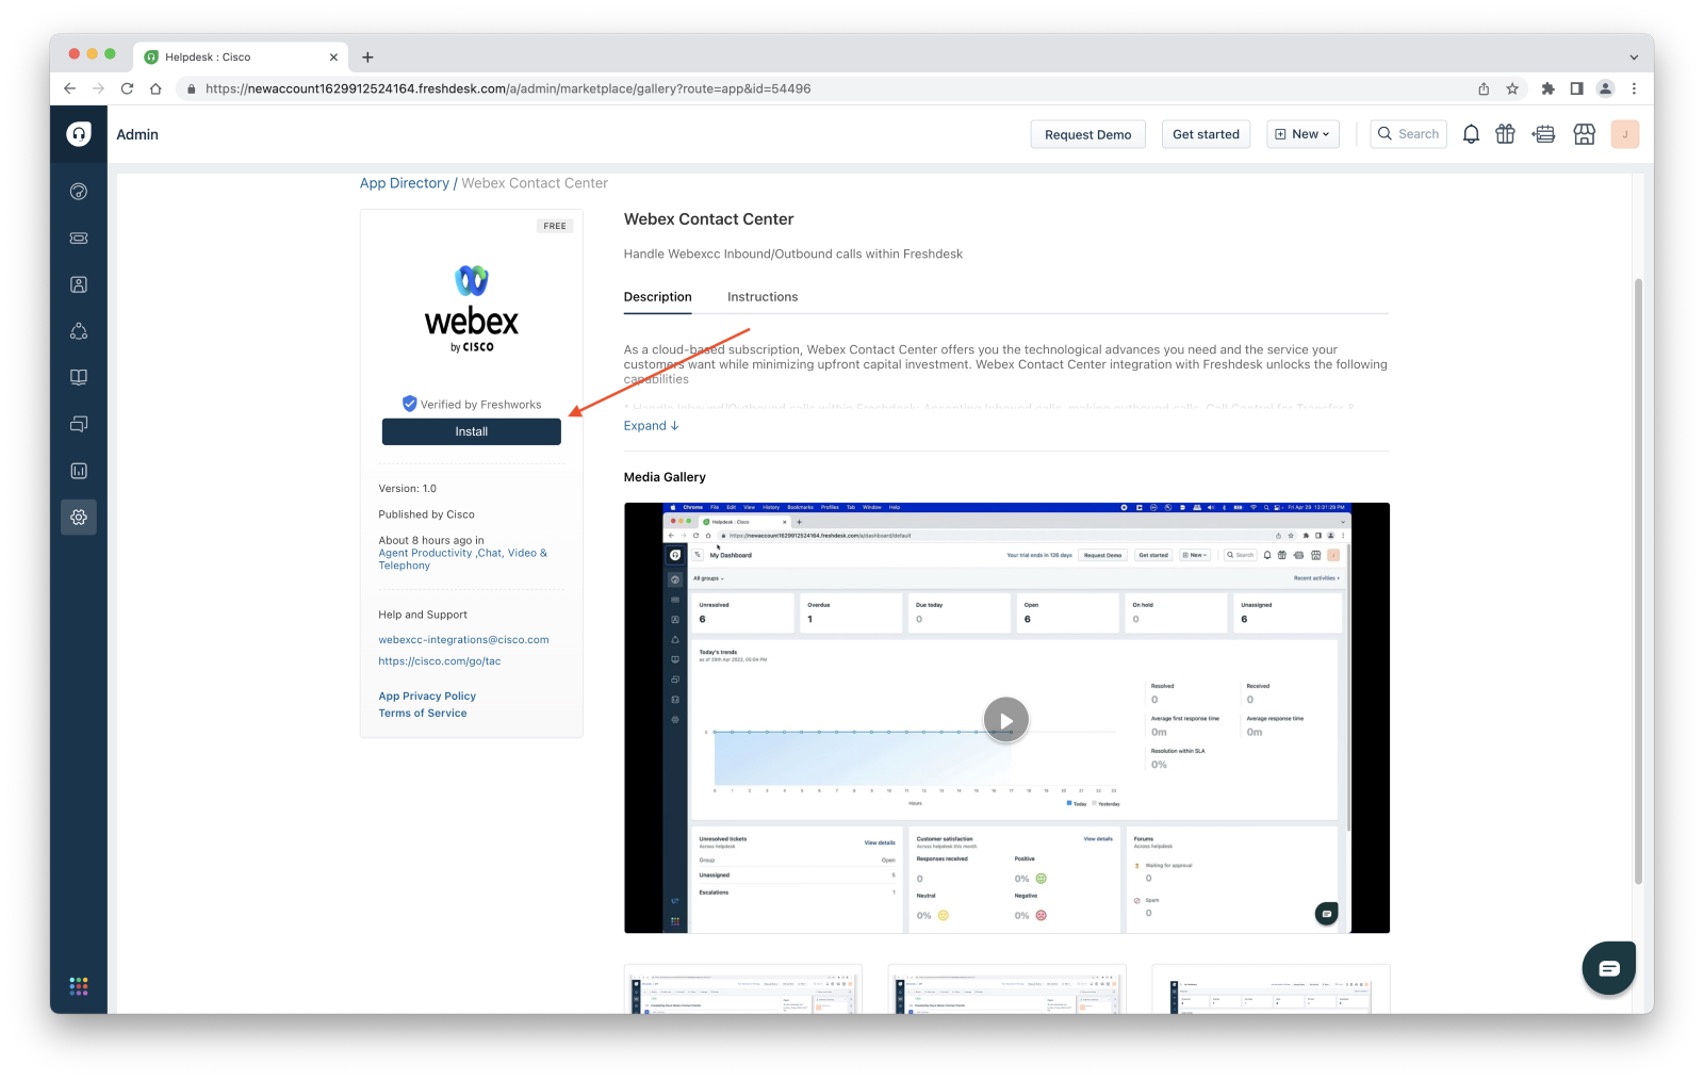
Click Install.
|
| 6 |
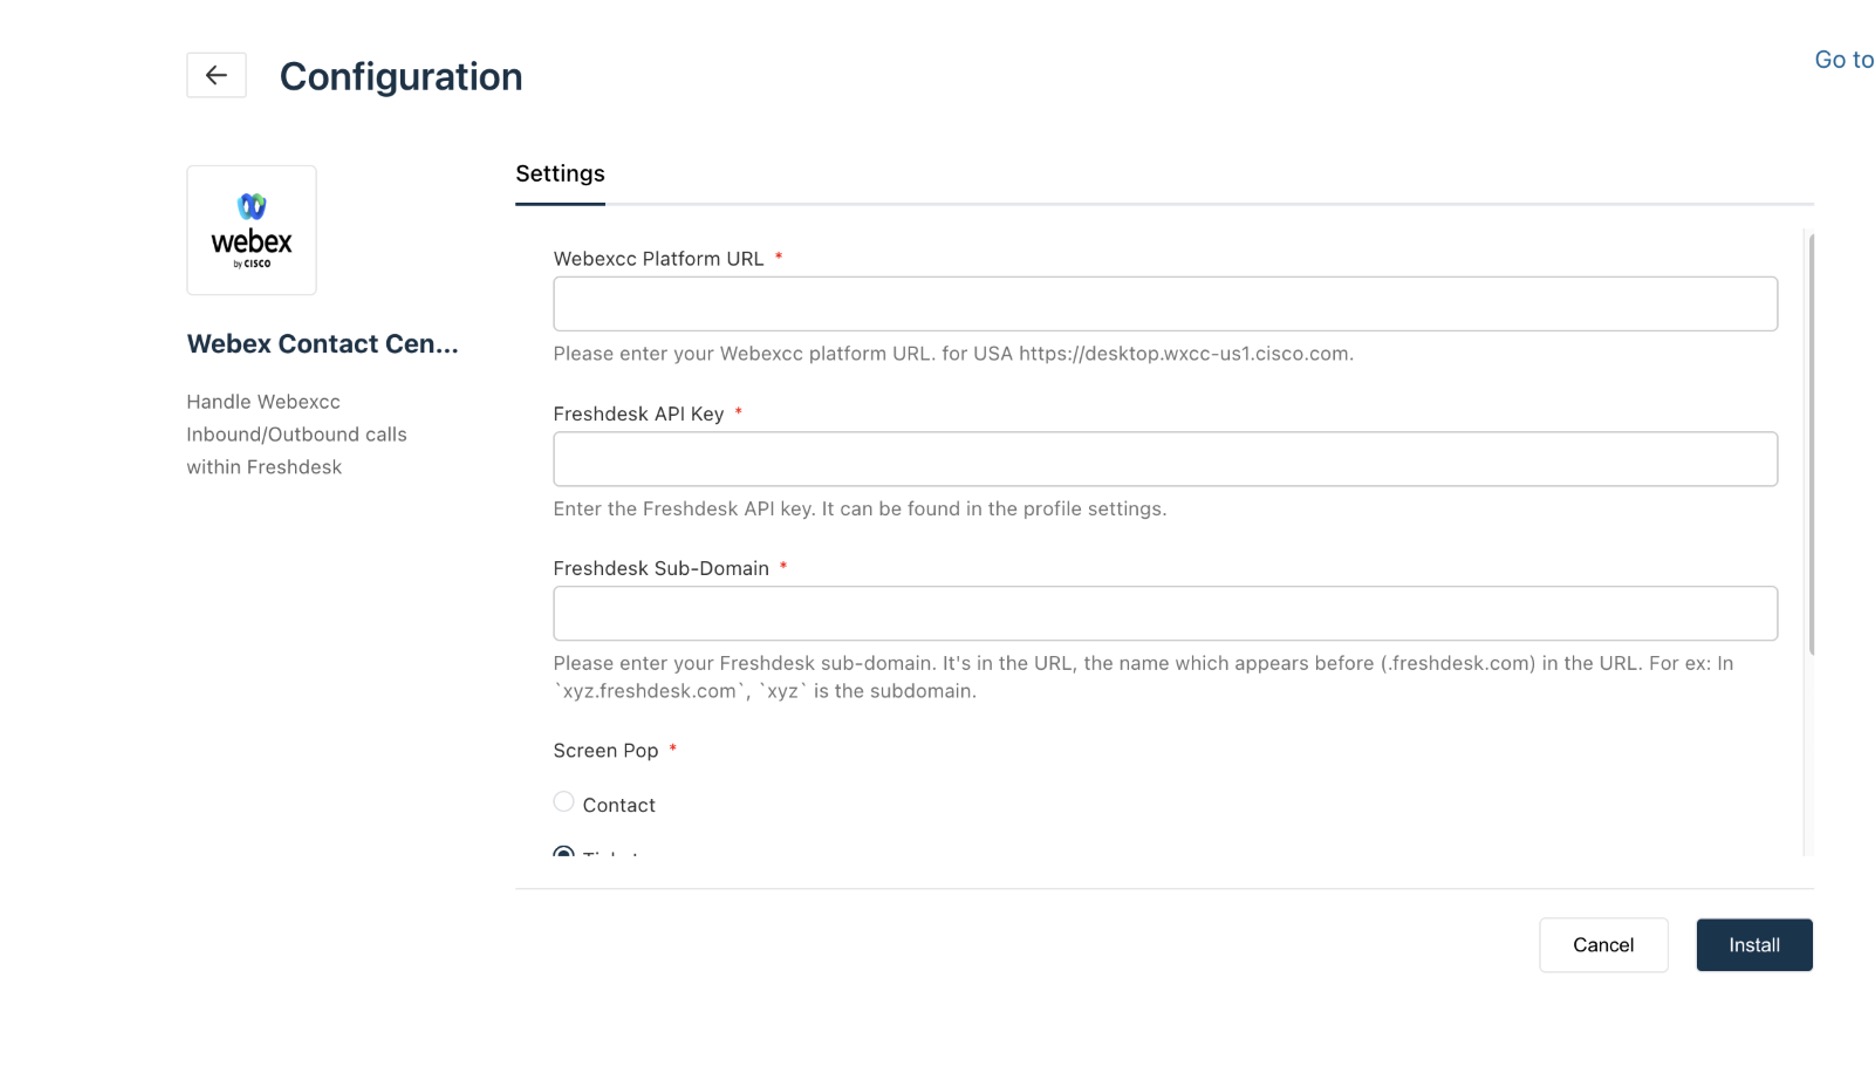
On the Settings screen, perform the following tasks:
When installed, you'll see the following screen: 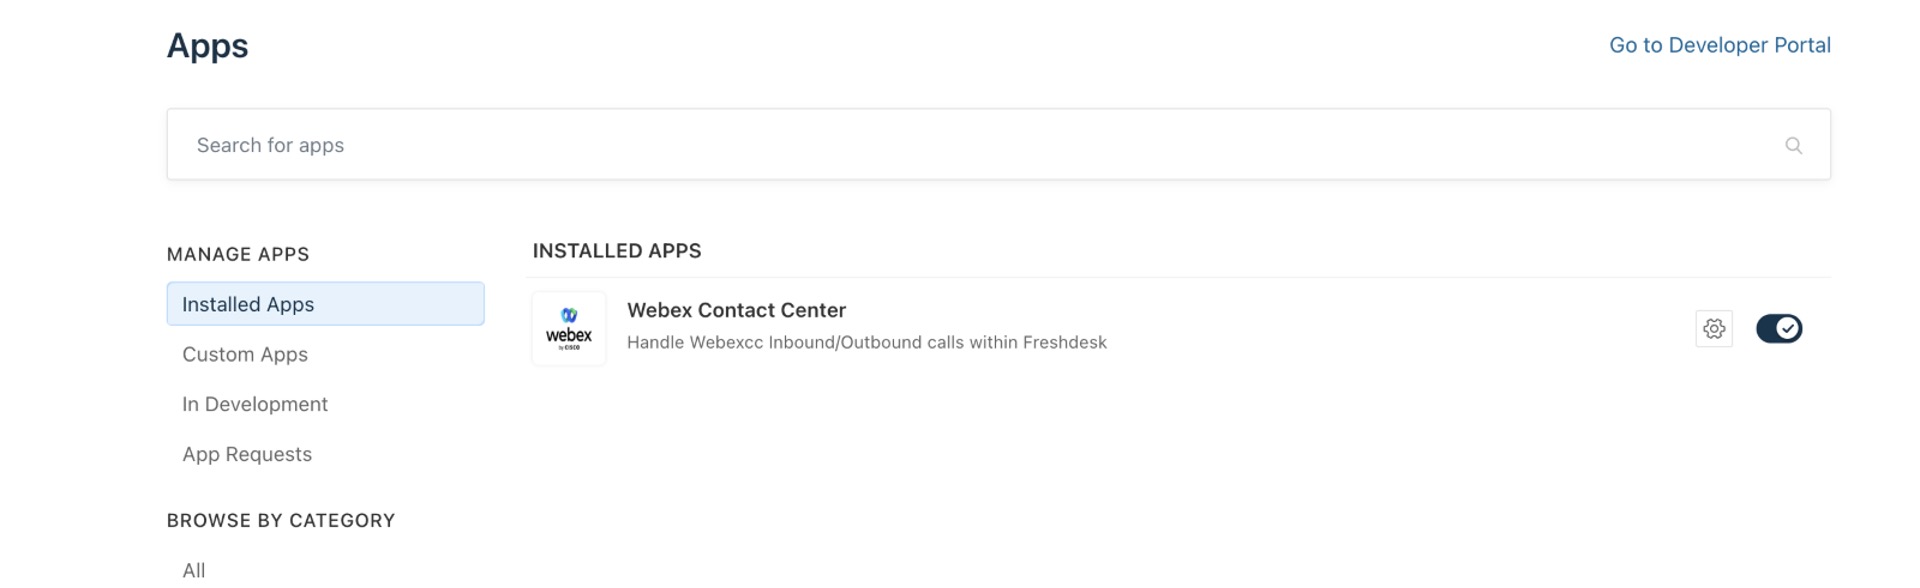
Refresh the Freshdesk CRM and click the Webex Contact Center icon on the bottom-left side of the sidebar to open the Webex Contact Center desktop. 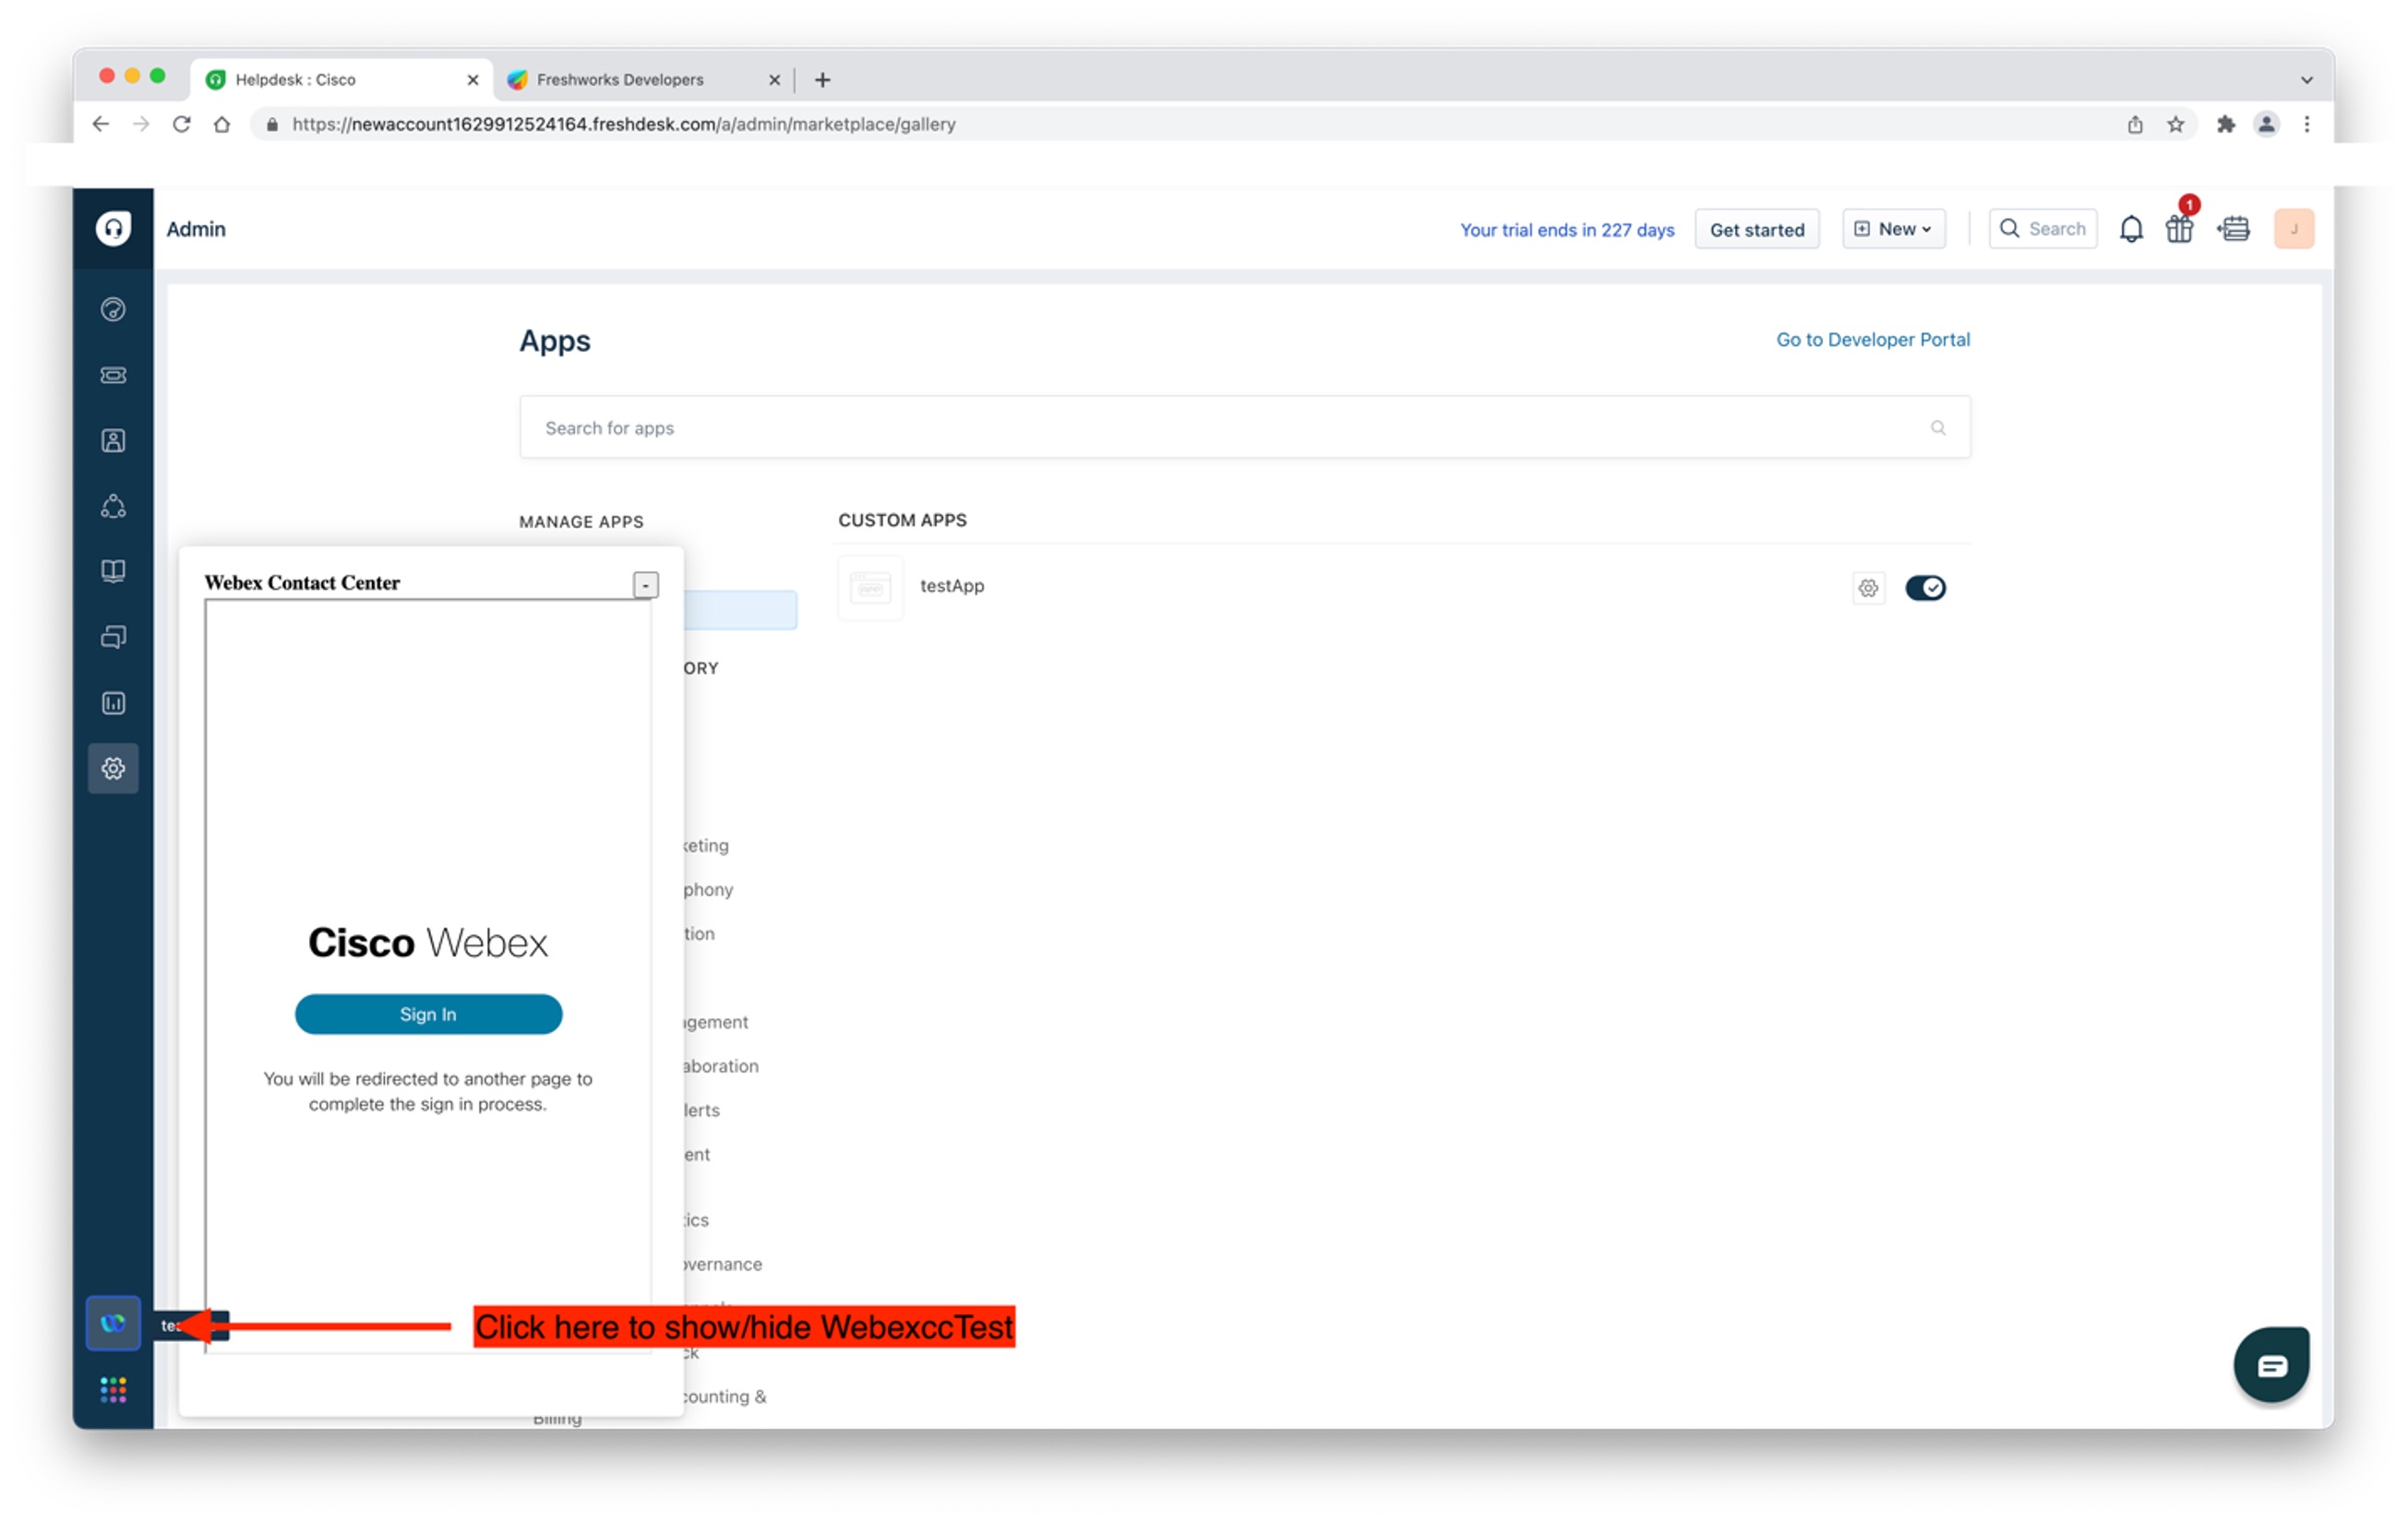
|

Before you begin
-
You can download the Desktop Layout JSON file for Freshdesk from https://github.com/CiscoDevNet/webex-contact-center-crm-integrations/tree/main/Freshdesk.
-
Use the latest Freshdesk_Desktop_<version>.json file for the Webex Contact Center Desktop Layout.
For more information about the Webex Contact Center Management Portal Desktop Layout, see the Provisioning chapter of the Cisco Webex Contact Center Setup and Administration Guide.
| 1 |
Sign in to the Webex Contact Center Management Portal with the appropriate credentials. |
| 2 |
From the navigation bar, choose . |
| 3 |
Click New Layout and enter the details for the desktop layout. |
| 4 |
Upload the Freshdesk Desktop Layout JSON file. |
| 5 |
Click Save. You can now start the Webex Contact Center Desktop within the Freshdesk CRM console. |
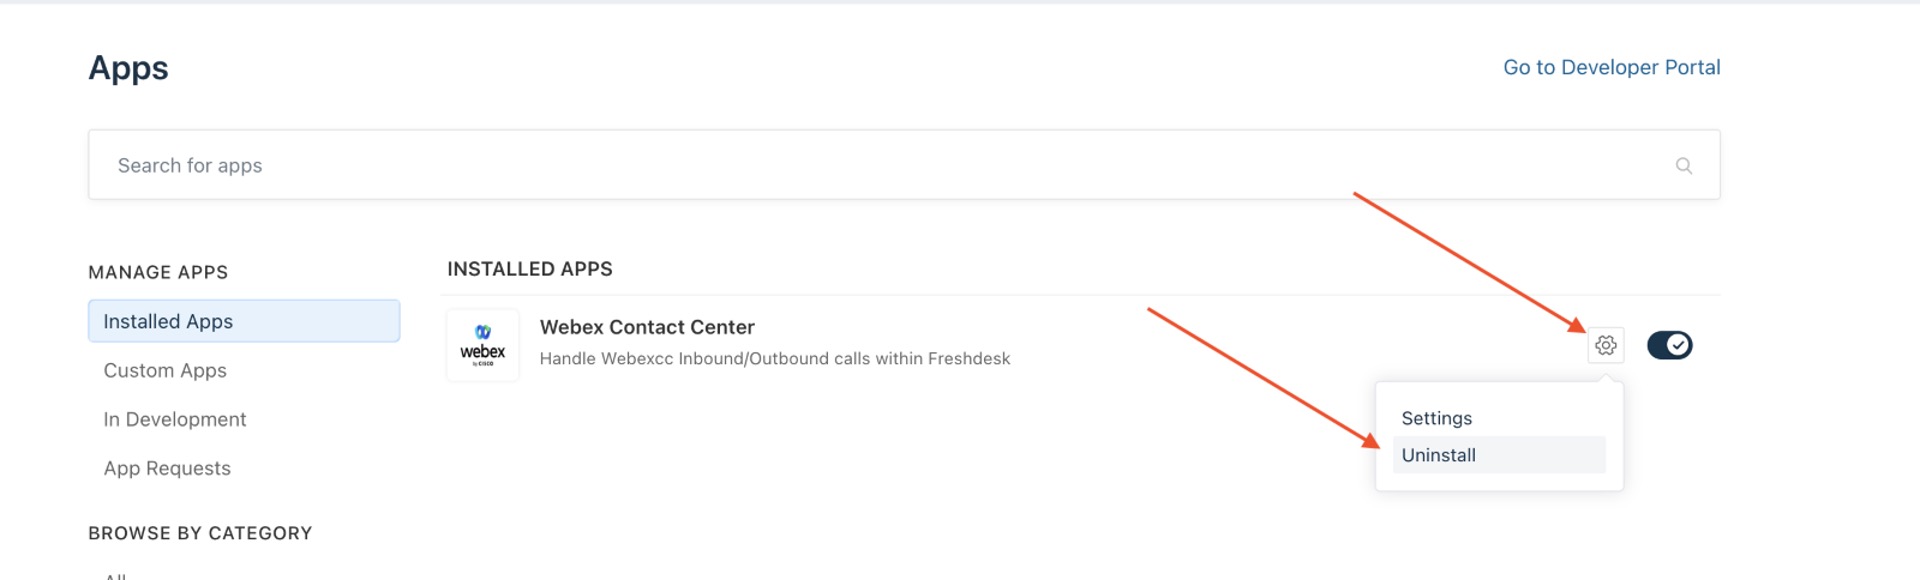
If you have an older version of the Webex Contact Center for Freshdesk App, uninstall the outdated version before you install the latest version.
| 1 |
Sign in to your Freshdesk account. |
| 2 |
Navigate to Settings > Admin on the left pane.
|
| 3 |
Enter
|
| 4 |
Click the Settings icon and then click Uninstall.
|
| 5 |
Click Uninstall to confirm. |

- We support signing into Agent Desktop using WebRTC for Salesforce (SFDC) and Microsoft Dynamics (MS Dynamics) Connectors only.
- Currently, this feature is applicable to agents only.
Before you make Outdial Calls
Before you make outdial calls, ensure that you do the following:
-
Create the outdial entry point and set up an outdial entry point strategy.
-
Enable outdial ANI for the Agent Profile.
-
Set the outdial ANI to a Dial Number-to-Entry Point mapping.
For more information, see the Provisioning chapter of the Cisco Webex Contact Center Setup and Administration Guide.
For information on how to use Desktop, see the Cisco Webex Contact Center Agent Desktop User Guide.
| 1 |
Sign in to the Freshdesk agent console at https://<your-instance>.freshdesk.com/. |
| 2 |
Click the Webex Contact Center icon from the toolbar on the lower left corner of the Freshdesk console.
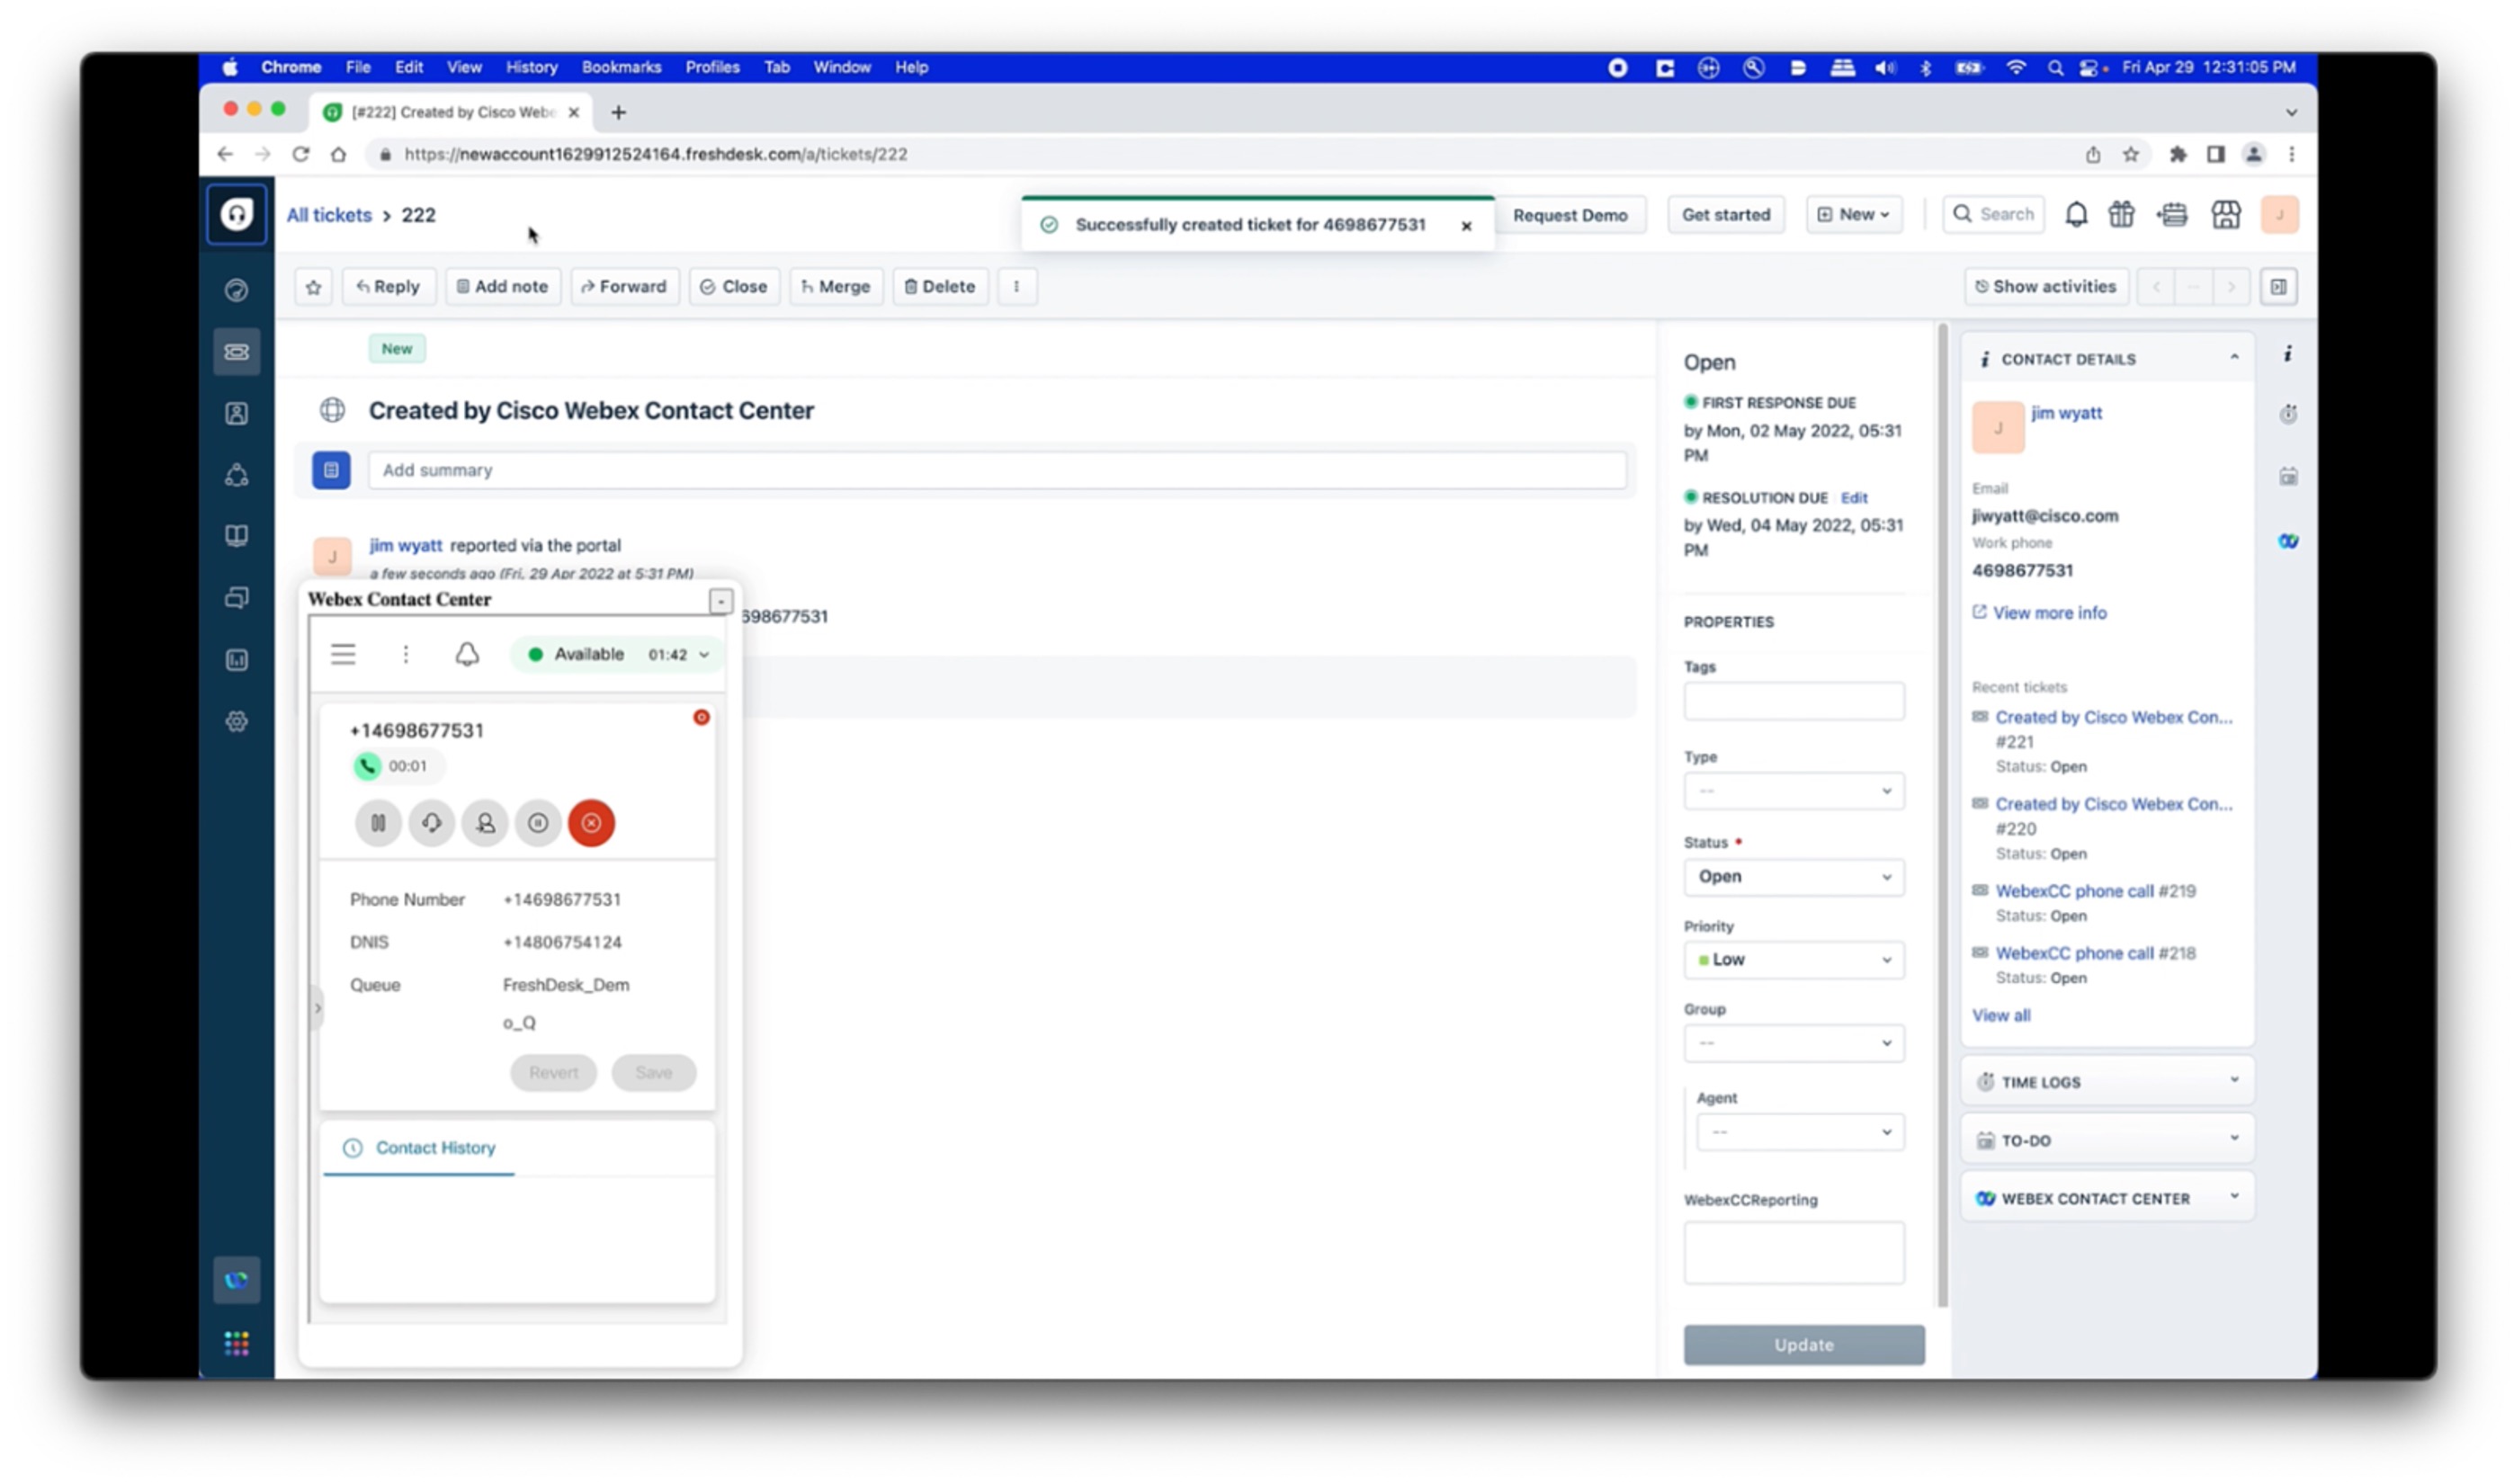
The integrated Webex Contact Center Desktop appears on the Freshdesk console. |
| 3 |
Click Sign In. |
| 4 |
Sign in with your Webex Contact Center Desktop credentials. |
| 5 |
Enter the Dial Number (DN) and Team information. You need to enter the DN and Team name the first time you sign into Webex Contact Center for Freshdesk. For subsequent sessions, the same DN and Team name appear in the application automatically.
|
| 1 |
Sign in to the Freshdesk agent console at https://<your-instance>.freshdesk.com/. |
| 2 |
Click the Webex Contact Center icon from the toolbar on the lower left corner of the Freshdesk console. The integrated Webex Contact Center Desktop appears on the Freshdesk console. |
| 3 |
Click Sign In. |
| 4 |
Sign in with your Webex Contact Center Desktop credentials. The Webex Contact Center application can only run from one Freshdesk tab in your browser window at a time. |
| 5 |
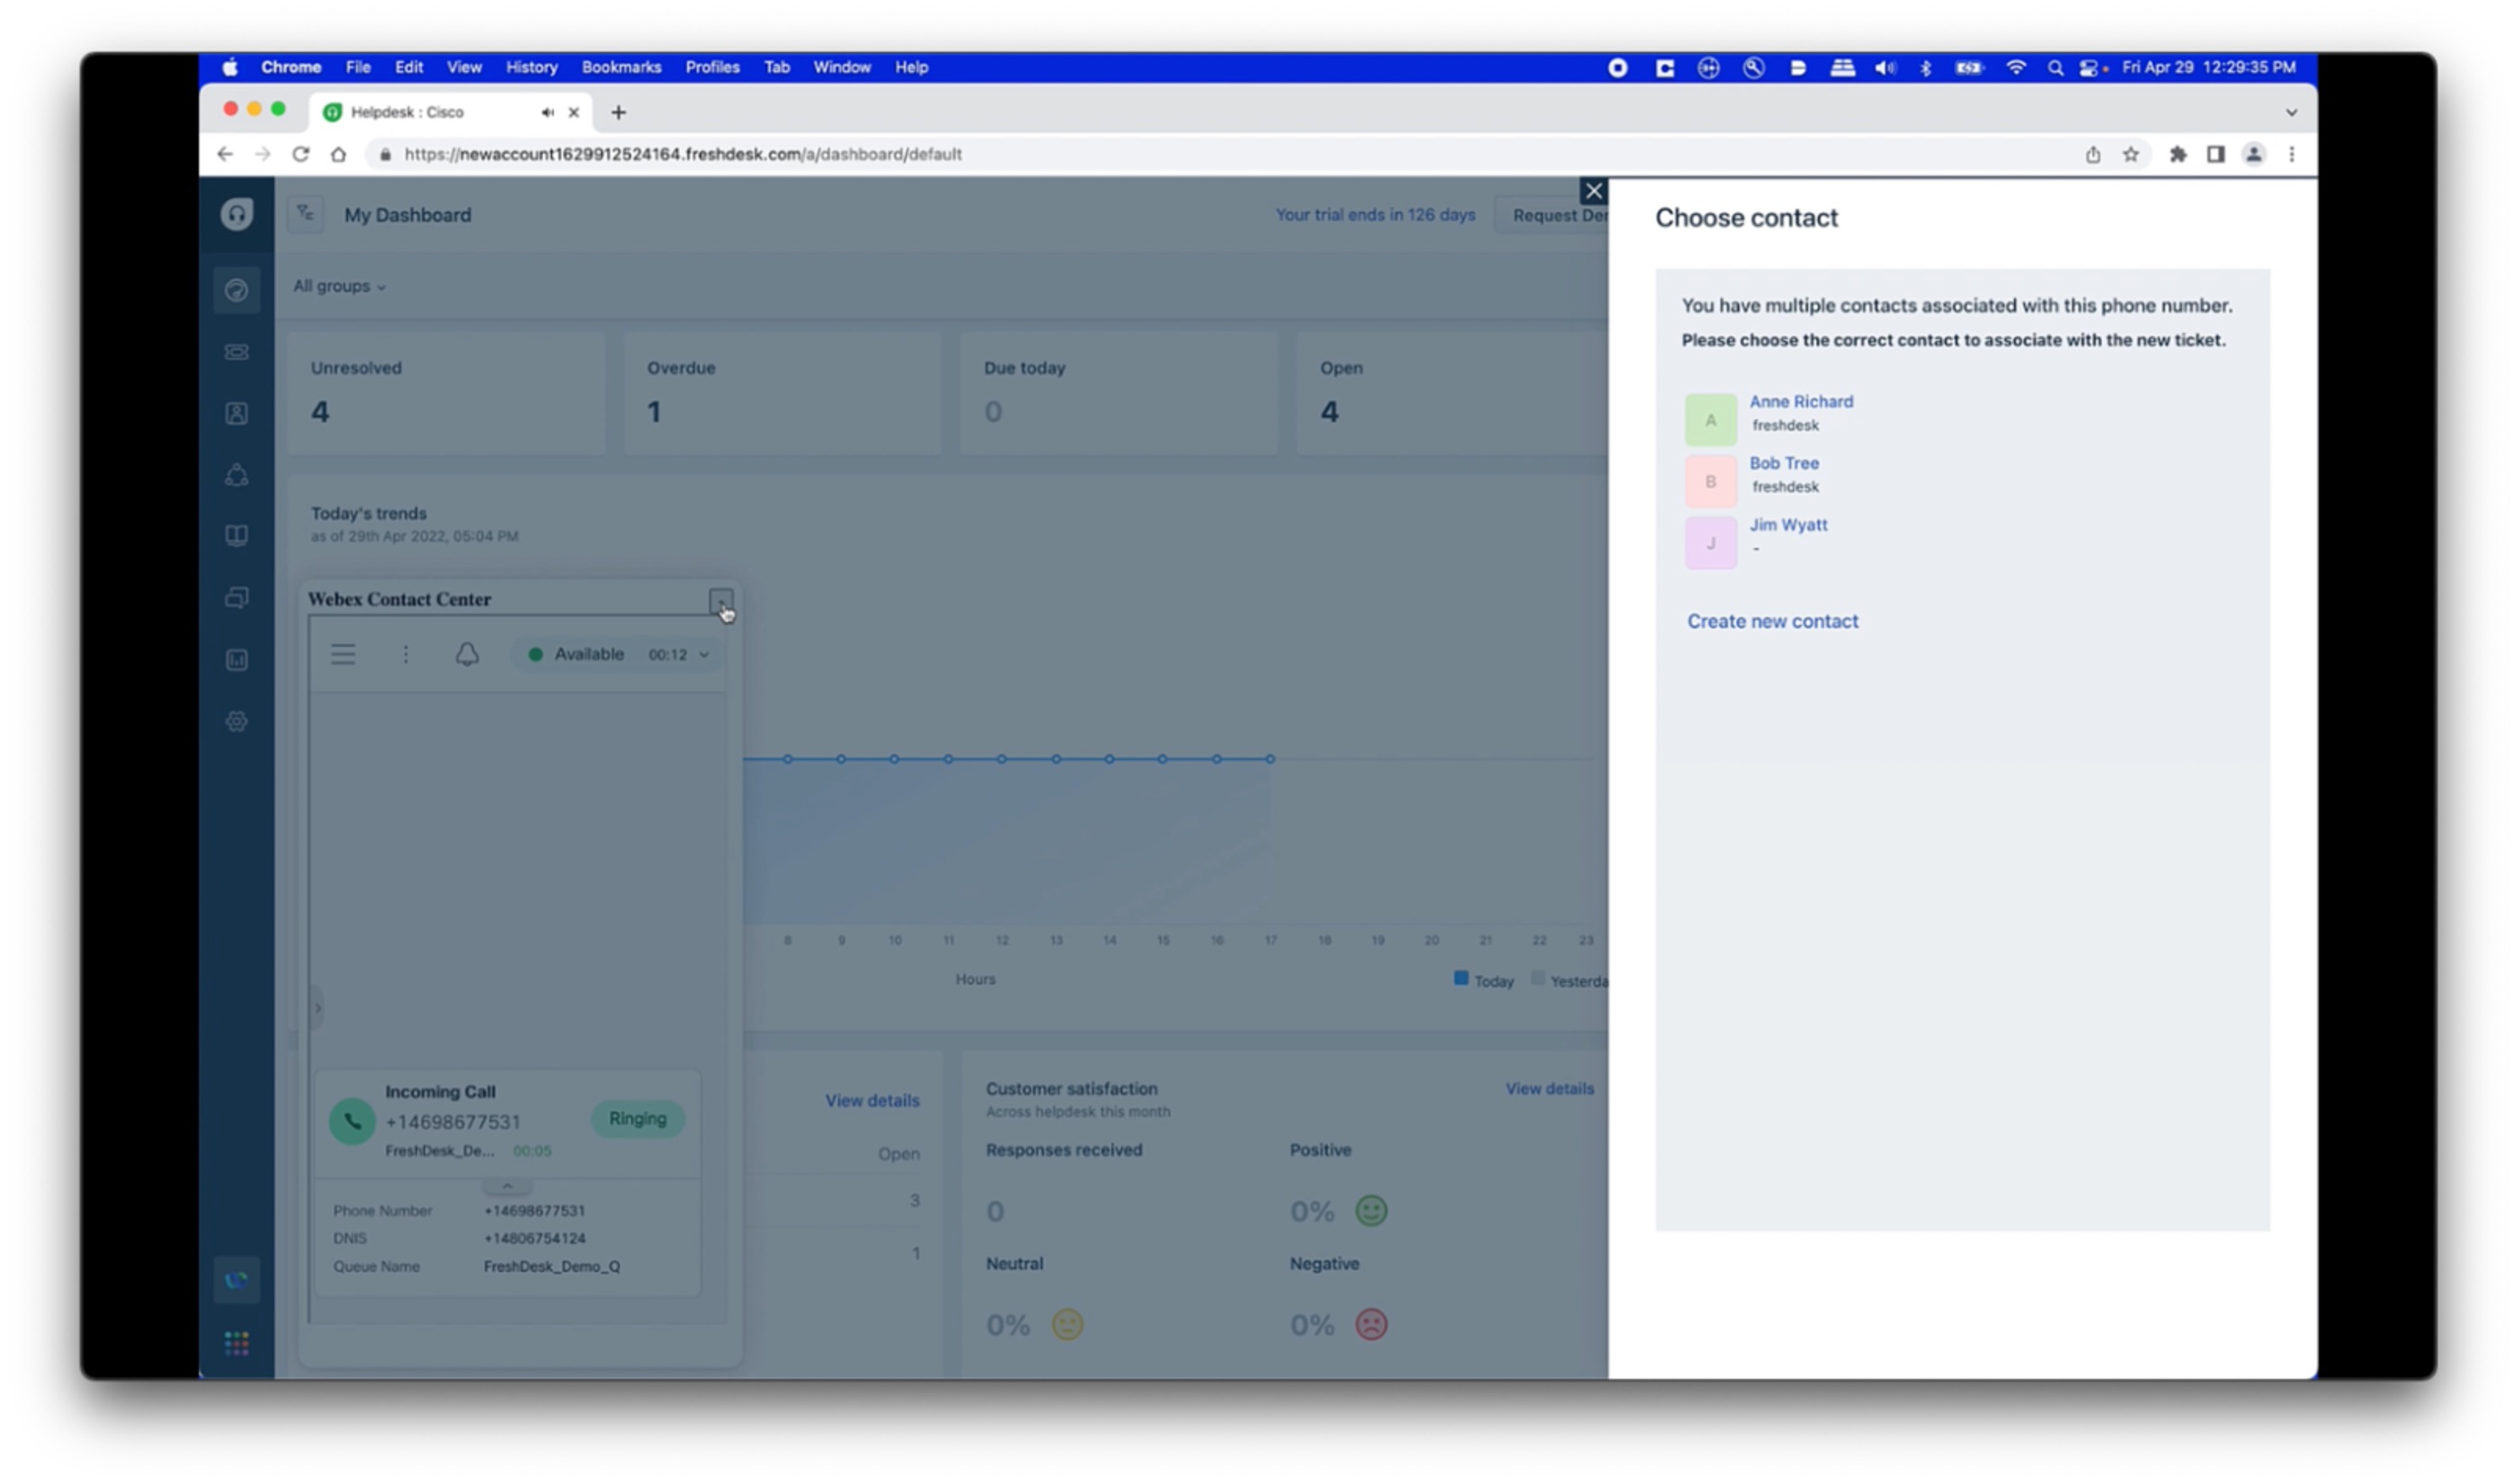
Change the agent status to Available. During inbound calls, the following situations occur:
|

| 1 |
Sign in to the Freshdesk agent console at https://<your-instance>.freshdesk.com/. |
| 2 |
Click the Webex Contact Center icon from the toolbar on the lower left corner of the Freshdesk console. The integrated Webex Contact Center Desktop appears on the Freshdesk console. |
| 3 |
Click Sign In. |
| 4 |
Sign in with your Webex Contact Center Desktop credentials. |
| 5 |
Enter the Dial Number (DN) and Team information.
|
| 6 |
Search and open the customer or ticket record. |
| 7 |
Locate and click the phone number that needs to be dialed. 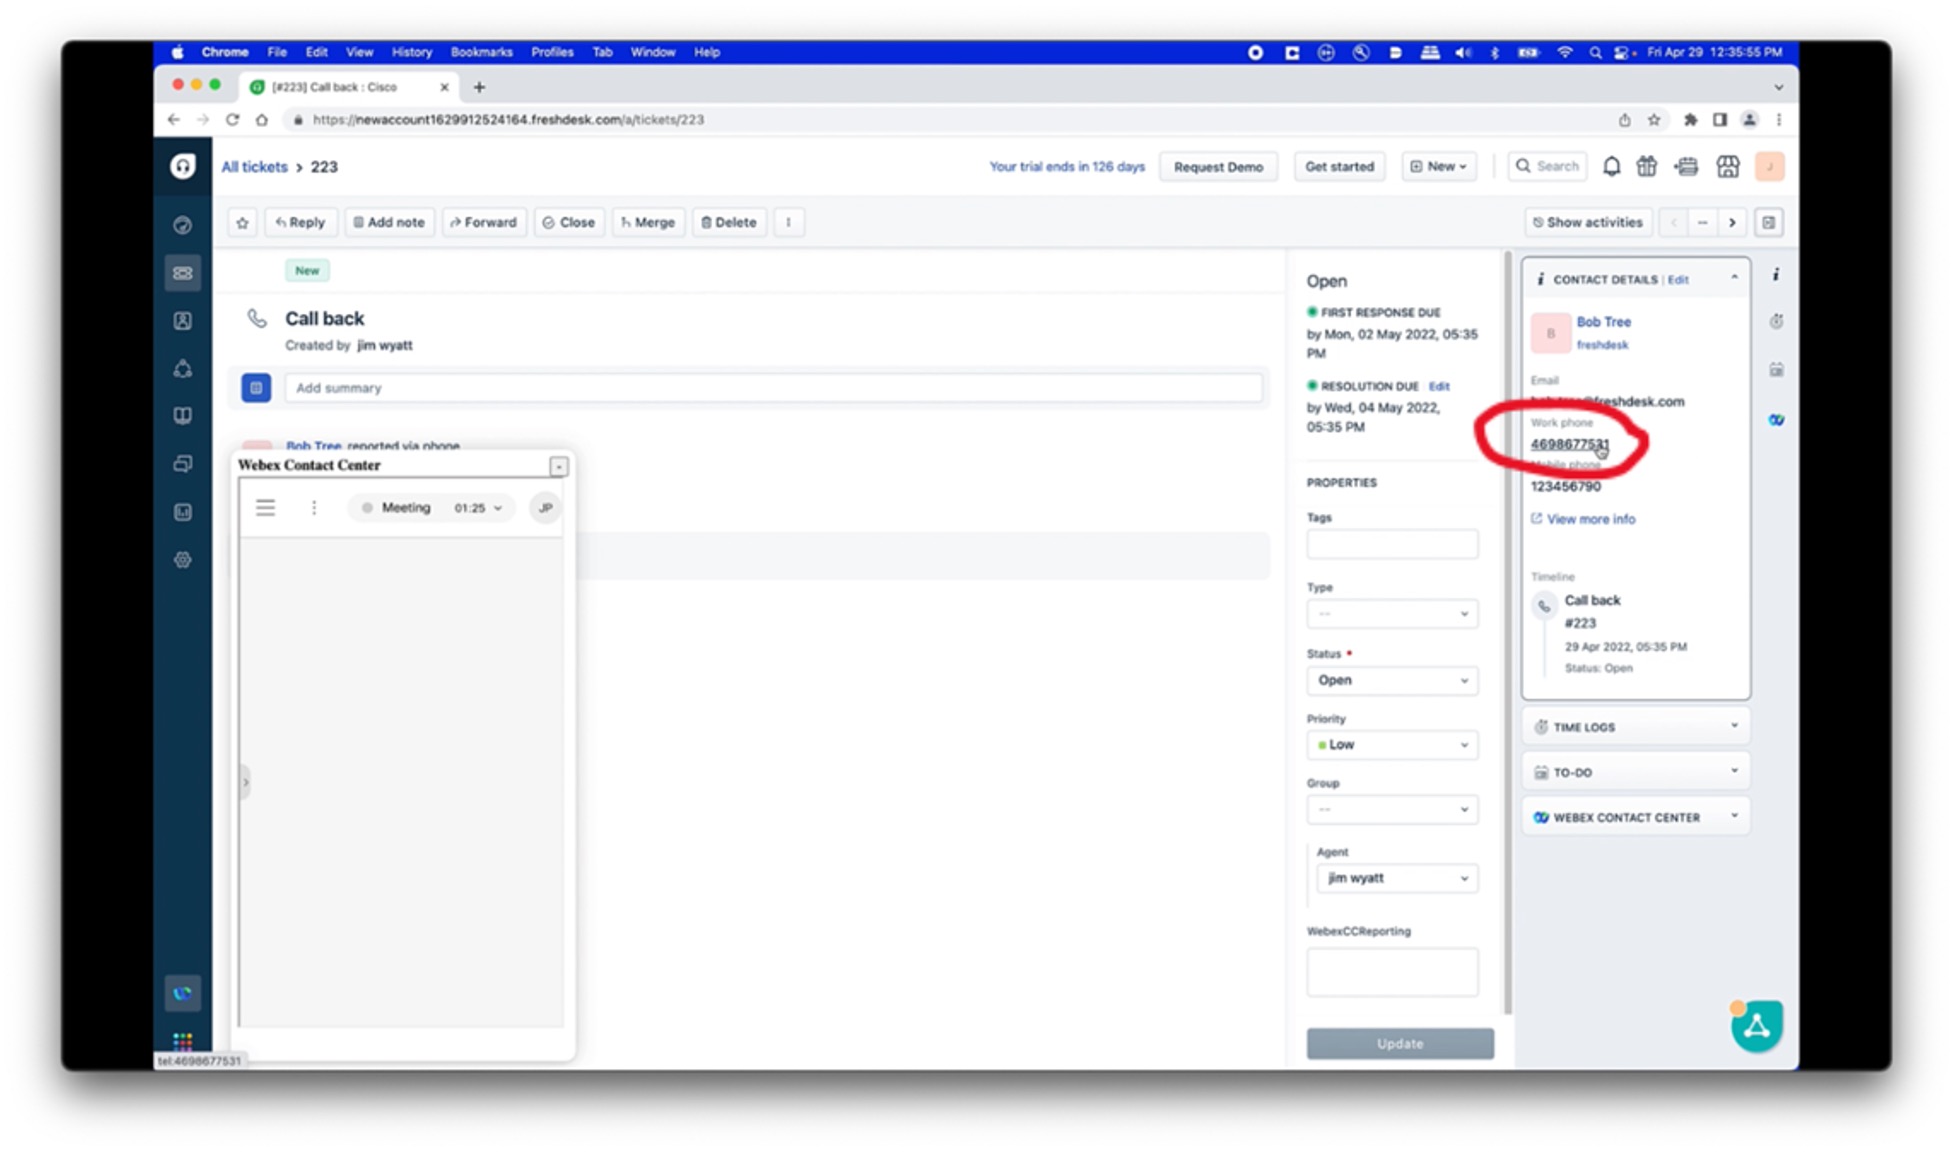
|
The system creates a private note on the Freshdesk ticket displaying data from the Webex Contact Center interaction.
Here's an example Webex Contact Center activity log:Entity API Name ................ :Task
Task Subtype ................... :Call
Status ......................... :Completed
Call Object .................... :c##d##cb-e###-####-a##a-#c#b##f#a#d#
Subject ........................ :Call ##.##.#### ##:## PM
Activity Date .................. :####-##-## ##:##:##
Call Type ...................... :INBOUND
Call Disposition ............... :Case Inquiry(e#f#c#c#-cac#-###b-af##-ebf##d#ea###)
Call Duration In Seconds ....... :##
Contact Type ................... :Call
Ringing Time ................... :##:##:##
Wrapup Time .................... :##:##:##
ANI ............................ :+###########
DNIS ........................... :+###########
Queue Name ..................... :FreshDesk_Demo_Q


