- Home
- /
- Article

Thanks for your feedback.

Move users from one location to another
 In this article
 Feedback?
You can seamlessly move users with and without a Calling license, from one location to another without impacting their access to the existing services.
You can move users across locations using:
-
Public APIs—Use these APIs to move a single user or several users in bulk. Refer to the Webex for Developers for details.
-
Control Hub—Use this method to move either a single user or multiple users. See the following sections.
Move non-Calling users
You can move users who don't have a Calling license to any location including the calling location, but they won’t have a Calling license. The user's existing access to messages and other settings is retained.
| 1 |
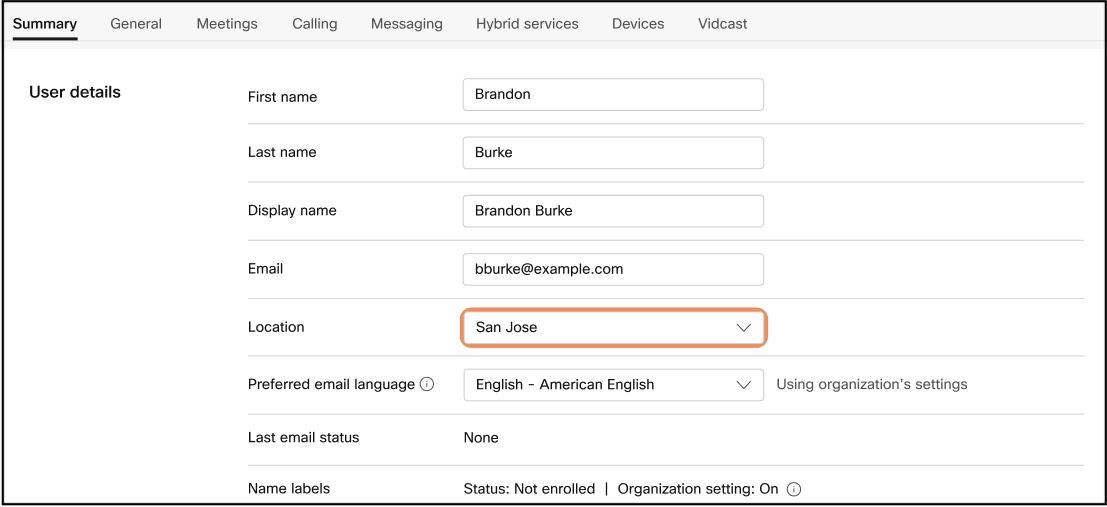
Sign in to Control Hub, and under Management, click Users. |
| 2 |
Do one of the following to move the user:
|
 icon in the respective user row and choose
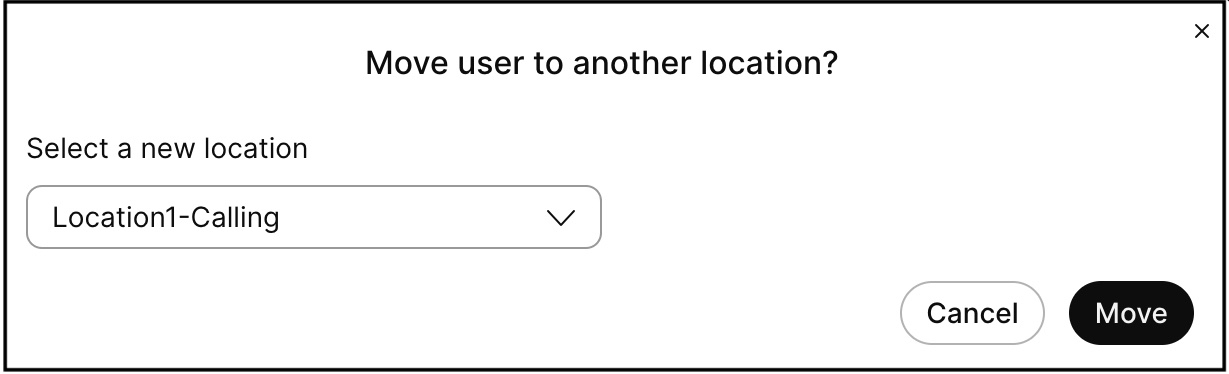
Move Calling users
Before you begin
-
You can move extension-only users, and users assigned with phone numbers.
-
You can only move users to a calling location.
-
You can only move one user at a time.
-
You can’t move users assigned with a charge number.
-
You can't move users who are in the DECT network, and Hot-desking or Hoteling active sessions.
-
You can't move users assigned with ATA, DECT, and customer-managed devices.
| 1 |
Sign in to Control Hub, and under Management, click Users. |
| 2 |
Do one of the following to move the user:
Only the calling location displays while choosing from the Location drop-down. |
| 3 |
To assign a new extension, uncheck Keep current extension and enter a new extension. By default, the Keep current extension check box is selected to move the user with their current extension. 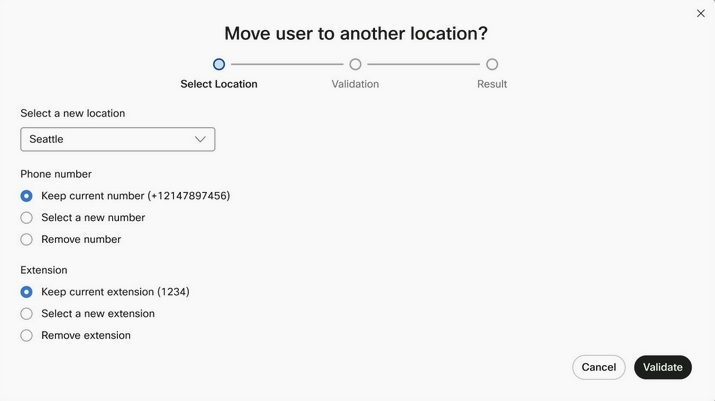
|
| 4 |
To use the current number, check Keep current phone number. Click Next.
Read these pointers, if you choose to move the same number to a different location:
|
| 5 |
To assign a new number, uncheck Keep current phone number and enter a number. Select at least one primary number for the new location. |
| 6 |
You can choose Remove number or Remove extension respectively and assign a different number. This option isn't supported for users who have an associated ESim device. |
| 7 |
Click Validate. If there are any issues in moving the user, the relevant details are displayed. Fix those issues and then move the user. If there are any changes expected to occur after moving the user, the relevant details display. |
| 8 |
Read the disclaimer and check the confirmation box. |
| 9 |
Click Move. The moving process starts and you can view in Task Manager. |
Impacts
After you move the Calling user to a new location, the following changes occur. You can update the changes based on the new location.
Features
-
Location-based feature schedules get removed.
-
If the current location has a different recording service than the new location, the recording of the user may be lost.
-
The user gets removed from the location-based groups such as Call Park group and Call Pickup.
-
If a user uses any location-based settings for features such as ECBN, Caller ID, and Incoming and outgoing call permissions, those features inherit the settings from the new location.
-
If the user is a member of nonlocation based groups such as Call Queue, Hunt Group, Paging Group, or Auto Attendant, they get retained.
Organization, user, and location-level settings
-
All the organization and user-level settings are retained.
-
All the location-level settings inherit the new location settings.
Devices
-
Reset the devices associated with the user.
Webex App
-
If a user tries to make calls directly from their call history, the call may not go through.
Move users using CSV
Webex Calling can move large enterprise customers with many users in a location using the CSV mechanism.
Consider these pointers while moving users:
-
The administrators must select a location to download the CSV. The downloaded users must belong to the same location.
-
You can download a maximum of 10,000 users in a location per CSV file. If there are more than 10,000 users for a location, then multiple CSV files are generated and wrapped as a zip file.
-
Use the CSV file to move both free Calling users and Webex Calling users.
-
Free Calling users can move from a Webex Calling to a non-calling location and from a non-calling location to a Webex Calling location. Also, you can remove a location.
-
Webex Calling users can move from one Webex Calling location to another.
-
Administrators can enable Webhook notification on successful CSV processing.
-
For free Calling users, assigning Webex Calling license, Telephone Number(TN), and extension number during the move isn’t supported.
-
While uploading the CSV file, you can choose a different location for each user.
-
When you upload the CSV file, a maximum of 500 users and a maximum file size of 100 Kb are supported.
Here are some recommendations:
-
Some spreadsheet editors remove the + sign from cells when they open the CSV file. We recommend that you use a text editor to make CSV updates. If you use a spreadsheet editor, ensure that you set the cell format to text and restore removed + signs.
-
Export a new CSV to capture the latest information for the fields and avoid errors during the import of changes.
Before you begin
| 1 |
Sign in to Control Hub and go to Users. | ||||||||
| 2 |
Click Add users > select the Move users by CSV option from the drop down menu. | ||||||||
| 3 |
The Move users by CSV window displays. Enter the location to move the users. You can do the following:
| ||||||||
| 4 |
Click Upload. The CSV file uploads and creates your task and a result csv. You can close the browser or this window. An administrator must manually remove users without any modifications from the CSV file before the upload. At the time of CSV import, the following validation actions occur:
|
 to download user data.
 What to do next
-
Interaction with the Move User job is available in the Task manager. Both success or errors in the move displays.
-
Once the Download User-Move CSV job is complete, administrators can click on the Download link to export the user's data to a local system to edit and upload.
-
The task-manager section for the Move Users job displays the statistics of all user types involved in the move.
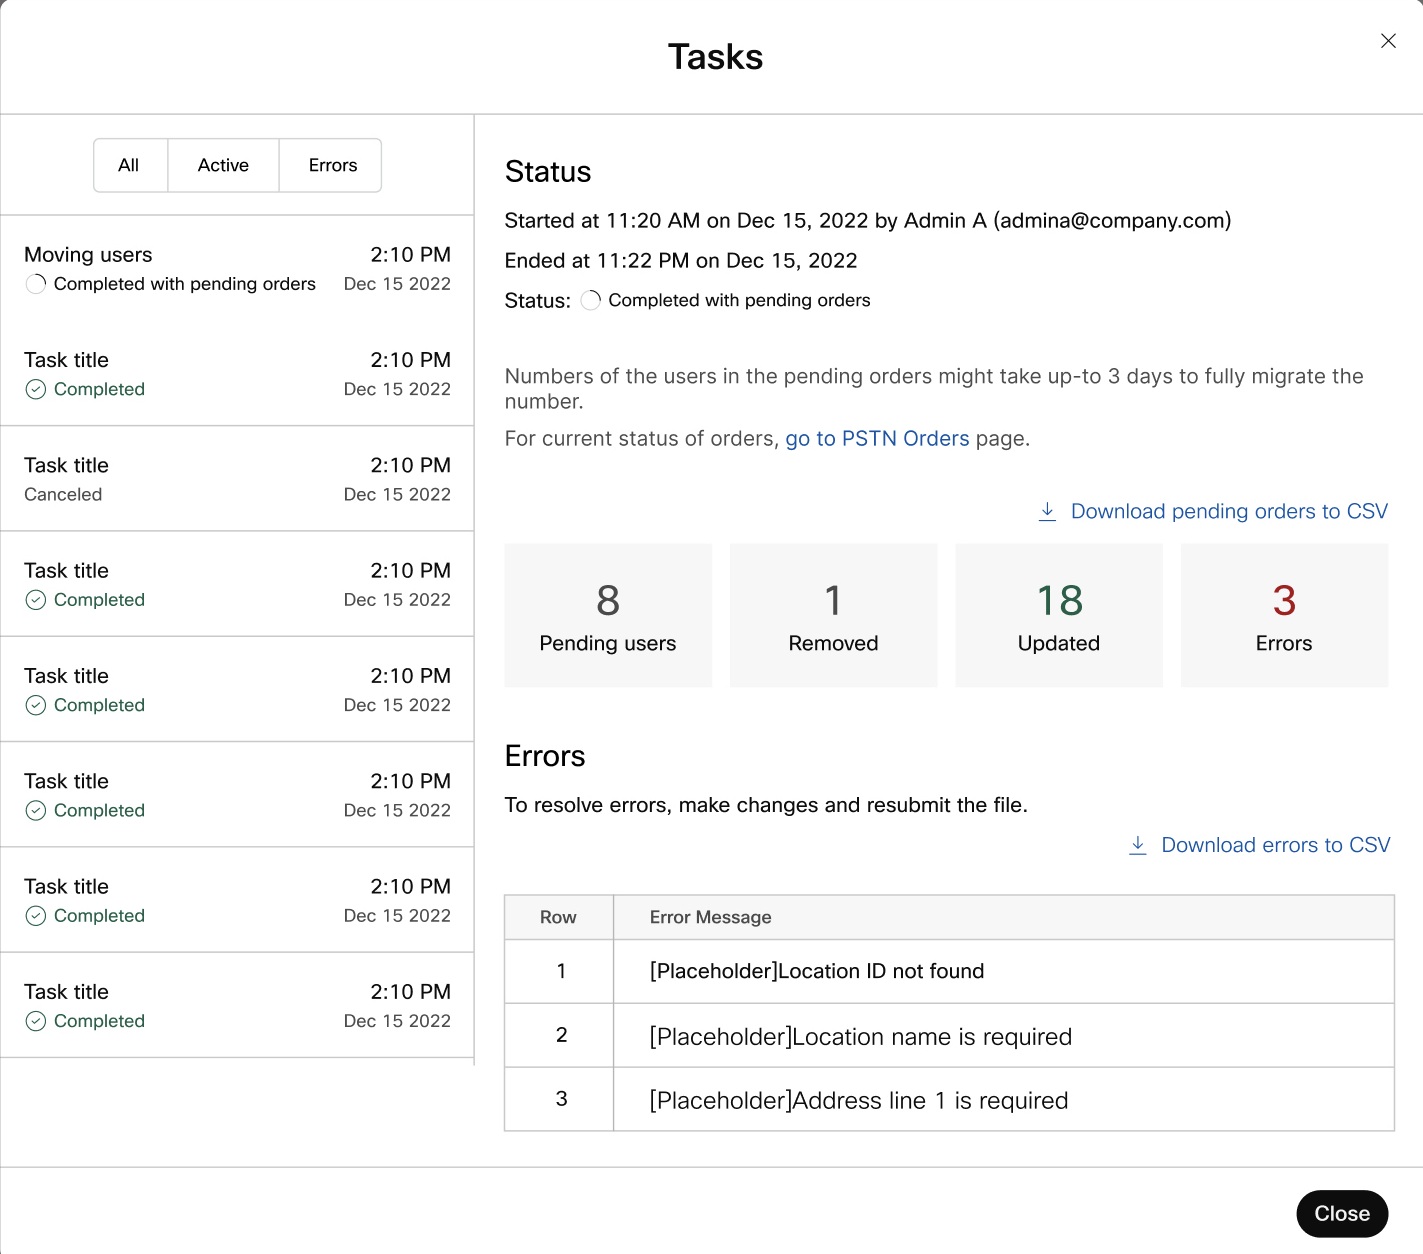
-
Removed
-
Updated
-
Completed with errors
-
Pending users—displays the number of users you moved to a different location with the current phone number. An order is created for the number move and processed in the background. As a result, the user move is in pending state until the number move completes.
-
-
Click the go to PSTN orders page link and enter the order ID in the PSTN order page to check the status of the move request.
-
Click the Download Pending users using CSV file to know the User IDs that are in pending state.


