- Home
- /
- Article

Thanks for your feedback.

Build and manage digital DECT network in Control Hub
 In this article
 Feedback?
Webex Calling provides multicell support for the Cisco IP DECT DBS-210, allowing the provisioning of up to 1000 lines across up to 254 bases.
Get Started with Your DECT Network
Administrators can build and manage Cisco DECT network settings within Cisco Webex Control Hub. The Cisco IP DECT Series consist these Cisco devices:
-
Cisco IP DECT DBS 110 Single-Cell Base Station
-
Cisco IP DECT DBS 210 Multi-Cell Base Station (up to 254 bases)
-
Cisco DECT Handsets (6823 and 6825)
For Webex Calling/Wholesale, these offers apply:
-
DBS 110 supports Single Cell deployments only with Repeaters.
-
DBS 210 supports Single, Dual, and Multi Cell deployments with Repeaters.
Creating a DECT network builds a virtual container to populate the various elements that make up a DECT Network. Building DECT networks allows an administrator to deploy a new DECT Network and manage existing Networks. You can migrate an existing single-cell or multi-cell networks to the new DECT network solution.
Building DECT Networks allows you to deploy both single-cell and multi-cell DECT Networks that can coexist within the same customer location.
When creating a DECT network, you can customize the network based on your deployment requirements (example: enterprise, warehouse environment, retail):
-
Assign users and places to a multi-cell network.
-
Configure multiple lines per handset.
-
Configure self-sufficient bases.
-
Group DECT base stations into DECT network
The three primary steps to creating a DECT network are:
| 1 |
Create the DECT network itself (the container that holds all bases and handsets). |
| 2 |
Add base stations. |
| 3 |
Assign users to handsets. |
Create a New DECT Network
Before you begin
-
Configure the DECT Networks within the DECT Network tab in the Control Hub. Here you can add base stations and assign handsets to users.
-
You can’t mix and match 110 and 210 bases within a DECT network.
-
A handset can have up to two lines, and a DECT network supports a total of 1000 total lines across all handsets.
-
Building a DECT network is like building a container that holds all your bases and handsets. You can create a DECT network and then assign users or lines later.
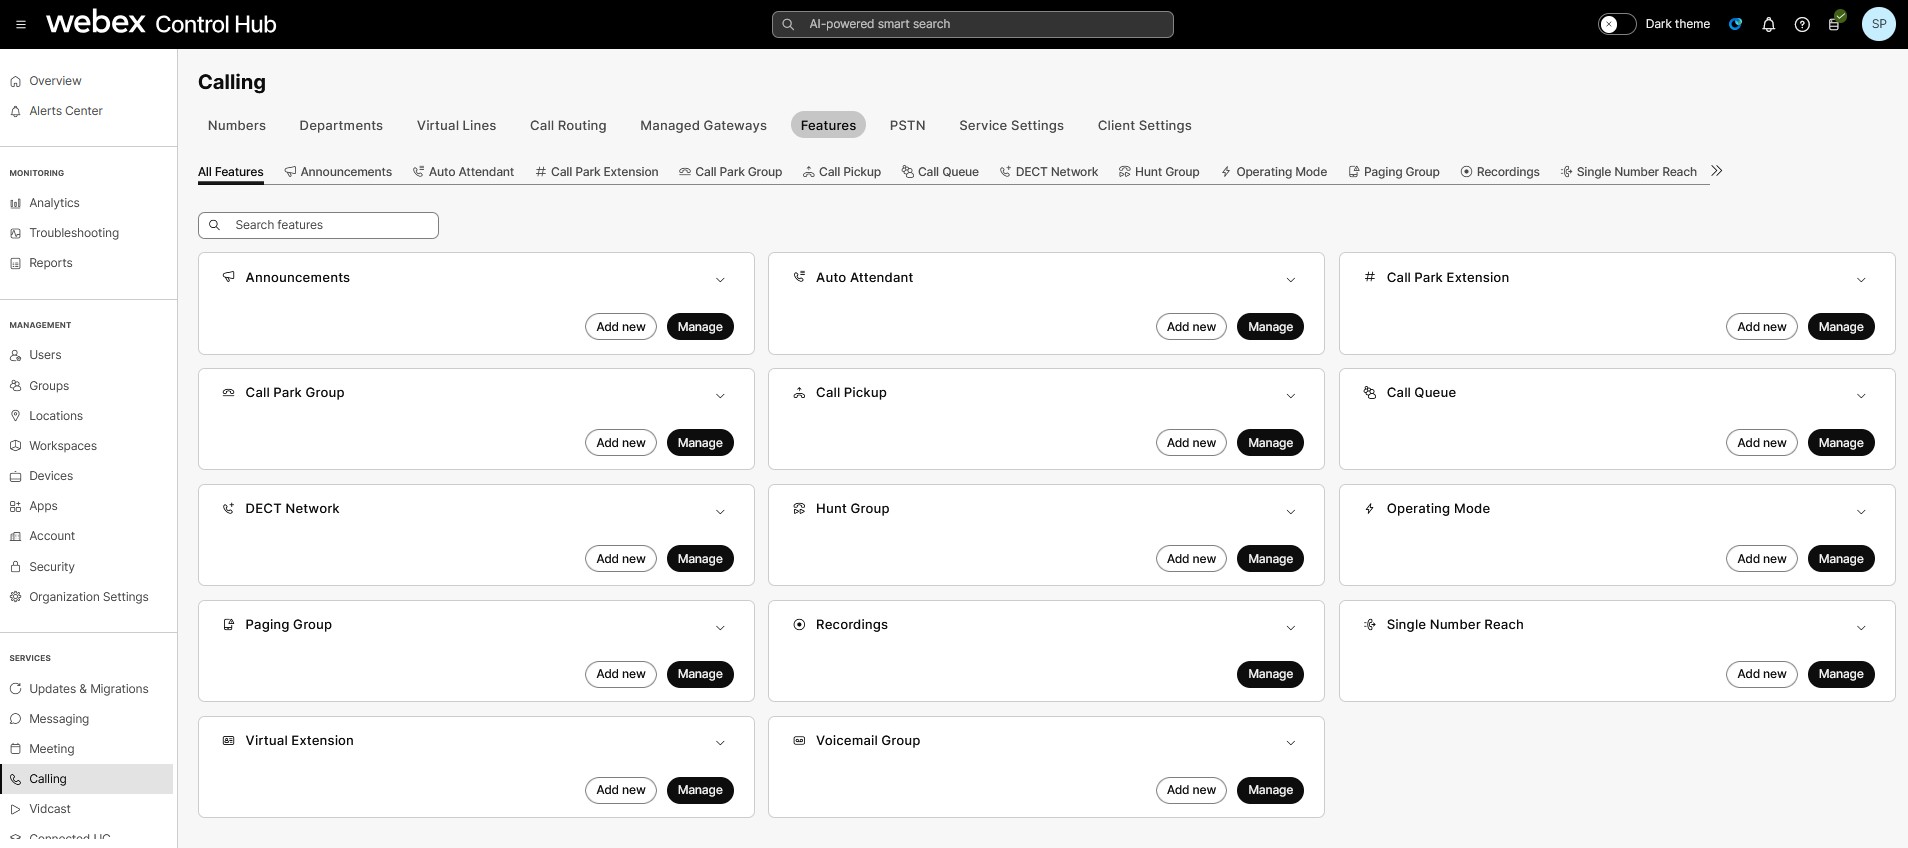
| 1 |
Sign in to Control Hub. |
| 2 |
Go to . |
| 3 |
Click Add New to Create a DECT Network. If you have an Existing Single-Cell or Multi-Cell Network, you can easily convert to a new DECT Network using the migration wizard. |
| 4 |
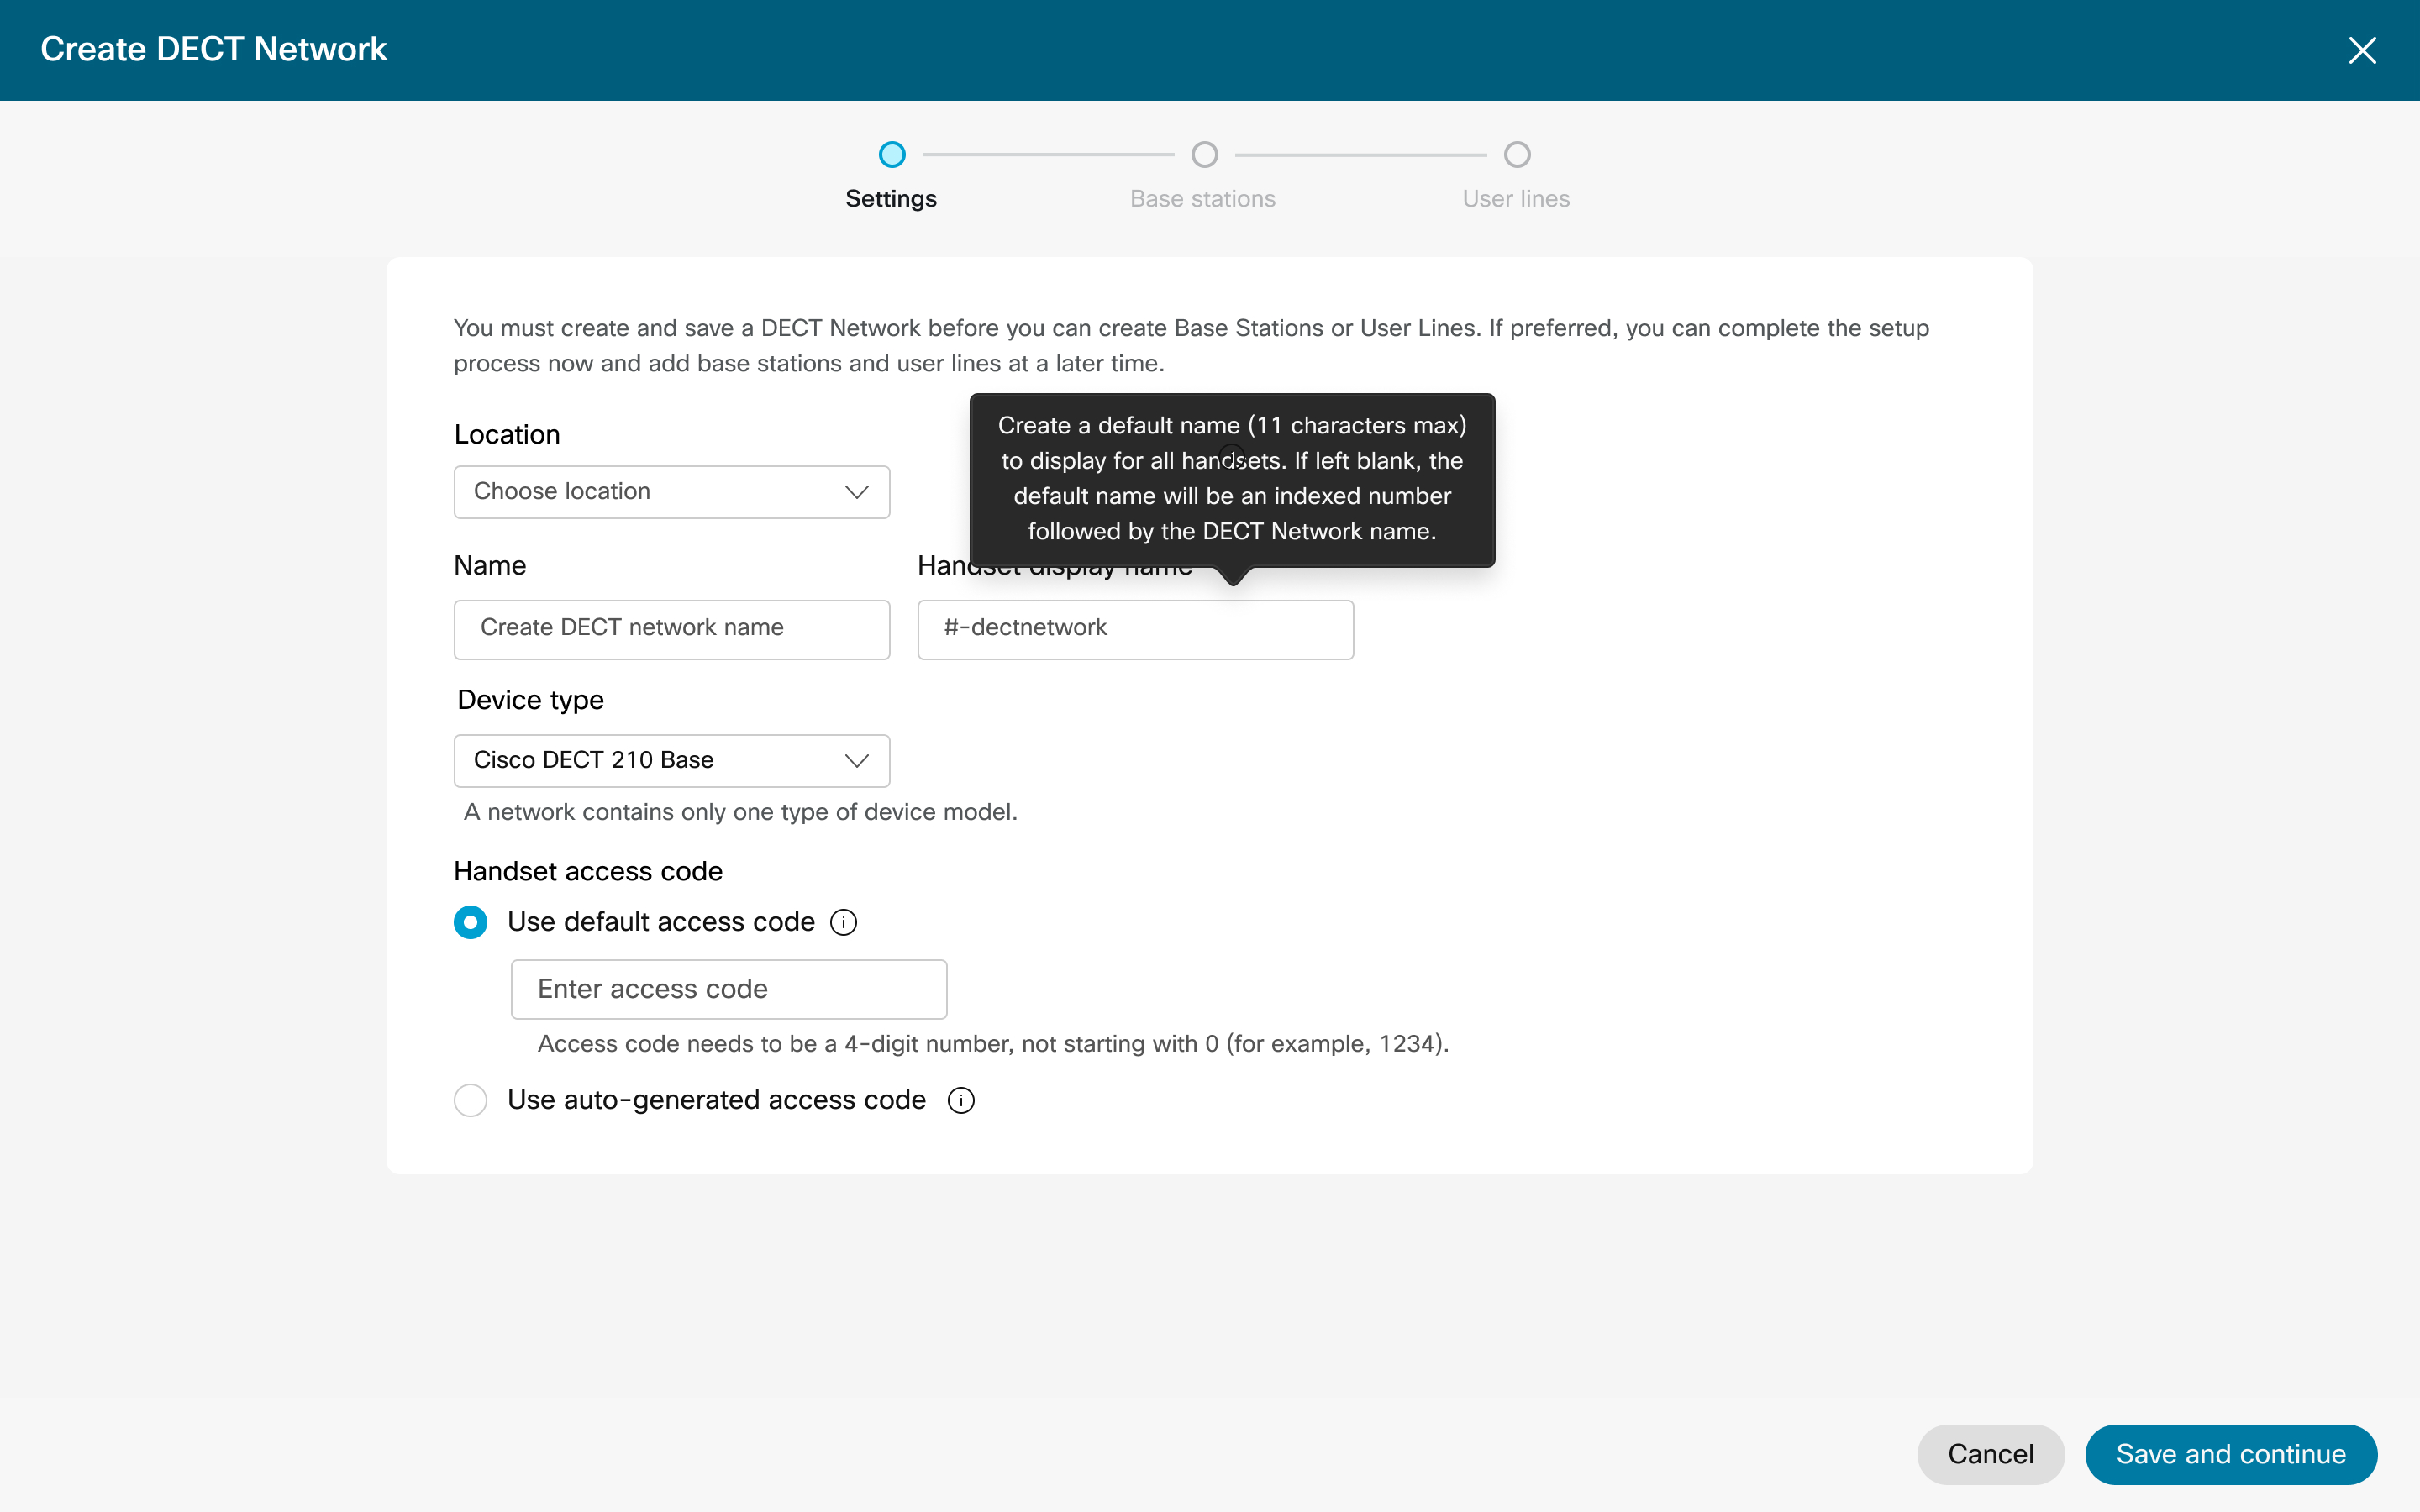
Under Settings, choose the Location from the drop-down menu. |
| 5 |
Enter a DECT Network name that can contain up to 20 alphanumeric characters. |
| 6 |
Enter the default Handset idle screen name. |
| 7 |
Choose your Device Type from the drop-down menu. This option defines the type of base that you use for this DECT Network. You can’t mix and match 110 and 210 base stations. |
| 8 |
Select your PIN configuration:
Use access codes to join handsets to the DECT Network for the first time or to rejoin a disconnected handset. |
| 9 |
Click Next to move to the base stations tab. If you click the X at the top of the box to close, the DECT network isn’t created and the settings aren’t retained. Click Next to create the DECT Network and preserve your settings. The remaining steps are optional and you can complete later using the manage DECT Network processes. |
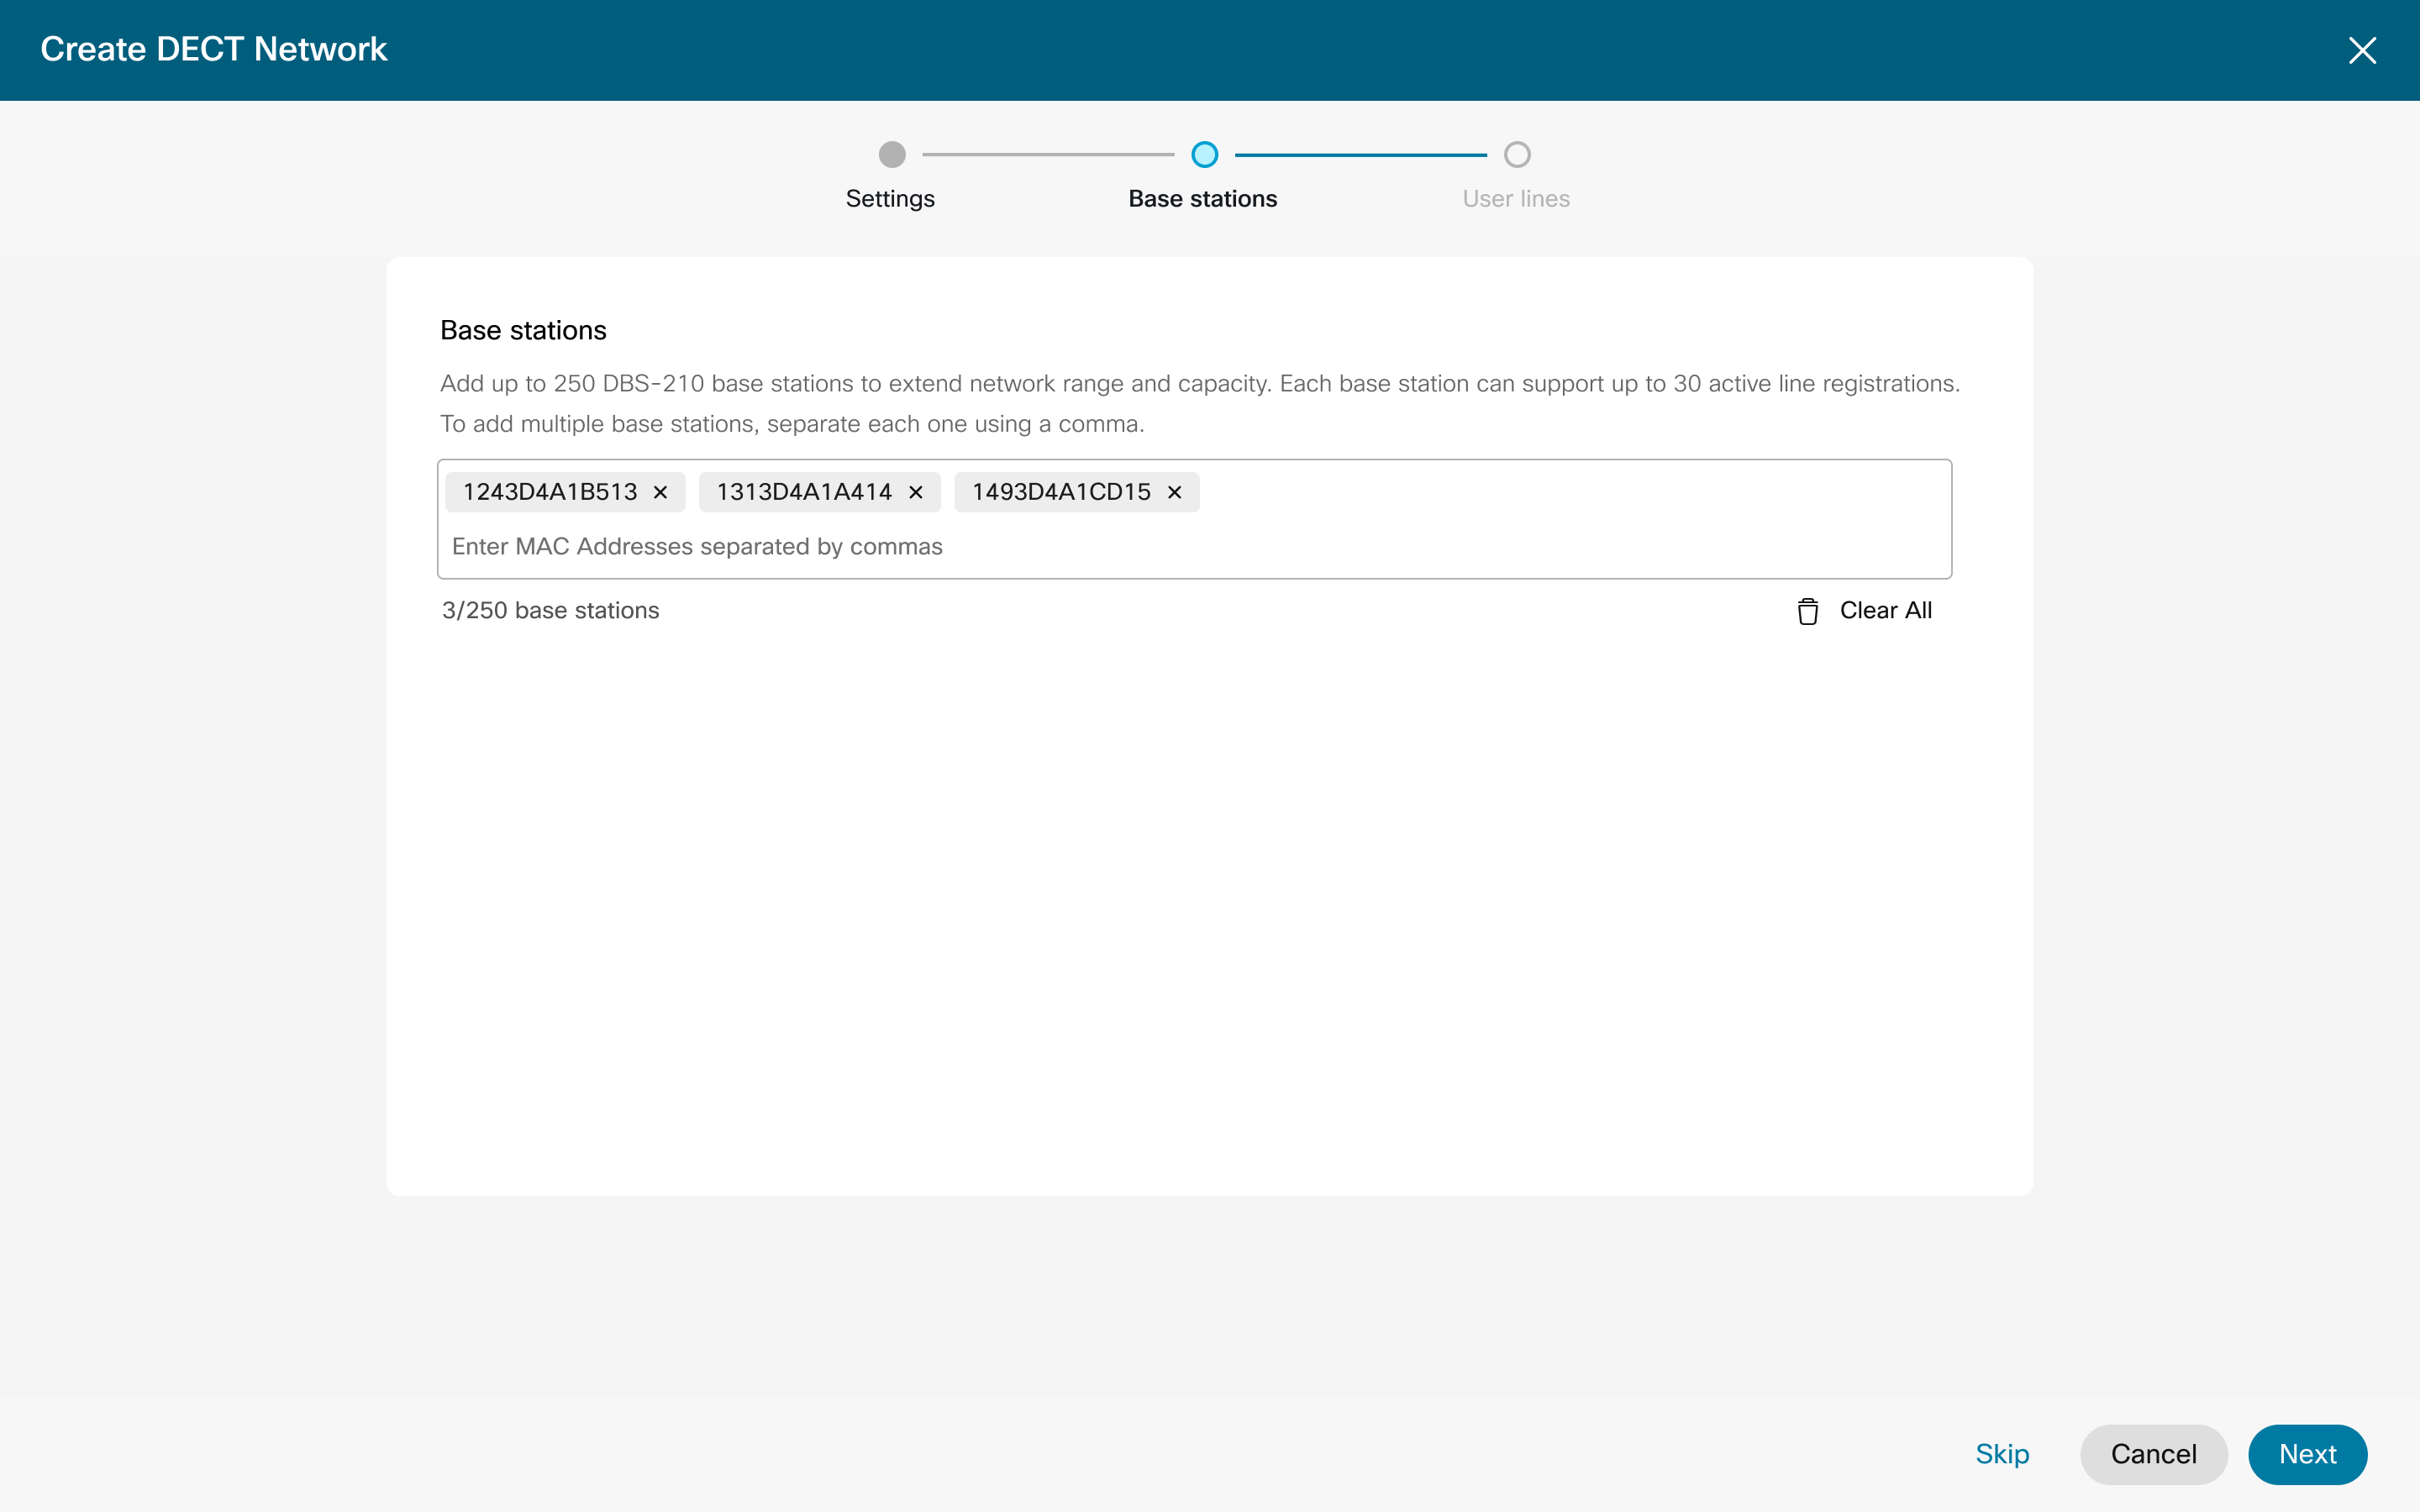
| 10 |
Enter the MAC addresses up to 5 at a time of the base stations you want to register. Enter a comma to separate each MAC address.
If you click the X at the top of the box from the settings screen, the DECT network is not created and the settings are not retained. Clicking Next, to create the DECT Network and preserve your settings. The remaining add base station and add user steps are optional and you can complete later using the manage DECT Network processes. |
| 11 |
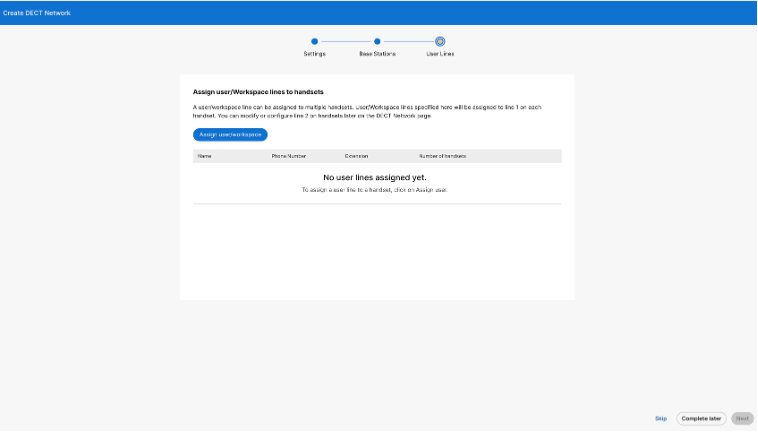
Click Next to move to the Users tab. Here you define
which users need to be assigned to handsets and how many. Assign more lines to these handsets using the Managed Handset process. The remaining add user step is optional at this point and you can complete the steps later using the manage DECT Network process. |
| 12 |
Select Assign Users/Workspace, then search for users in the corresponding search box and select the user to assign. |
| 13 |
From the Number of Hansets drop-down menu, select the number of times this user ID can be tied to handsets.
|
| 14 |
Click Next when complete. |
| 15 |
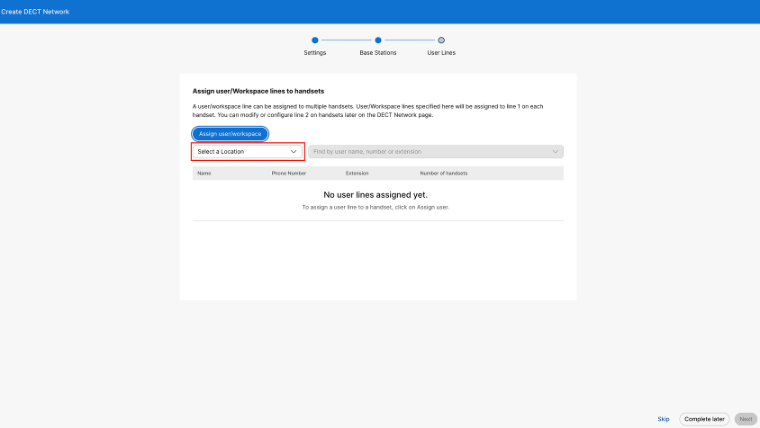
Click Done. 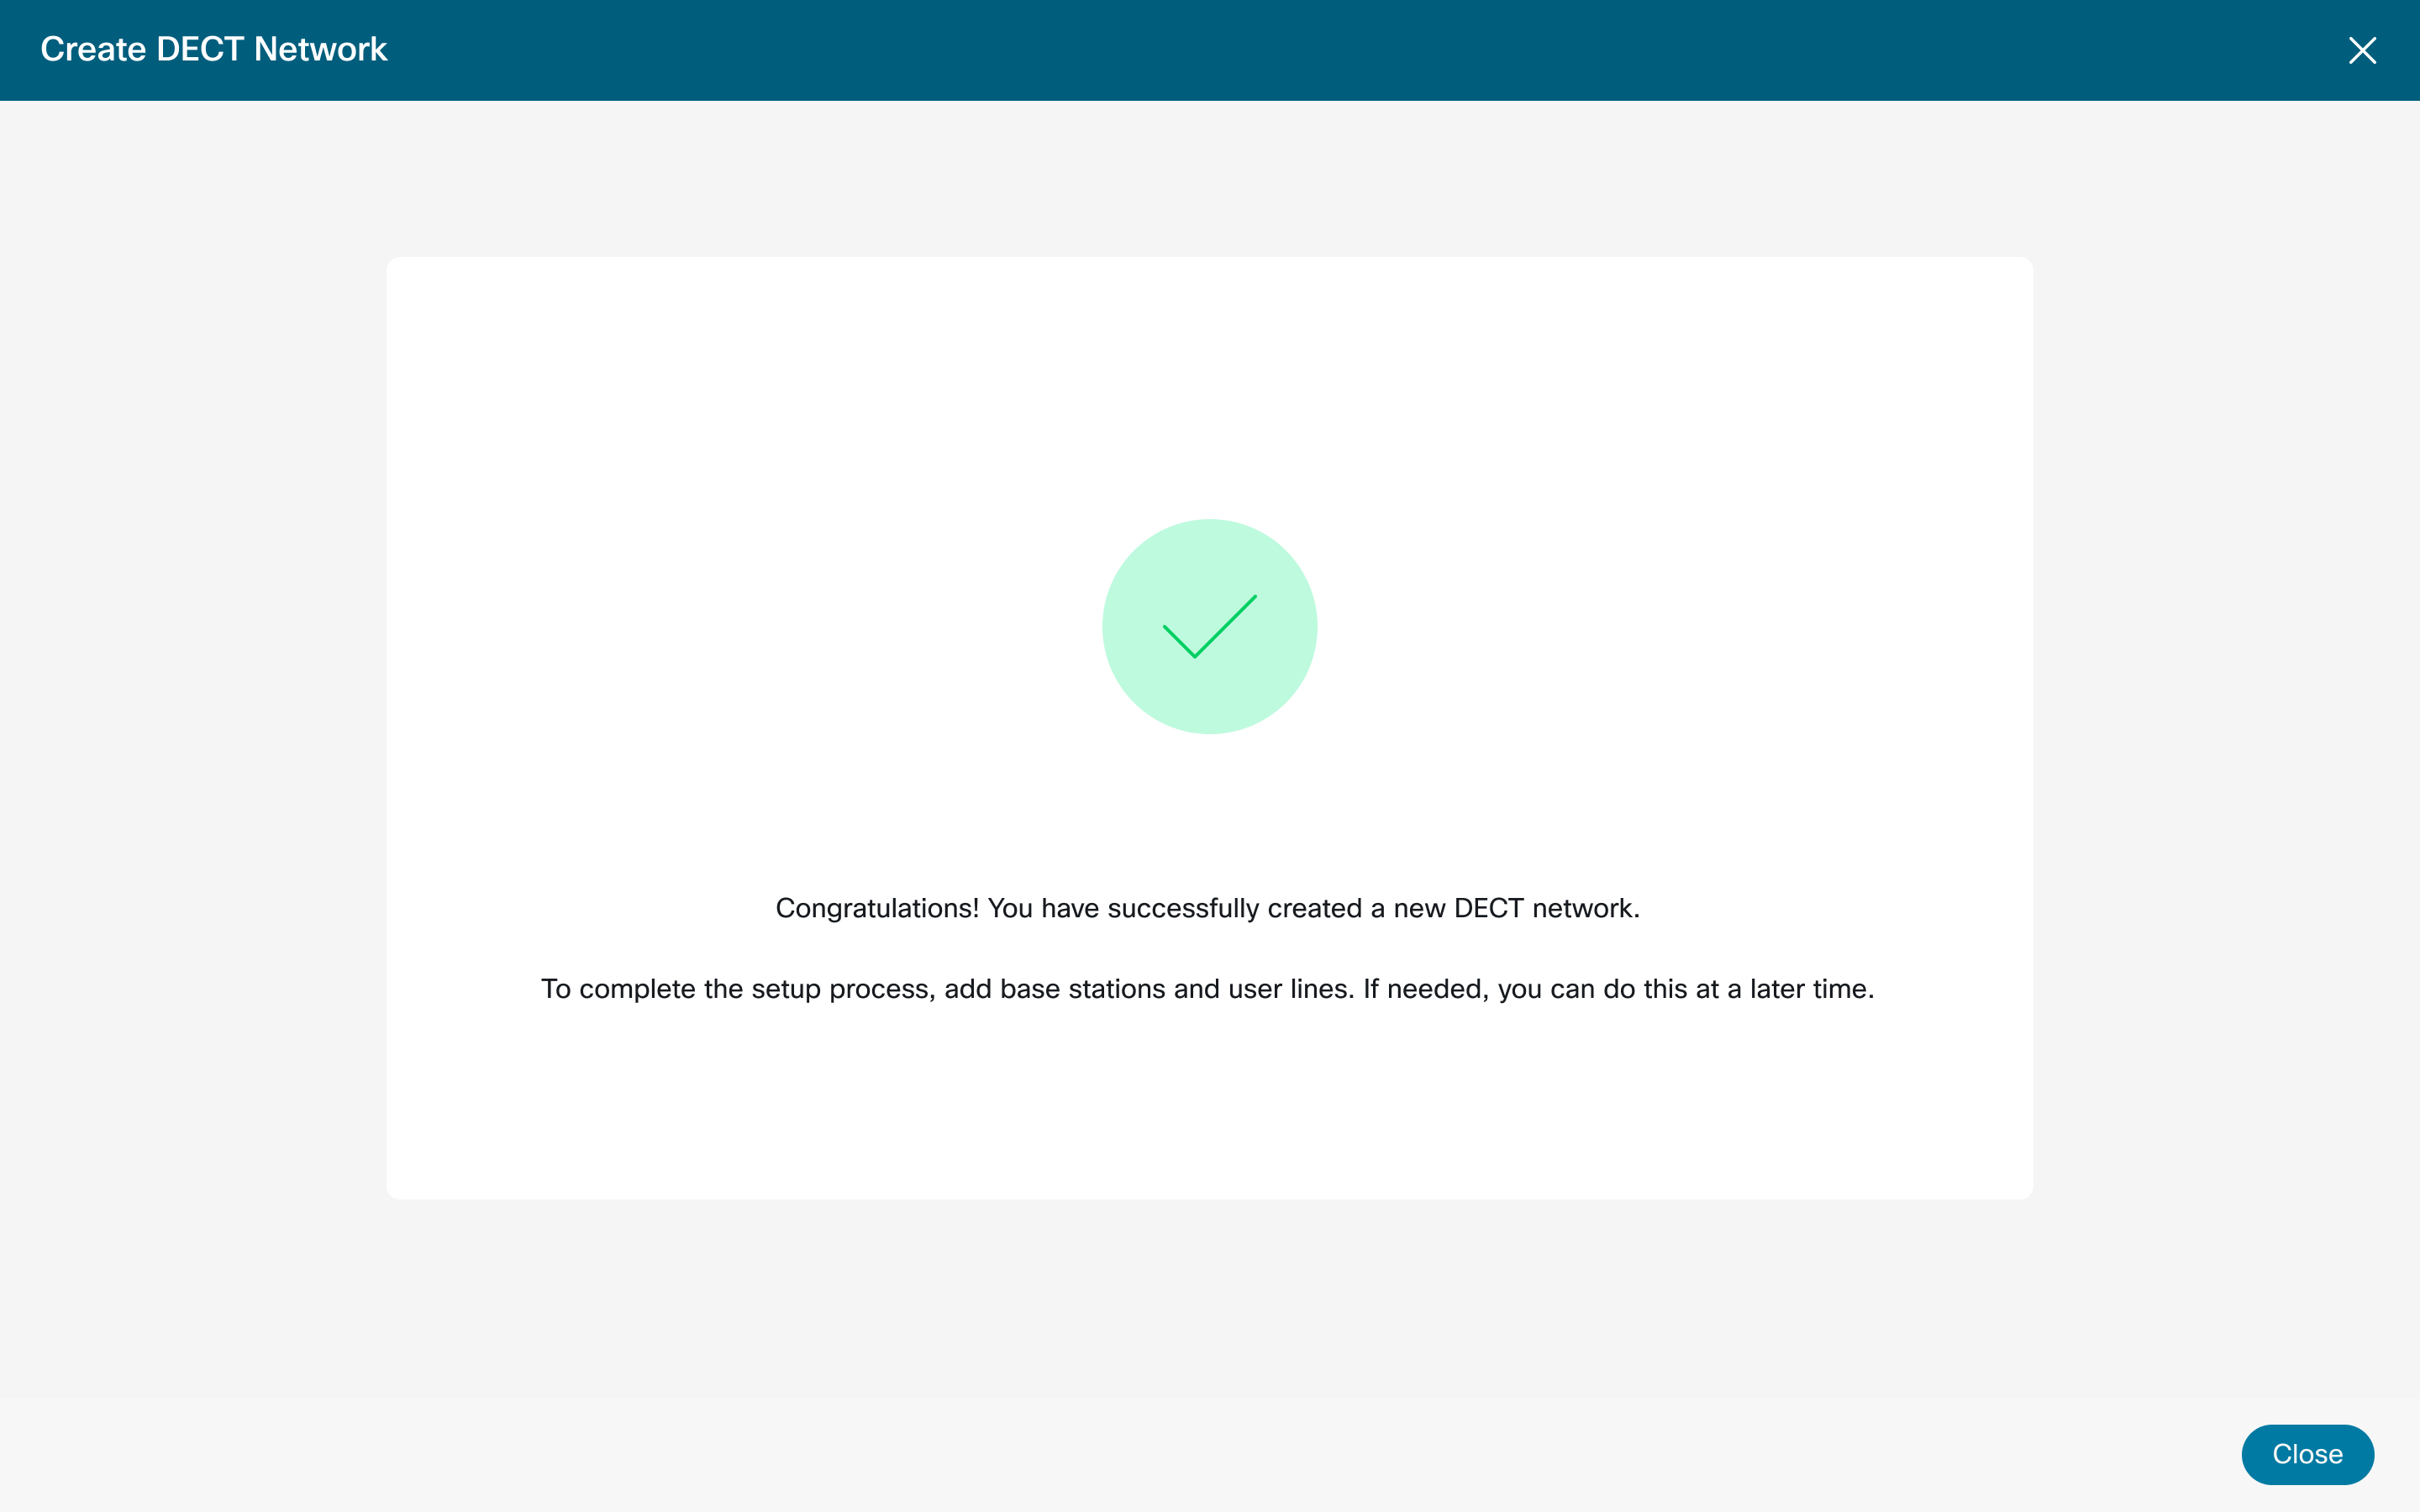
For large organizations, the administrator must select a location before assigning an user or workspace.
|
Manage Handset Access Code
| 1 |
Sign in to Control Hub. |
| 2 |
Go to . |
| 3 |
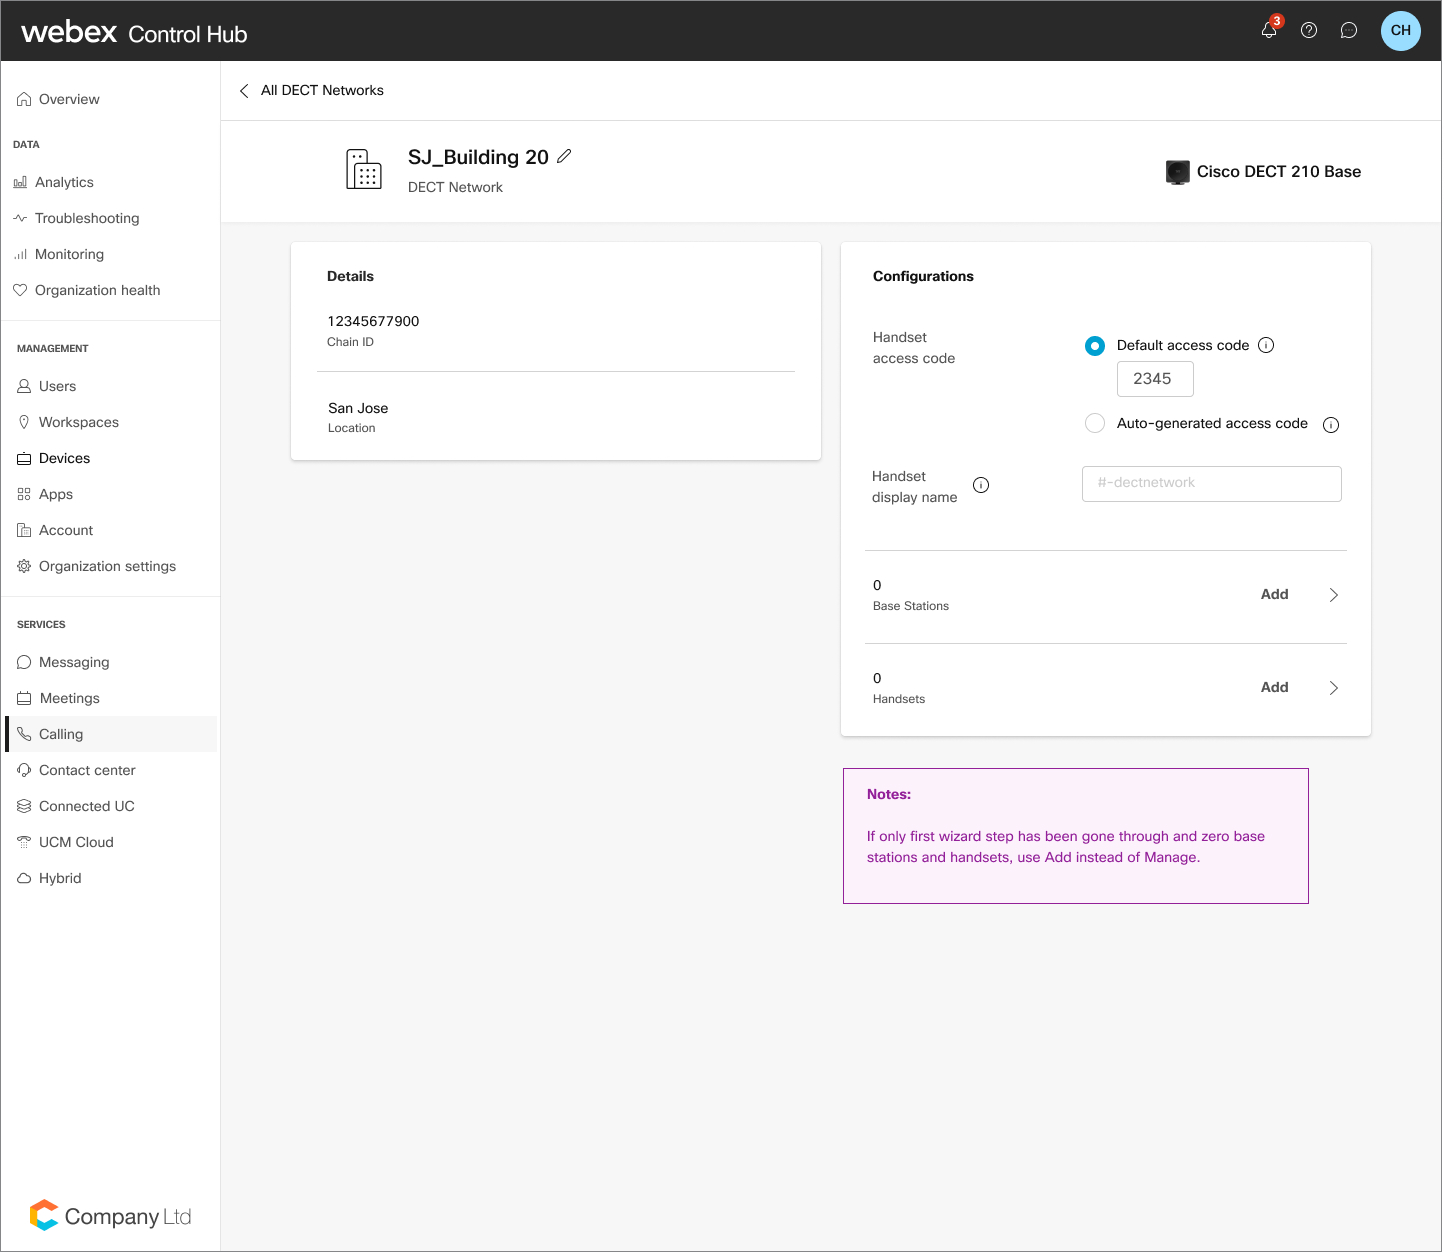
Locate and select the DECT Network that you want to modify. You can add Repeaters to an existing DECT NETWORK, and they will automatically connect to existing DECT Bases. There is limit to the number of Repeaters that can be used based on the Cisco Base type. |
| 4 |
Within the DECT Network settings, click Handset Access Code, then change your default access code. You can also switch to the autogenerated code for a unique PIN for each line. |
| 5 |
Click Save. |
Manage Idle Handset Name
| 1 |
Sign in to Control Hub. |
| 2 |
Go to . |
| 3 |
Select the DECT Network you want to modify. |
| 4 |
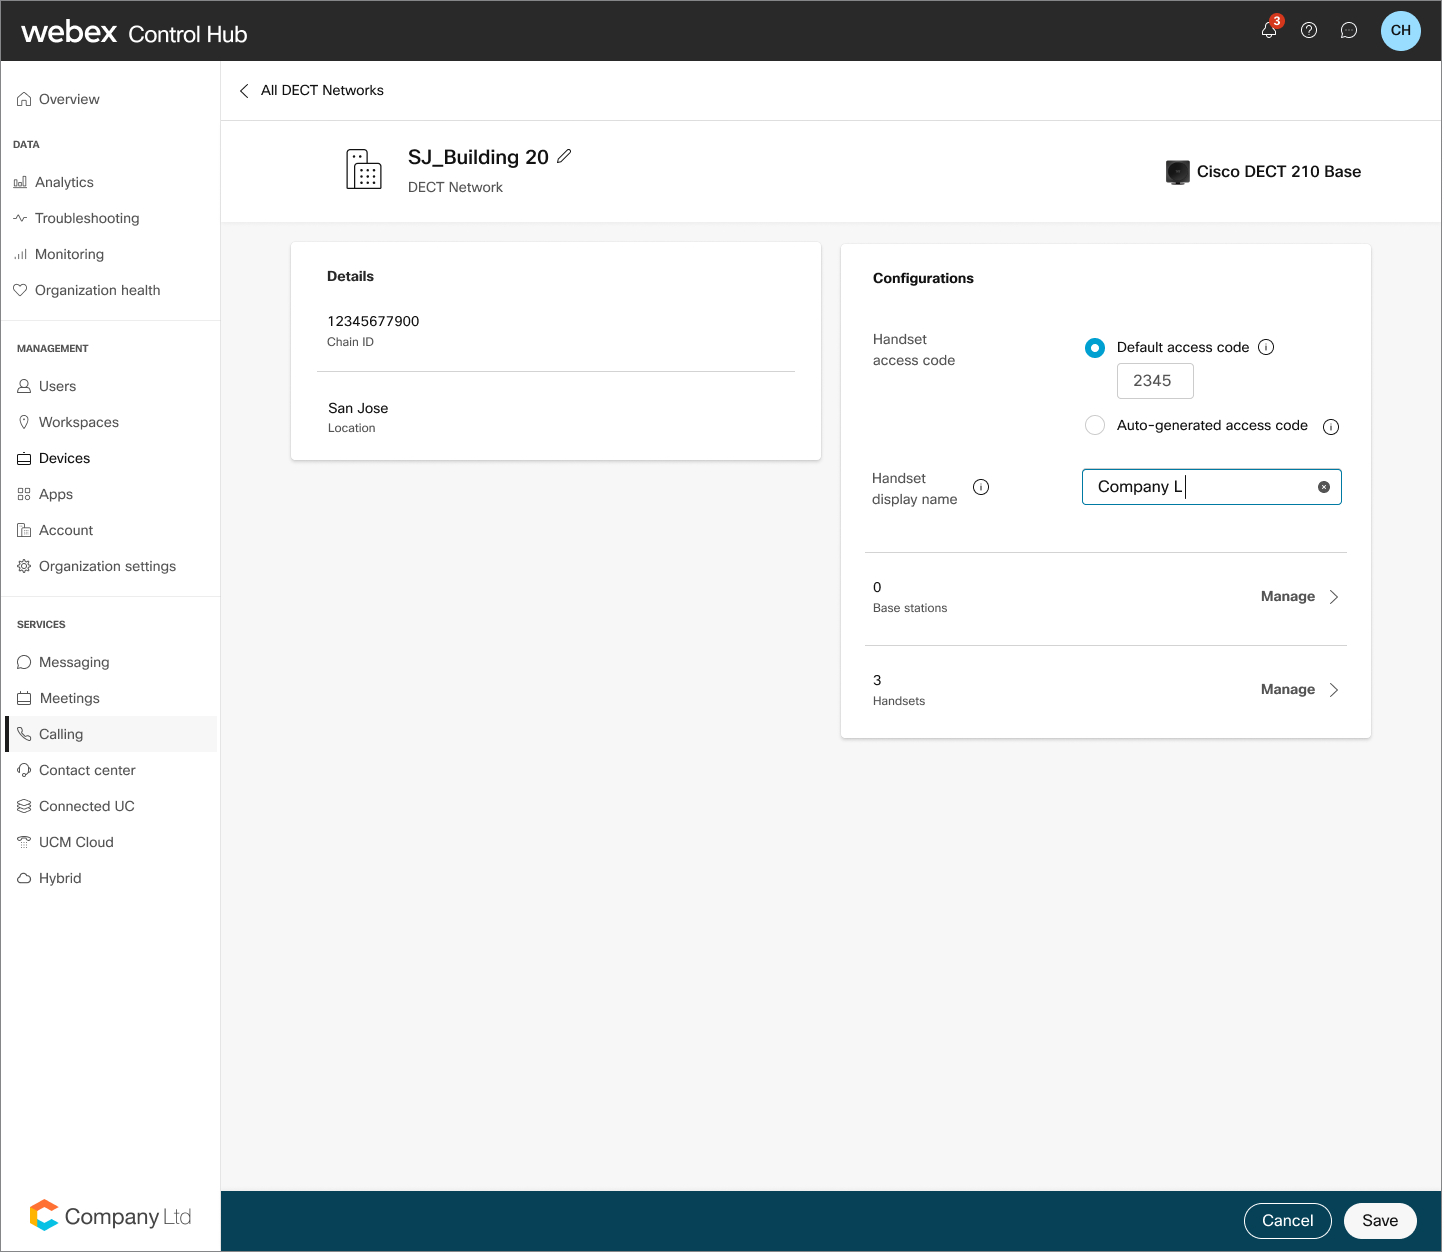
Within the DECT Network settings, click Handset Display Name. |
| 5 |
Entered the desired name. Click Save. |
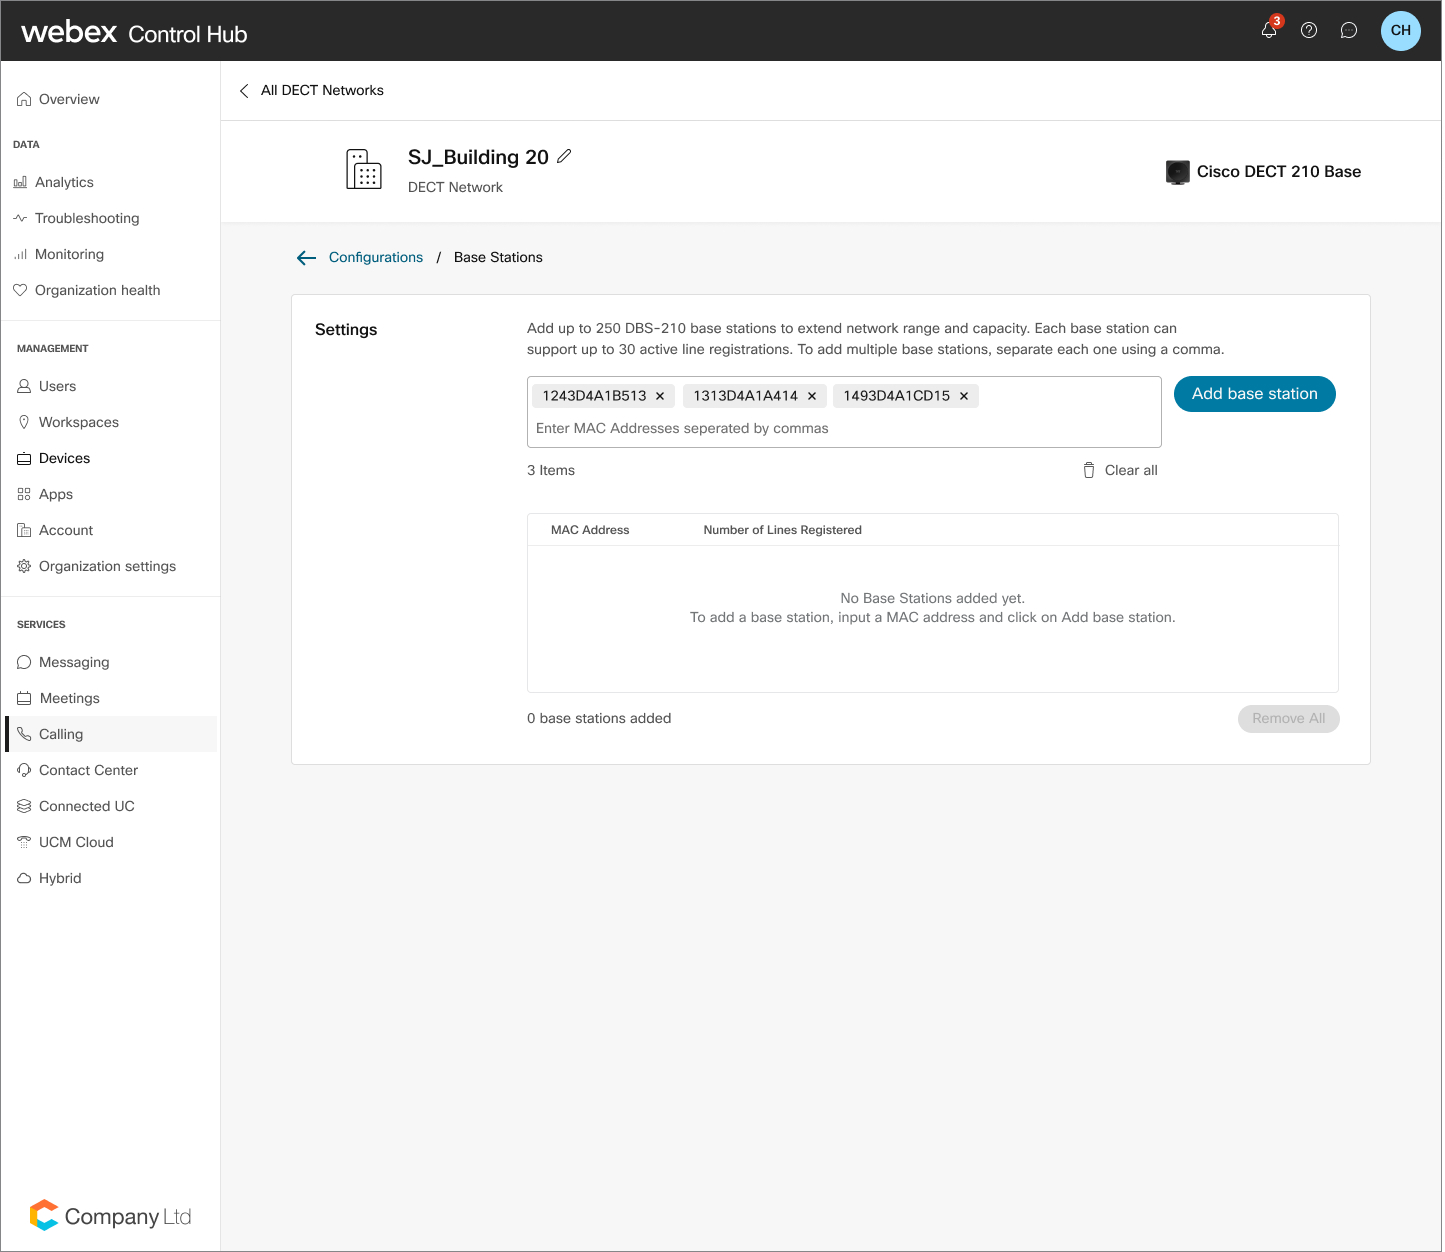
Manage Base Stations
| 1 |
Sign in to Control Hub. |
| 2 |
Go to . |
| 3 |
Locate and select the DECT Network you want to modify. |
| 4 |
Within Base Stations, click Manage. |
| 5 |
Enter the MAC addresses of the base stations you want to add. Remember to enter a comma to separate each MAC address. |
| 6 |
Click Add Base Stations. |
| 7 |
Click Save. To remove a base station, locate the base station in the table. Click the Trash icon and confirm the deletion by selecting Delete. |
Manage Handsets
| 1 |
Sign in to Control Hub. |
| 2 |
Go to . |
| 3 |
Locate and select the DECT Network you want to modify. |
| 4 |
From Handsets, click Manage. |
| 5 |
Select Add Handsets. |
| 6 |
From the table, click the Plus icon and search for users in the corresponding search box and select the user to assign. |
| 7 |
Click Save. To remove a user, locate the user in the table. Click the Trash icon and confirm the deletion by selecting Delete. Deleting the first provisioned handset causes all other handsets to change to an unregistered state. You can also add a second handset to each line. After completion, you have the ability to switch between the two handsets. 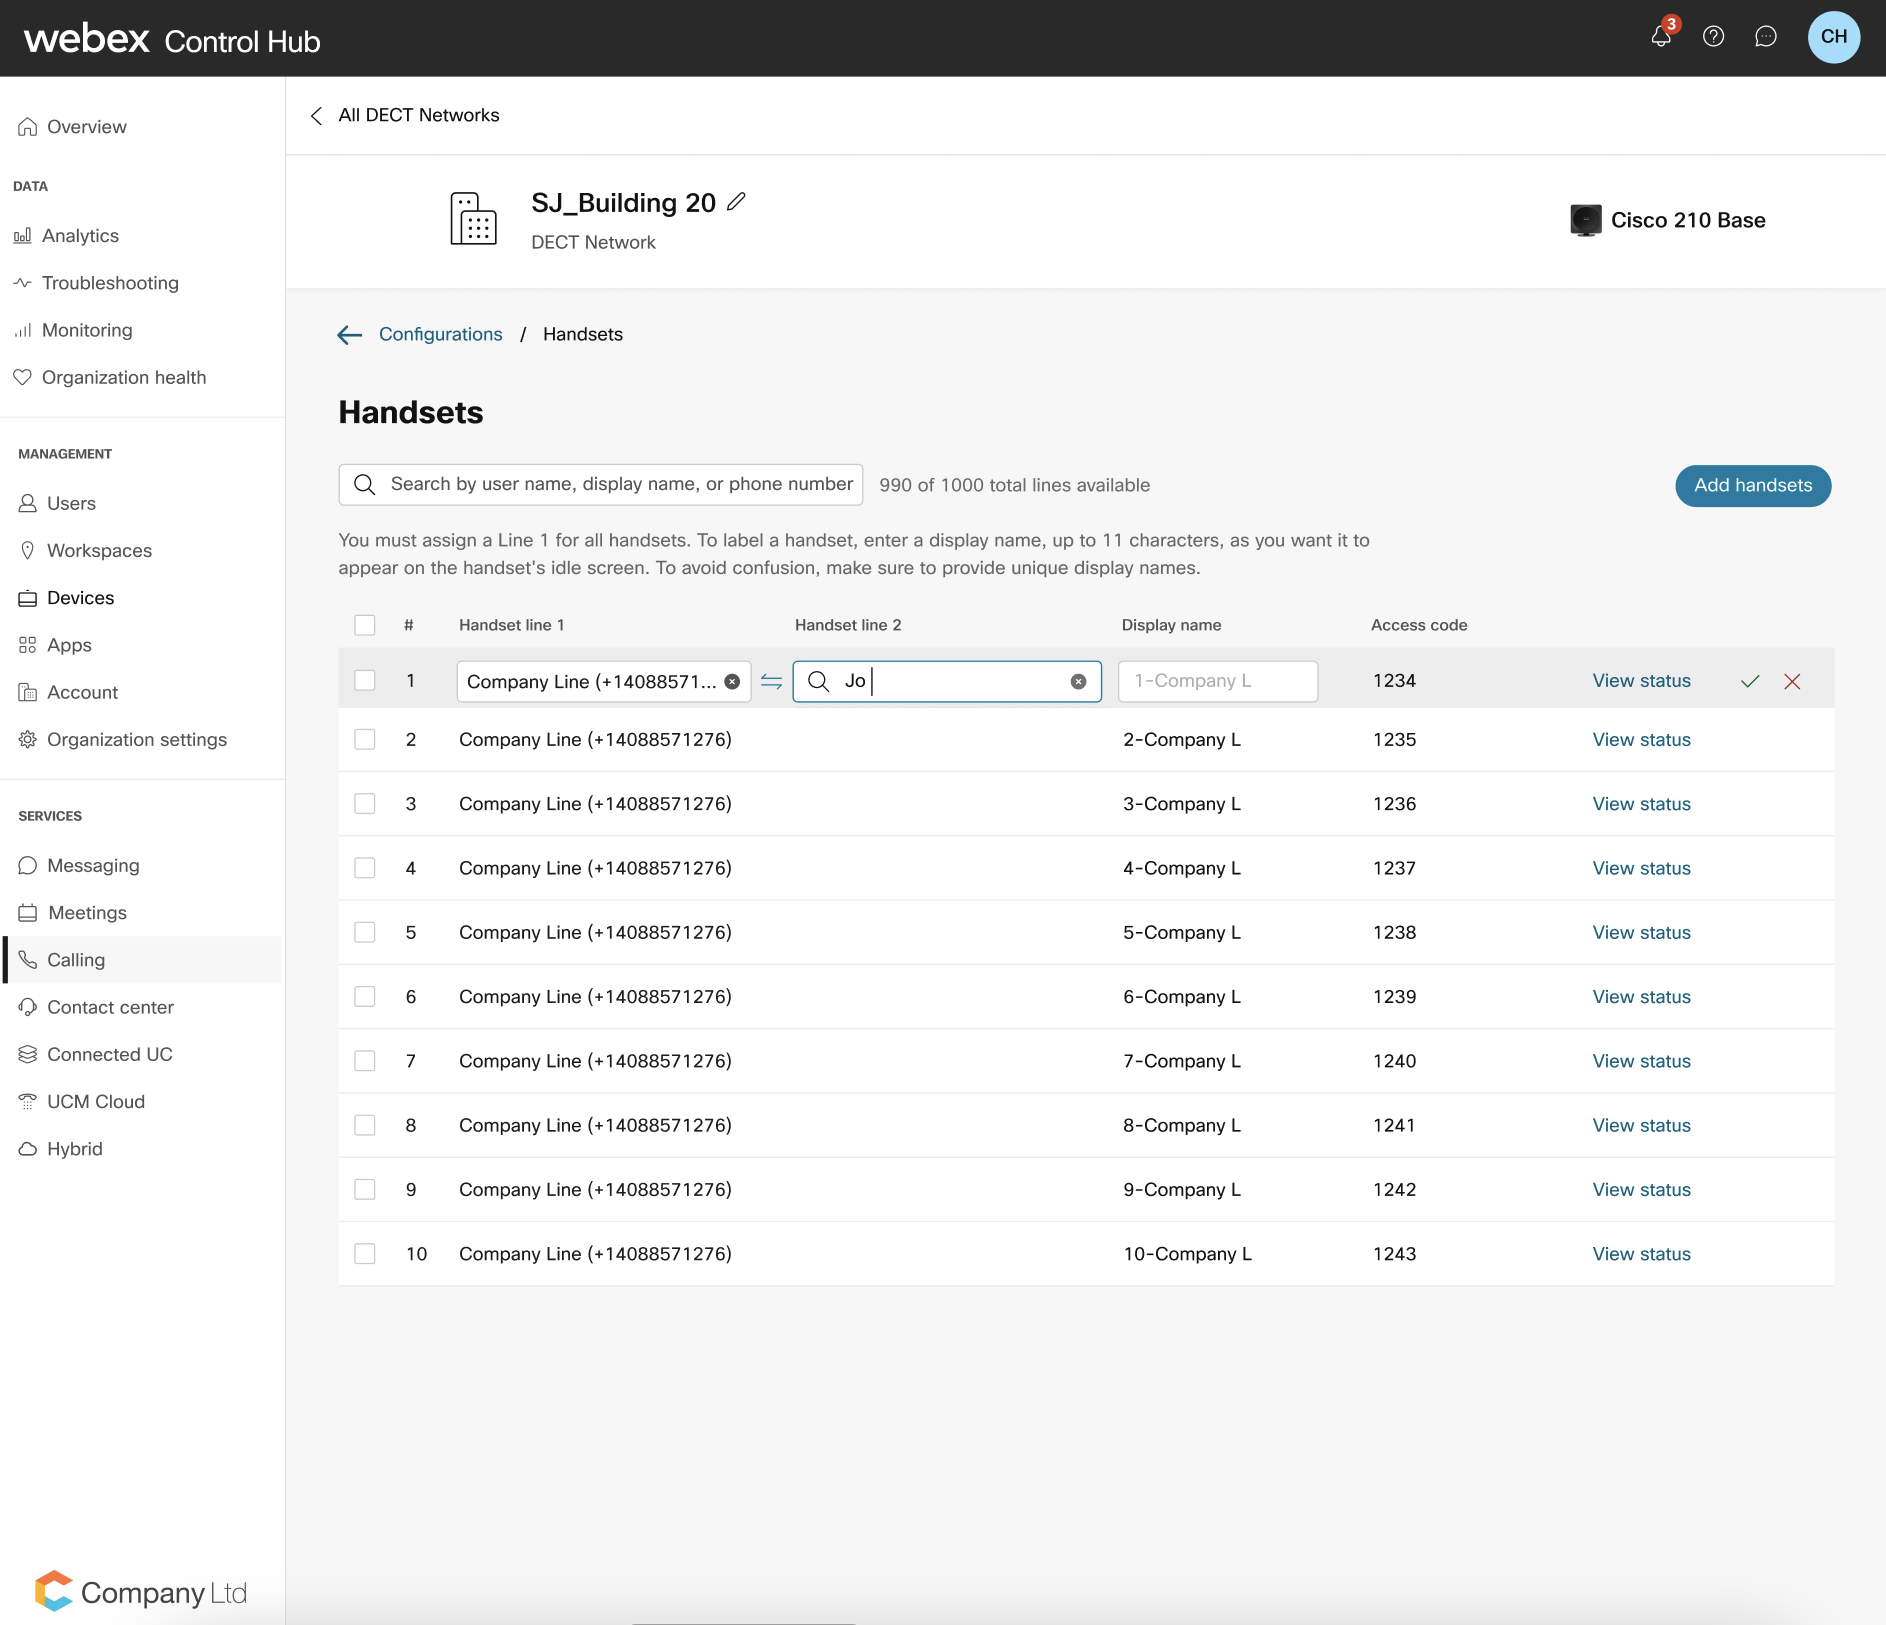
For large organizations, the administrator must select a location before adding a handset to a phone line. Click
|

 icon, and you can see a pop up window with
the location filter. The administrator then can select the desire
location and select the user or workspace.
icon, and you can see a pop up window with
the location filter. The administrator then can select the desire
location and select the user or workspace.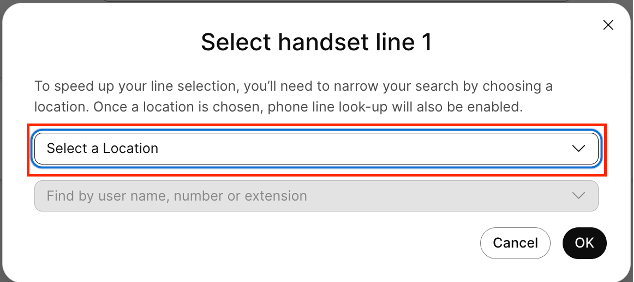
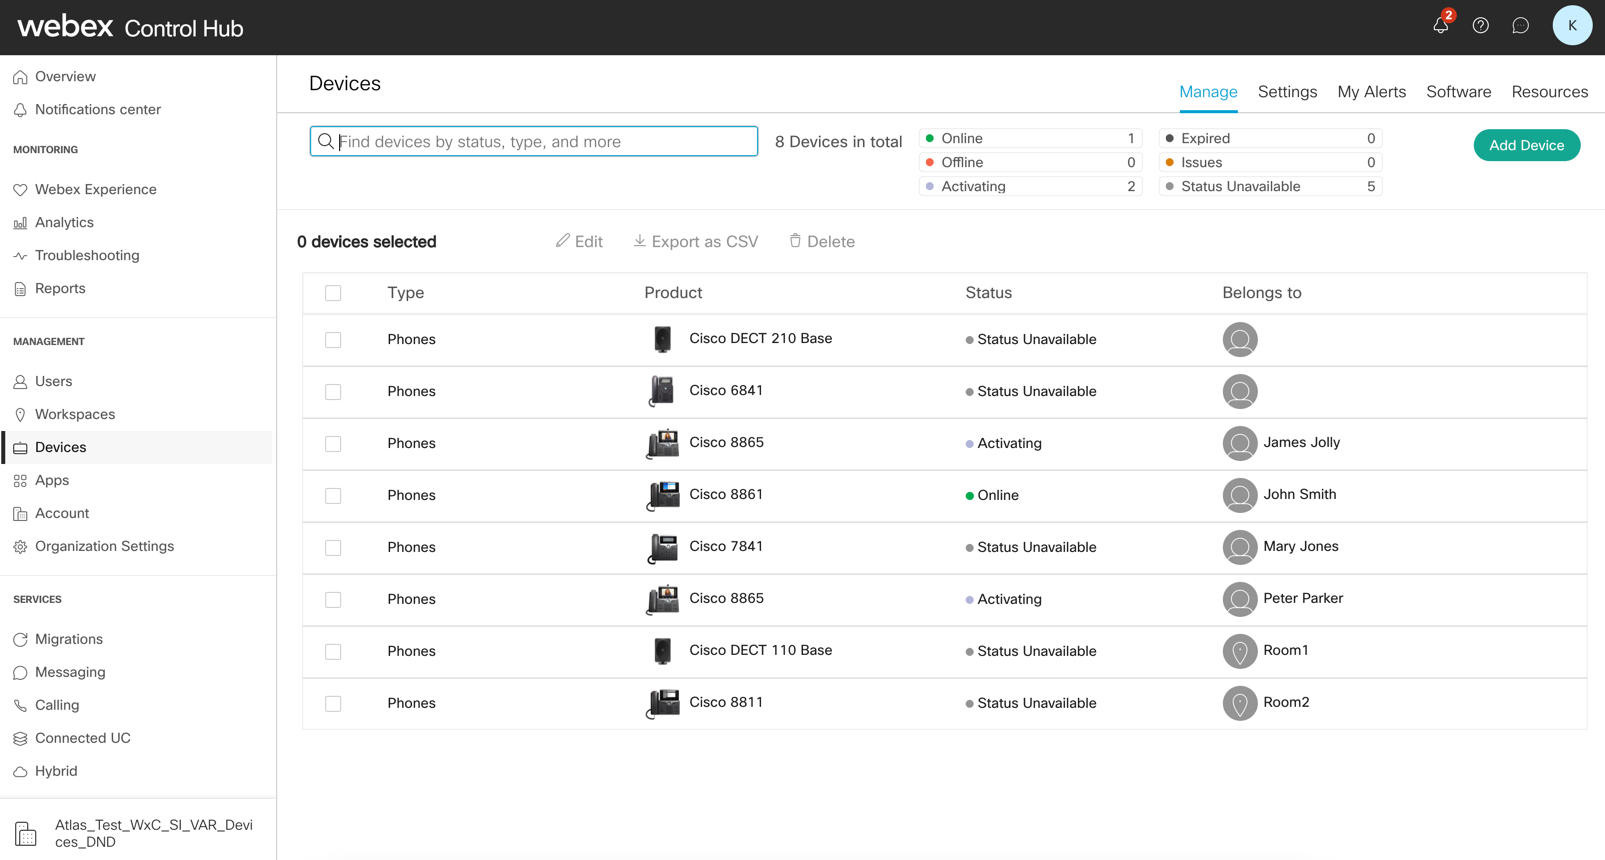
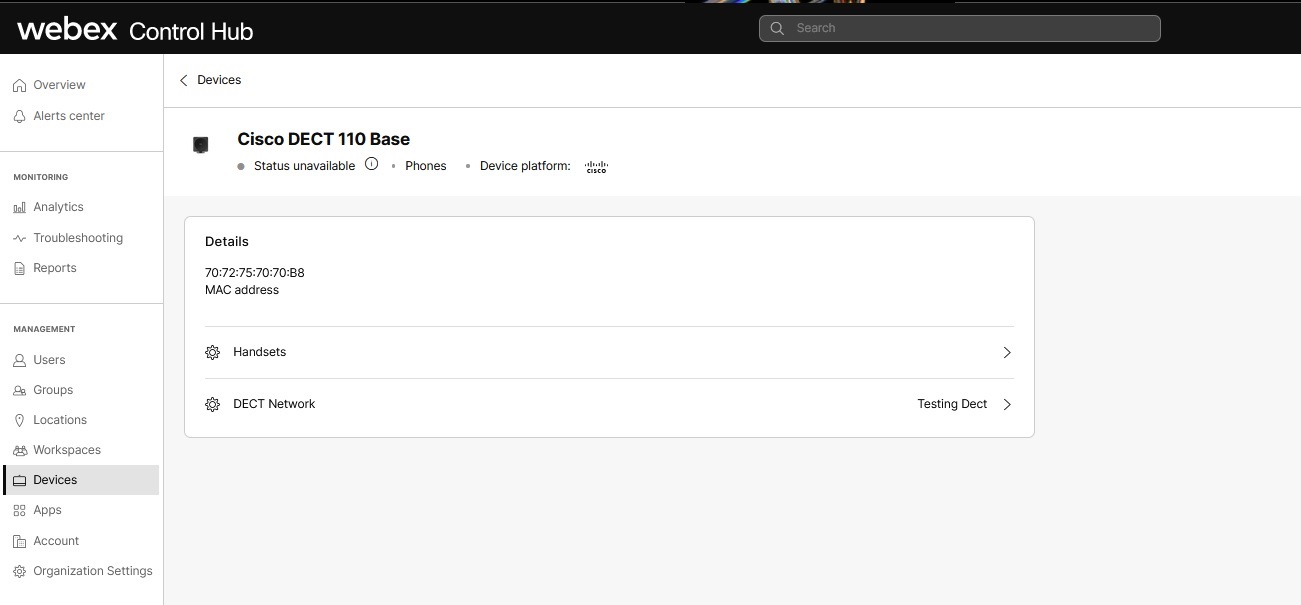
Check the Status of Your DECT Bases and Handsets
Once your DECT network is configured, you can view the status of active handset registrations per base, legacy single-cell stations, and active line registrations, per handset. This is done from the Devices page within Control Hub.
| 1 |
Sign in to Control Hub. |
| 2 |
Go to . |
| 3 |
In the Status column, you can view the status of a device such as online, offline, or status unavailable. |
| 4 |
Select a specific device, to view the device details. Use the device details view, to check the status of the handset. Click on the forward arrow against the handset to know the status. |
Delete Your DECT Network
| 1 |
Sign in to Control Hub. |
| 2 |
Go to . |
| 3 |
Locate and select the DECT Network you want to remove. |
| 4 |
Click the Trash icon. |
| 5 |
Click Delete. To reuse these devices, provision a new DECT network. You also need to factory reset all devices associated with the deleted account before adding them to the Control Hub. |
Deploy Your Base Stations
| 1 |
This document describes the best practices for deploying a Single Cell system and Multi Cell system with the Cisco IP DECT 6800 Series with Multiplatform Firmware handsets and base station. |
| 2 |
Configure Multicast on the local networking equipment, to sync the DECT bases with each other. If you do not configure Multicast, this causes performance issue to the DECT network that is being deployed. See DECT Administrator Guide and DECT Deployment Guide for more information. |
What to do next
After installing the base stations, rerun the site survey to ensure that you have good coverage throughout the entire working area of your site. If you have trouble connecting your base station to the platform, you may have to manually configure your base station to connect.
Pair Your Handset to the Base Station
Before you begin
-
The handset battery must be installed and charged.
-
Install the handsets at each user’s work location or in a common area if they’re shared.
| 1 |
Turn On the handset. |
| 2 |
Press . |
| 3 |
Highlight an empty row on the screen and press Select. |
| 4 |
Enter the Access Code in the AC field. Press OK. |
What to do next
Press and hold Power/End until the screen turns on.
Migrate Legacy DECT Bases In Single Or Multi-cell Mode
Existing Cisco DECT bases that have been provisioned in Control Hub prior to the new DECT network provisioning solution, must be migrated to the new DECT network solution before any changes can be made to their setup. Bases should be migrated during a maintenance window so that a successful conversion can be verified. Once bases have been migrated, they can be fully managed via the new .
| 1 |
Sign in to Control Hub. |
| 2 |
Go to . |
| 3 |
Locate the base to convert then click Convert to DECT Network. |
| 4 |
Enter the DECT network name, then click Convert. |
| 5 |
Review and verify your list of assigned users, then click Convert. |
| 6 |
To exit, click Close. |
Manually reconfigure Cisco DECT DBS210/DBS110 for Webex Calling
This procedure is for manual reconfiguration of a Cisco DECT DBS210/DBS110 to Webex Calling network. On completing this configuration, all prior settings on the device are overridden, including the administrator password. You can use the newly configured device only on the Webex Calling network. To use the device on any other network, perform a factory reset on the device.
Configure Cisco DECT DBS210/110 with Webex Calling
Before you begin
Firmware requirements are as follow:
-
Ensure that the DBS210 base has a firmware version 480 before you configure the device on Webex Calling.
-
Ensure that the DBS110 base has a firmware version 480Bx (any 480 version) before you configure the device on Webex Calling.
| 1 |
Ensure that the DBS210 device meets the firmware requirement. All DBS110 devices must have the firmware version 480Bx installed already. This step is not required for DBS110 devices.
|
| 2 |
Add the DBS210/110 device from Control Hub. Write down the Access Code that is configured for the handsets on the Control Hub. |
| 3 |
Factory resets the device by following this procedure:
|
| 4 |
Wait until the device boots up. The light on the DECT device must display green. Here is a series of changes that you can observe on the device.
|
| 5 |
Register the handset. From the handset, Click Menu button and navigate to Connectivity > Register and enter the Access Code that you obtained earlier, to register the handset. |
If you cannot discover the device in the network or there are any issues, perform the following steps:
-
Verify that the device MAC address is correct in the Control Hub.
-
Verify that the device MAC is added to the DECT Network where a user or phone is assigned in the Control Hub.
-
Follow Check the firmware version for DECT devices to check firmware version. If the device has a firmware version earlier than 480B20, follow Manually upgrade the DBS210 device firmware to upgrade the device manually.
If you still experience an issue with the device, contact your technical support team for assistance.
Check the firmware version for DECT devices
Use this procedure to log in to the device web interface and check the device firmware version before you on board the device with Webex.
| 1 |
Use a handset to find the IP address of the base. On the handset, press the menu button , enter *47* to find the base IP address. |
| 2 |
Enter the IP address in the format
|
| 3 |
The firmware version displays on the home page once the admin logs into the web interface. |
Manually upgrade the DBS210 device firmware
Use this procedure to manually upgrade a DBS210 device to 480B20 using the Control Hub.
| 1 |
Log into the device web interface as an administrator. | ||||||||||
| 2 |
Navigate to the Firmware Update page to set the firmware version.
| ||||||||||
| 3 |
Click Save/Start Update. |
Troubleshoot Your DECT Network
For information about troubleshooting specific issues, follow the below links by category:


