- Home
- /
- Article

Thanks for your feedback.

 In this article
 Feedback?
In today’s multitasking environment, phone power users like contact center agents may need to communicate on multiple lines. Multi line in Webex Calling enables those users to do just that. It's easy to place and receive calls with different assigned directory numbers and thus helps users to manage their busy day much more efficiently.
Overview
As an administrator, you can use the virtual line to configure multiple lines for Webex Calling users. You can configure virtual lines with its associated business calling features, such as voicemail, call forward, call waiting and many more, without requiring an additional license. Once configured, you can assign the lines to the user devices and Webex App as non-primary lines. You can also assign the lines as a secondary line to a workspace device. Users can use these lines to place and receive calls like the primary line.
Some of the common use cases of virtual lines are:
-
Users in support roles who manage high volume of incoming calls across multiple queues and hunt groups.
-
Regional workers who desire phone numbers in multiple local area codes.
-
Administrative staffs who manage calls for executives on shared lines.
-
An executive who needs separate private and public lines.
The prerequisites to configure a virtual line are:
-
You must be either a full administrator or a user and device administrator.
-
You can assign virtual line only to users and workspaces with a Webex Calling professional license.
Virtual lines are entitled to a 1:1 ratio for every professional license.
Benefits of virtual line
For an administrator:
-
Full flexibility to assign, change, and delete the line easily at any time as it’s not tied to any specific user or device.
-
No additional license, user ID, or email is required for creating a virtual line.
For an end user:
-
Access multiple lines to organize the busy day much more efficiently.
-
Handle calls from any device at any time when the same line is assigned to multiple devices.
-
Easily access all the assigned lines in one place with the flexibility of choosing the line to place a call.
-
Get a visual indication for all missed calls and voice messages next to the line numbers to track easily.
-
Access all the midcall features, such as, call transfer and call forward for the additional line similar to the primary line.
Create a virtual line
There are two ways to create a virtual line:
Manual creation—You can choose this option if you've only a few lines to add.
Bulk upload—You can choose this option to bulk upload more than one line and thus save time.
Create a virtual line manually
| 1 |
Sign in to Control Hub. |
| 2 |
Go to . |
| 3 |
Click Create if you're creating the virtual line for the first time, or click . |
| 4 |
Enter the following details:
|
| 5 |
Turn on the Cisco Calling Plan to allow users to make outgoing calls. Outbound Calling Plan is required for the virtual line to make outgoing calls from a Cisco Calling PSTN location. 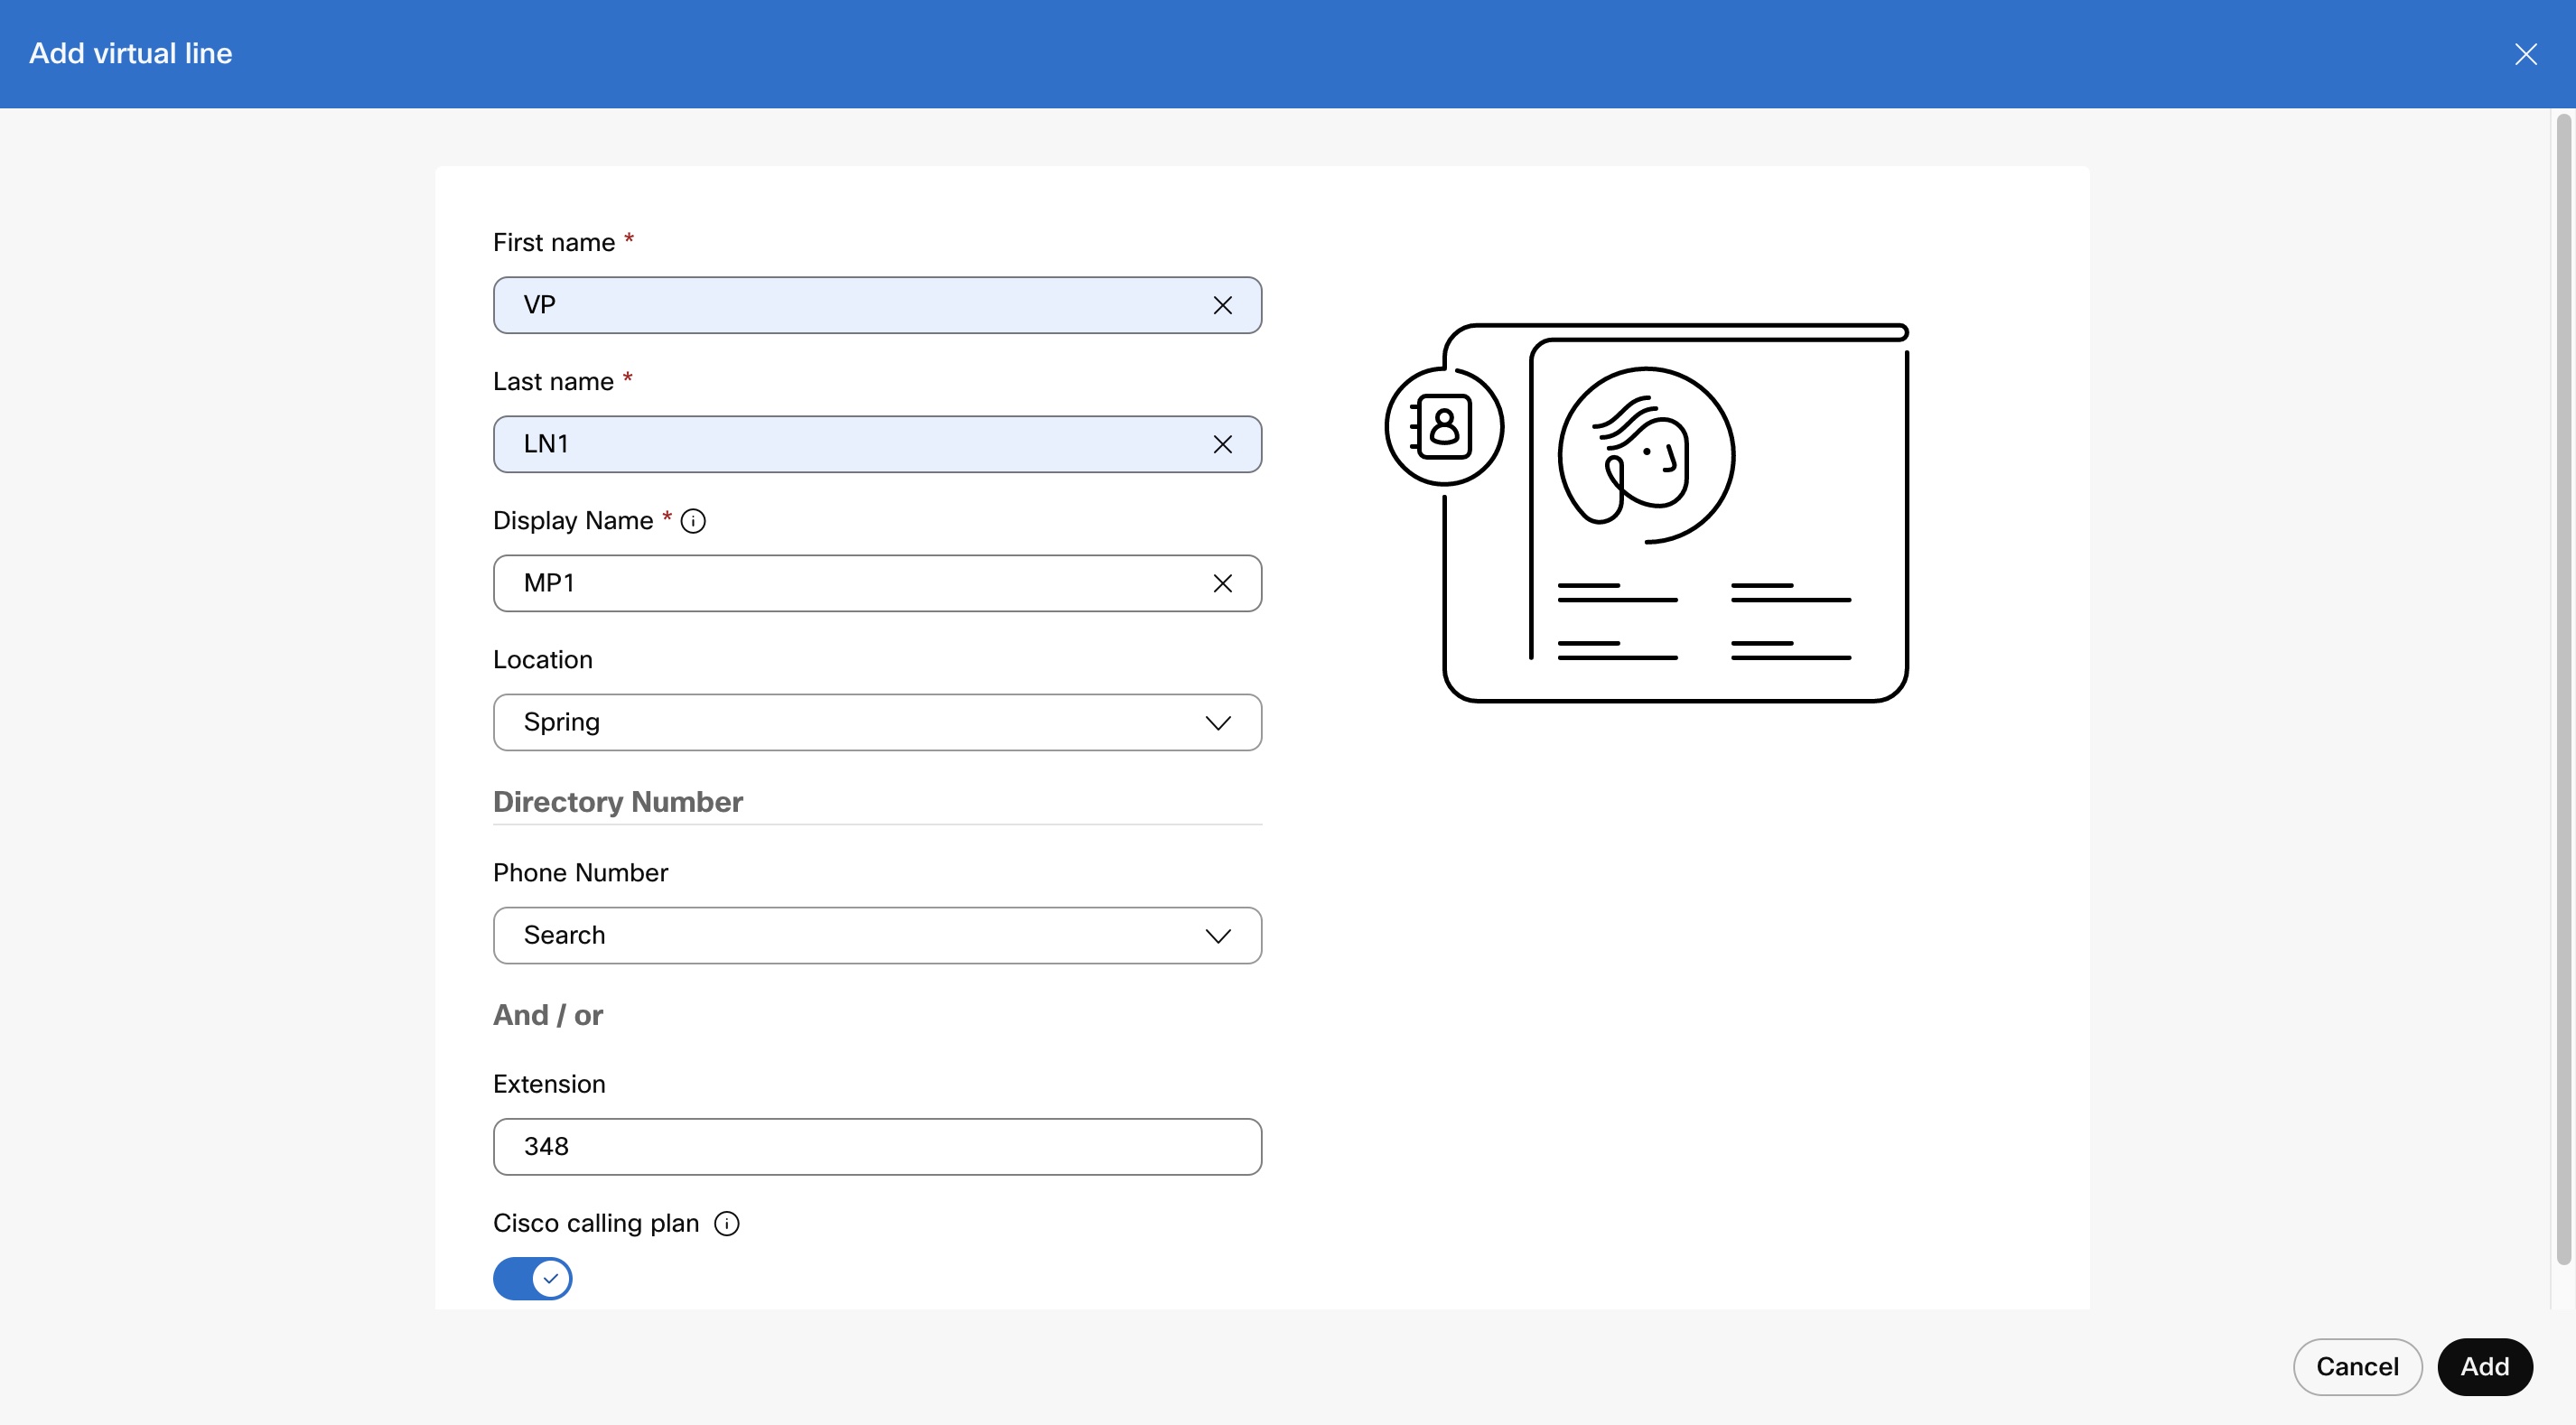
|
| 6 |
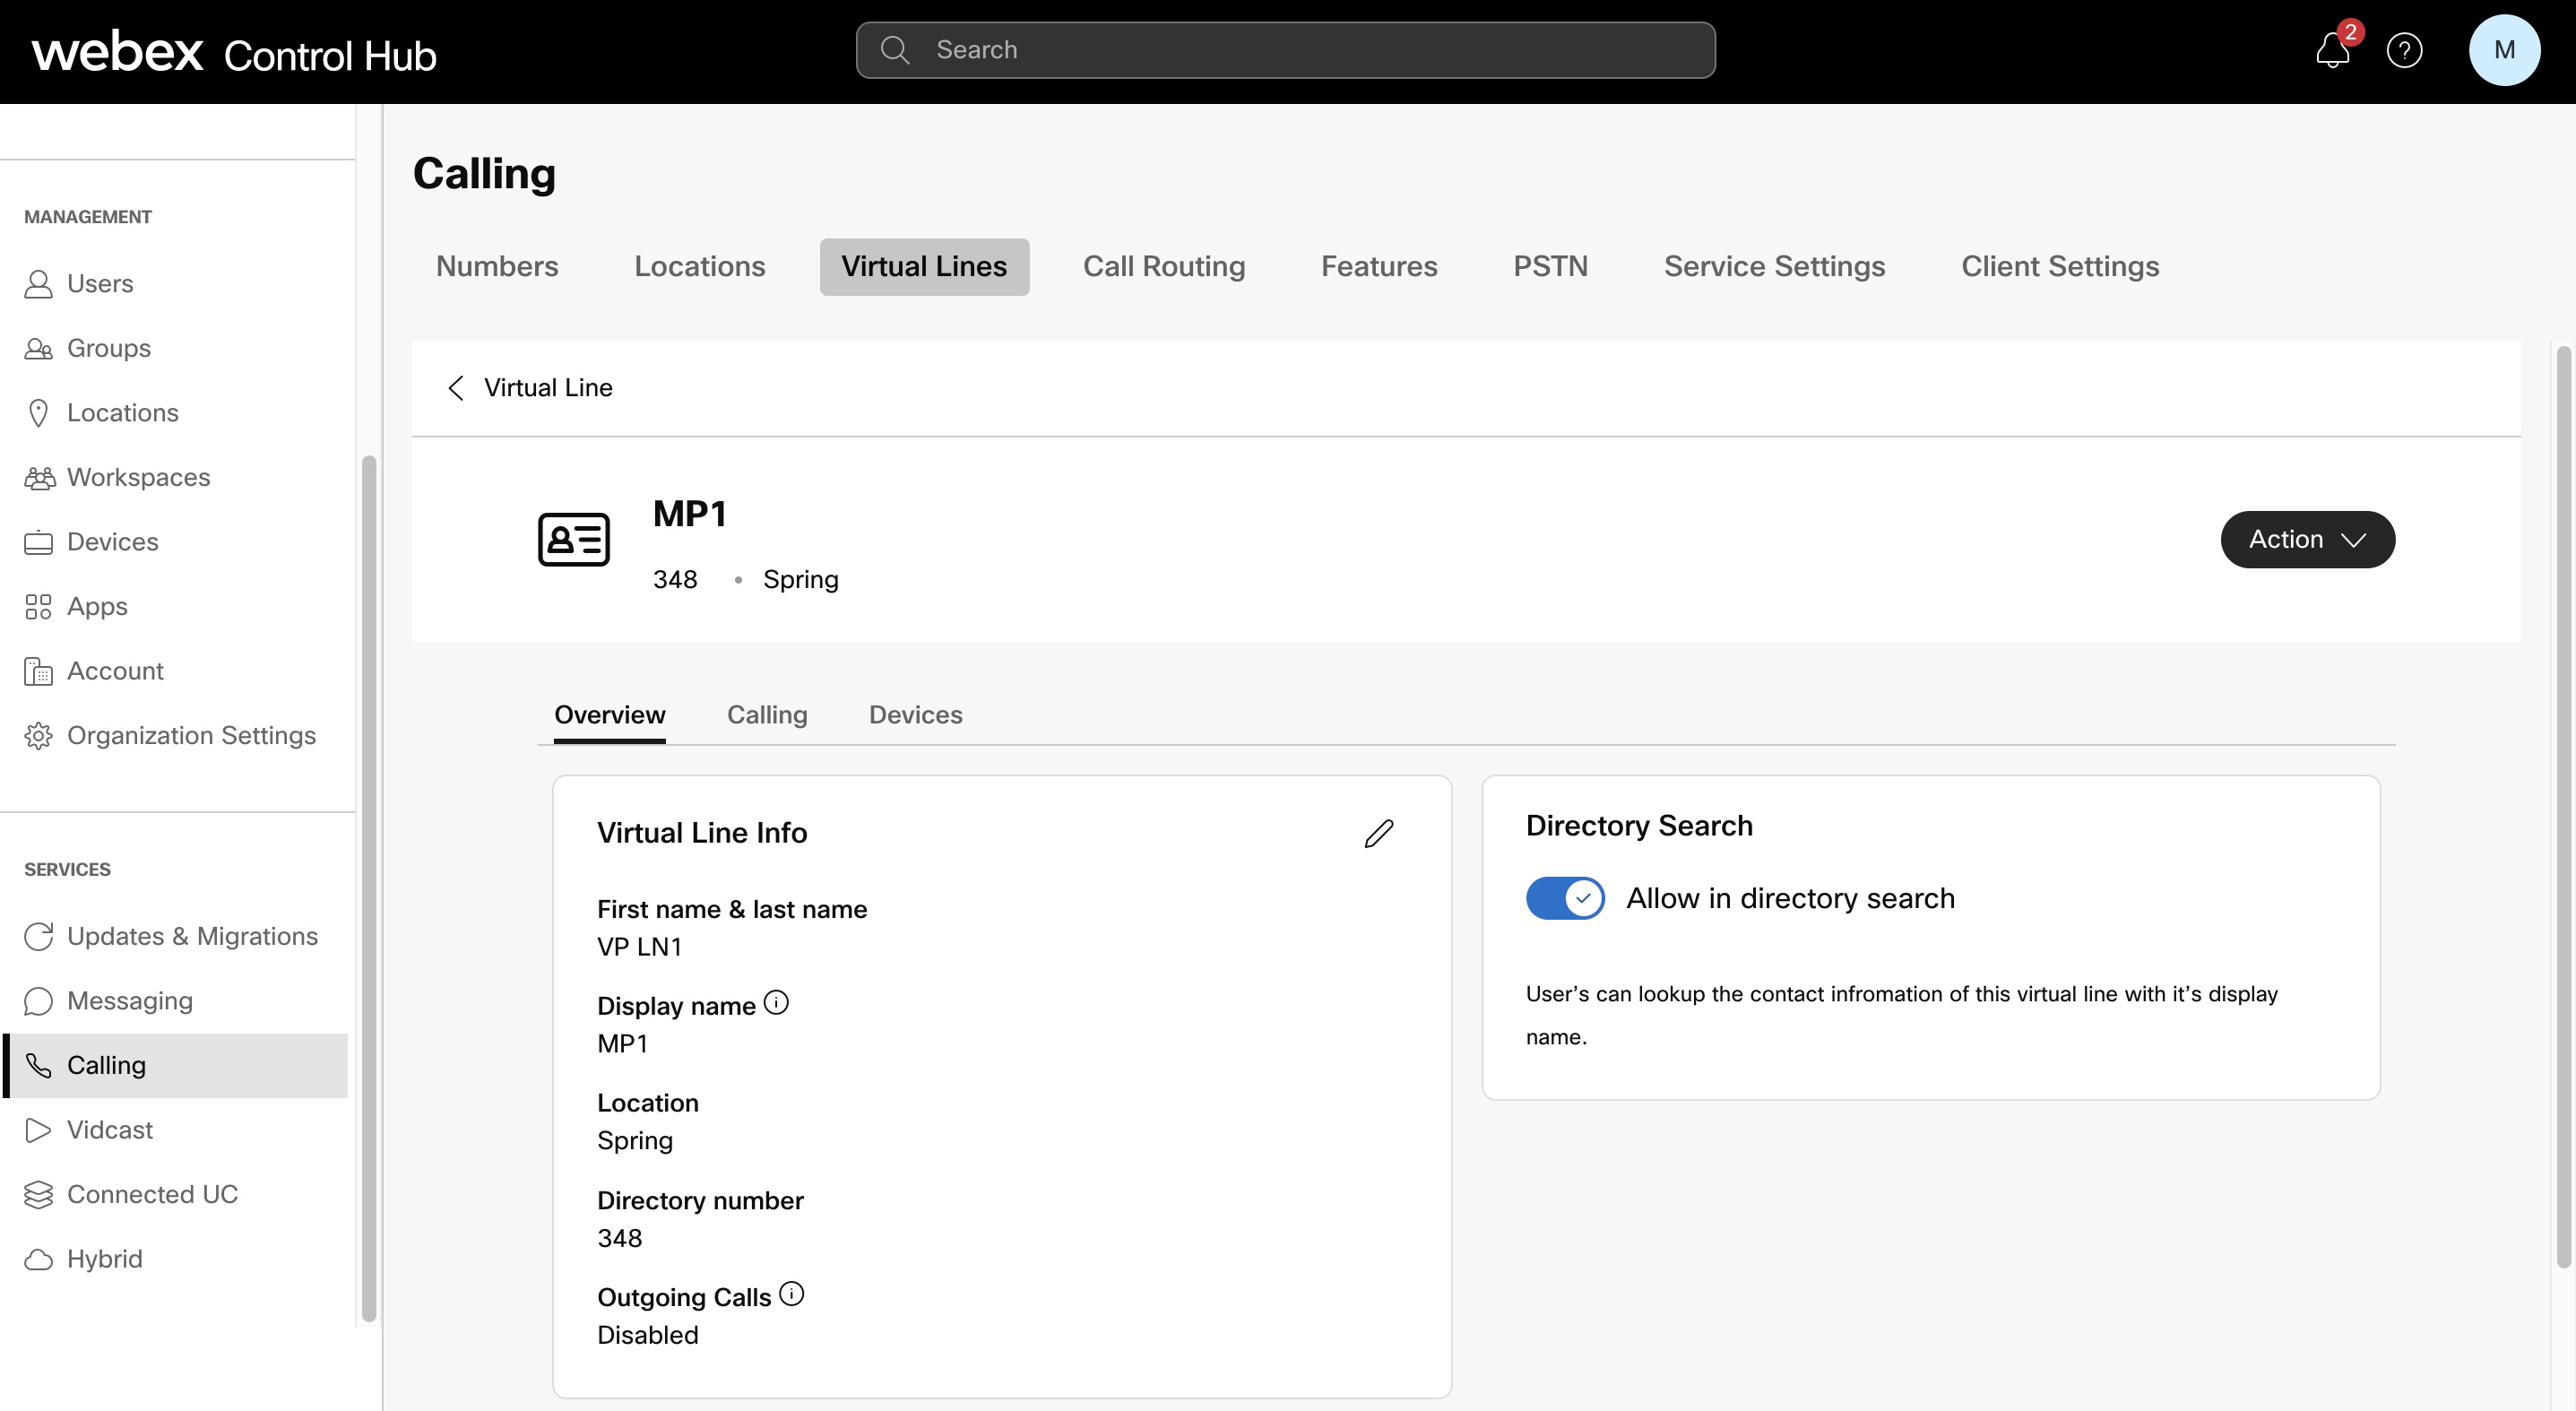
Click Add. The virtual line is created with default call settings under the Virtual Lines tab. To modify the call settings of the line at any time and continue adding the lines, click . Edit, delete, and view the created line
|
 , or click
  to delete the line.
What to do next
You can assign the created line to the user devices, configure various call settings, and add the line as a member to the calling features.
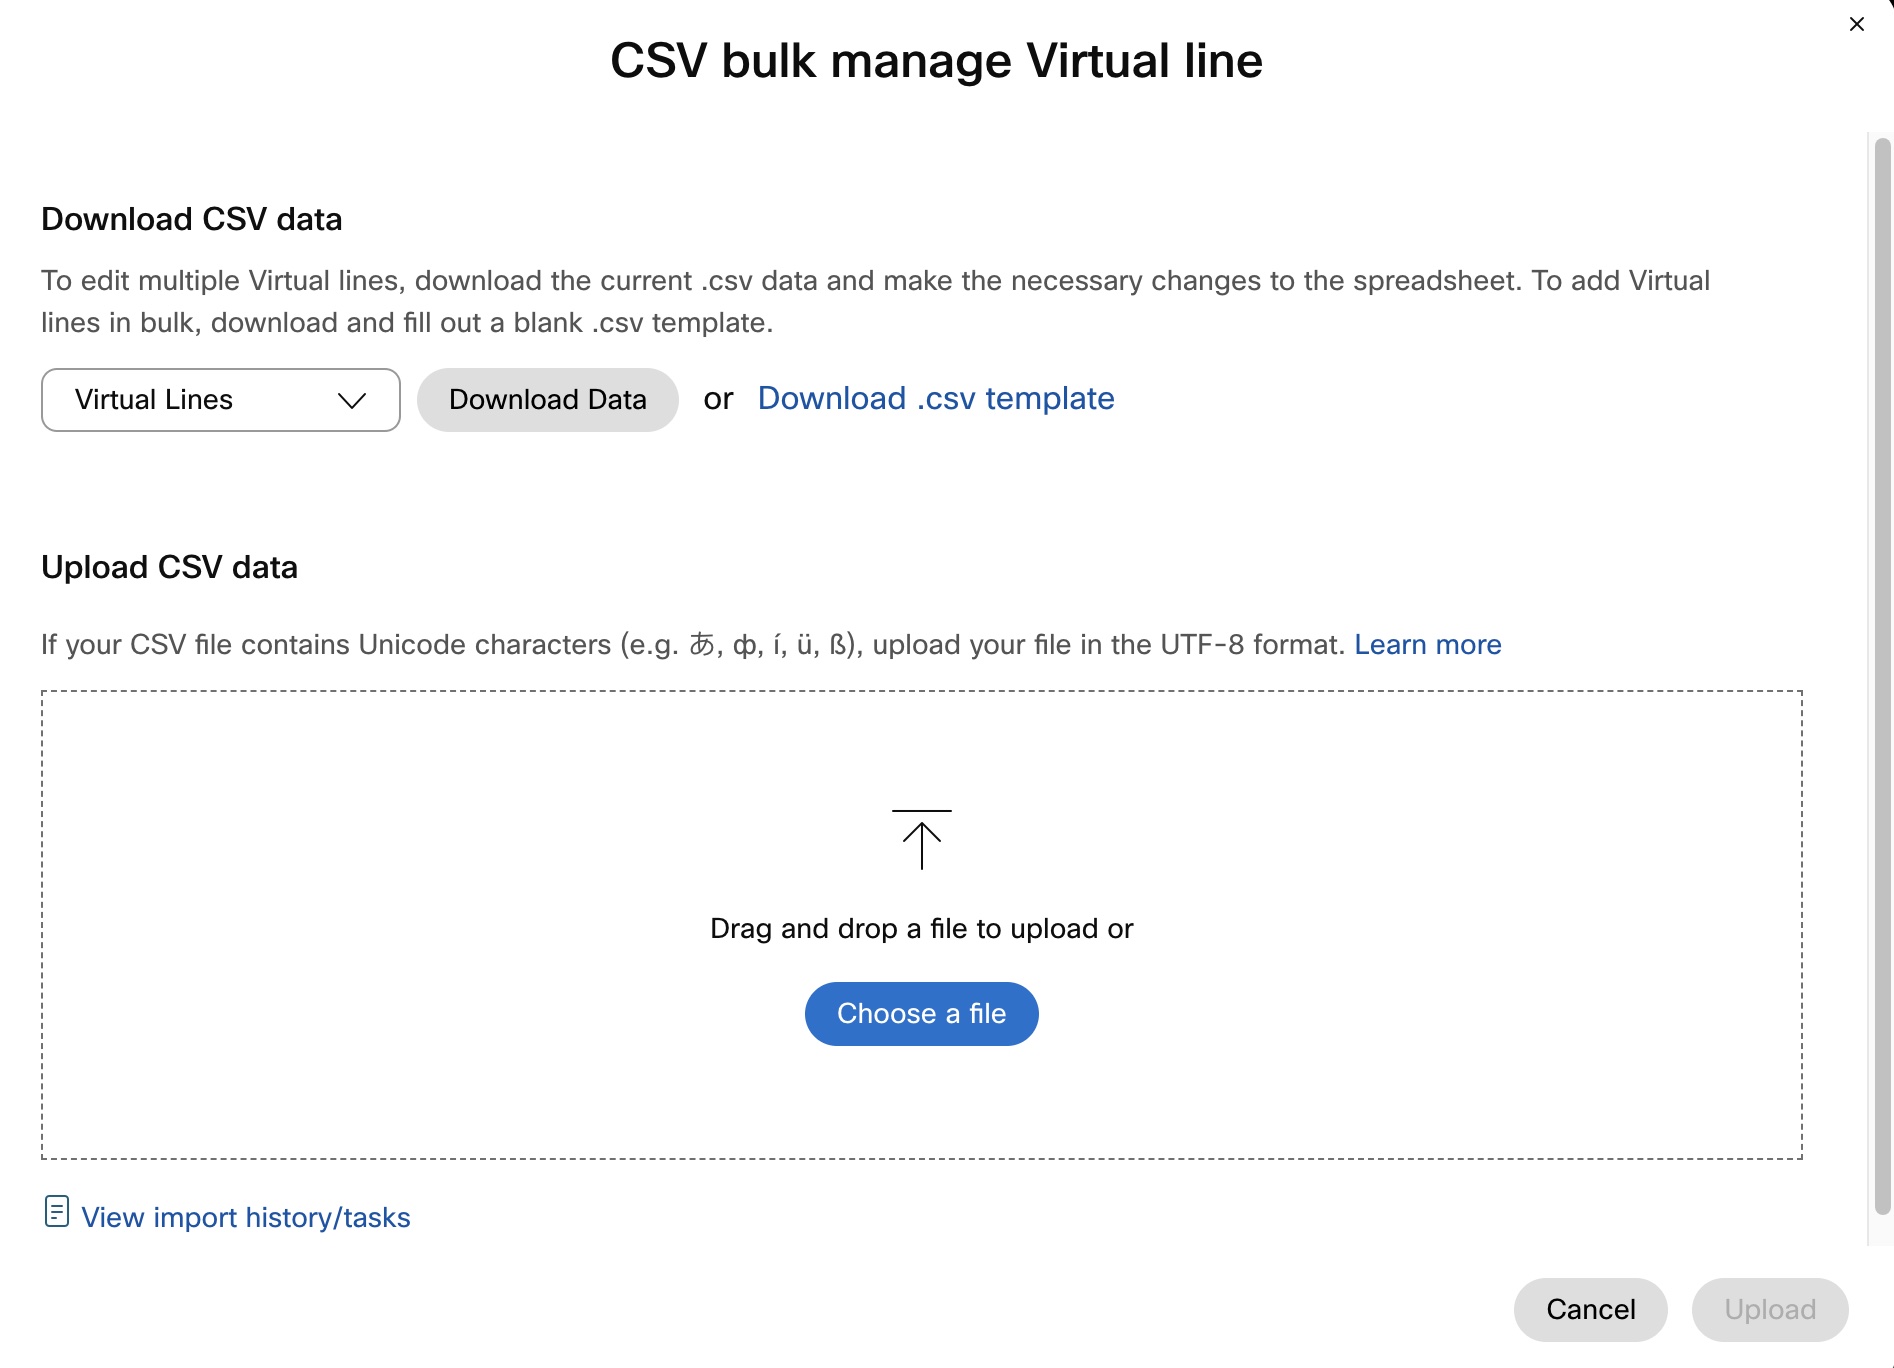
Upload virtual lines in bulk
| 1 |
Sign in to Control Hub. |
| 2 |
Go to . |
| 3 |
Click Bulk Upload if you're creating the virtual line for the first time or click . |
| 4 |
Perform one of the following ways:
|
| 5 |
In the spreadsheet, fill first name, last name, display name, location, phone number and/or extension. And, in the Outgoing column, add TRUE to enable the outgoing calls and add FALSE to disable. |
| 6 |
Upload the CSV file by dragging and dropping or clicking Choose a file. |
| 7 |
Click Upload. You can click View import history/tasks to view the import and export status. |
The virtual line is created with default call settings. You can modify the call settings of the line at any time.
What to do next
You can assign the created line to user devices, configure various call settings, and add the line as a member to the calling features.
Assign virtual lines to device and Webex App
Before you begin:
-
The maximum number of virtual lines assigned to a device is limited by the number of line keys on the device.
-
Virtual lines can't be assigned to the primary line of the user or workspace device. They can be assigned only as secondary lines in these devices.
-
Virtual lines from different Webex Calling locations can be assigned to devices and Webex App in different locations. For example, a virtual line from the UK location can be assigned to a device and Webex App that is assigned to a user in the U.S. location.
For more information on virtual lines across locations, see: Configuration of shared lines and virtual lines across locations.
-
Virtual line can be assigned to a maximum of 36 devices.
-
Compatible devices—Virtual line can be assigned only to the following devices:
-
Cisco Multiplatform Phones (MPP)—All models except 7811, 7832, and 8832
-
Webex App—Minimum version required for mobile and tablet is 45.3. The minimum version required for desktop is 42.12.
-
DECT handset—Virtual lines can only be assigned as line 2 on a handset.
-
Webex Wireless Phone 840 and 860
Virtual lines aren’t supported on the following devices:
-
Analog Telephone Adapter (ATA) devices such as Cisco 19x, Cisco VG400 ATA, and AudioCodes MP-12xx
-
Conferencing stations
-
Cisco Webex Room devices
-
Customer-managed devices
-
Cisco ATAs
-
Voice gateways (VG)
-
Generic SIP devices
-
-
Webex Calling professional license is mandatory to allow assignment of virtual lines on user and workspace devices. For assignment of Webex Calling professional license on workspace device, see Upgrade Webex Calling workspace license.
You can perform one of the following ways to assign the virtual lines to a device:
-
Assign virtual lines from the Calling section.
-
Assign virtual lines from the Devices section.
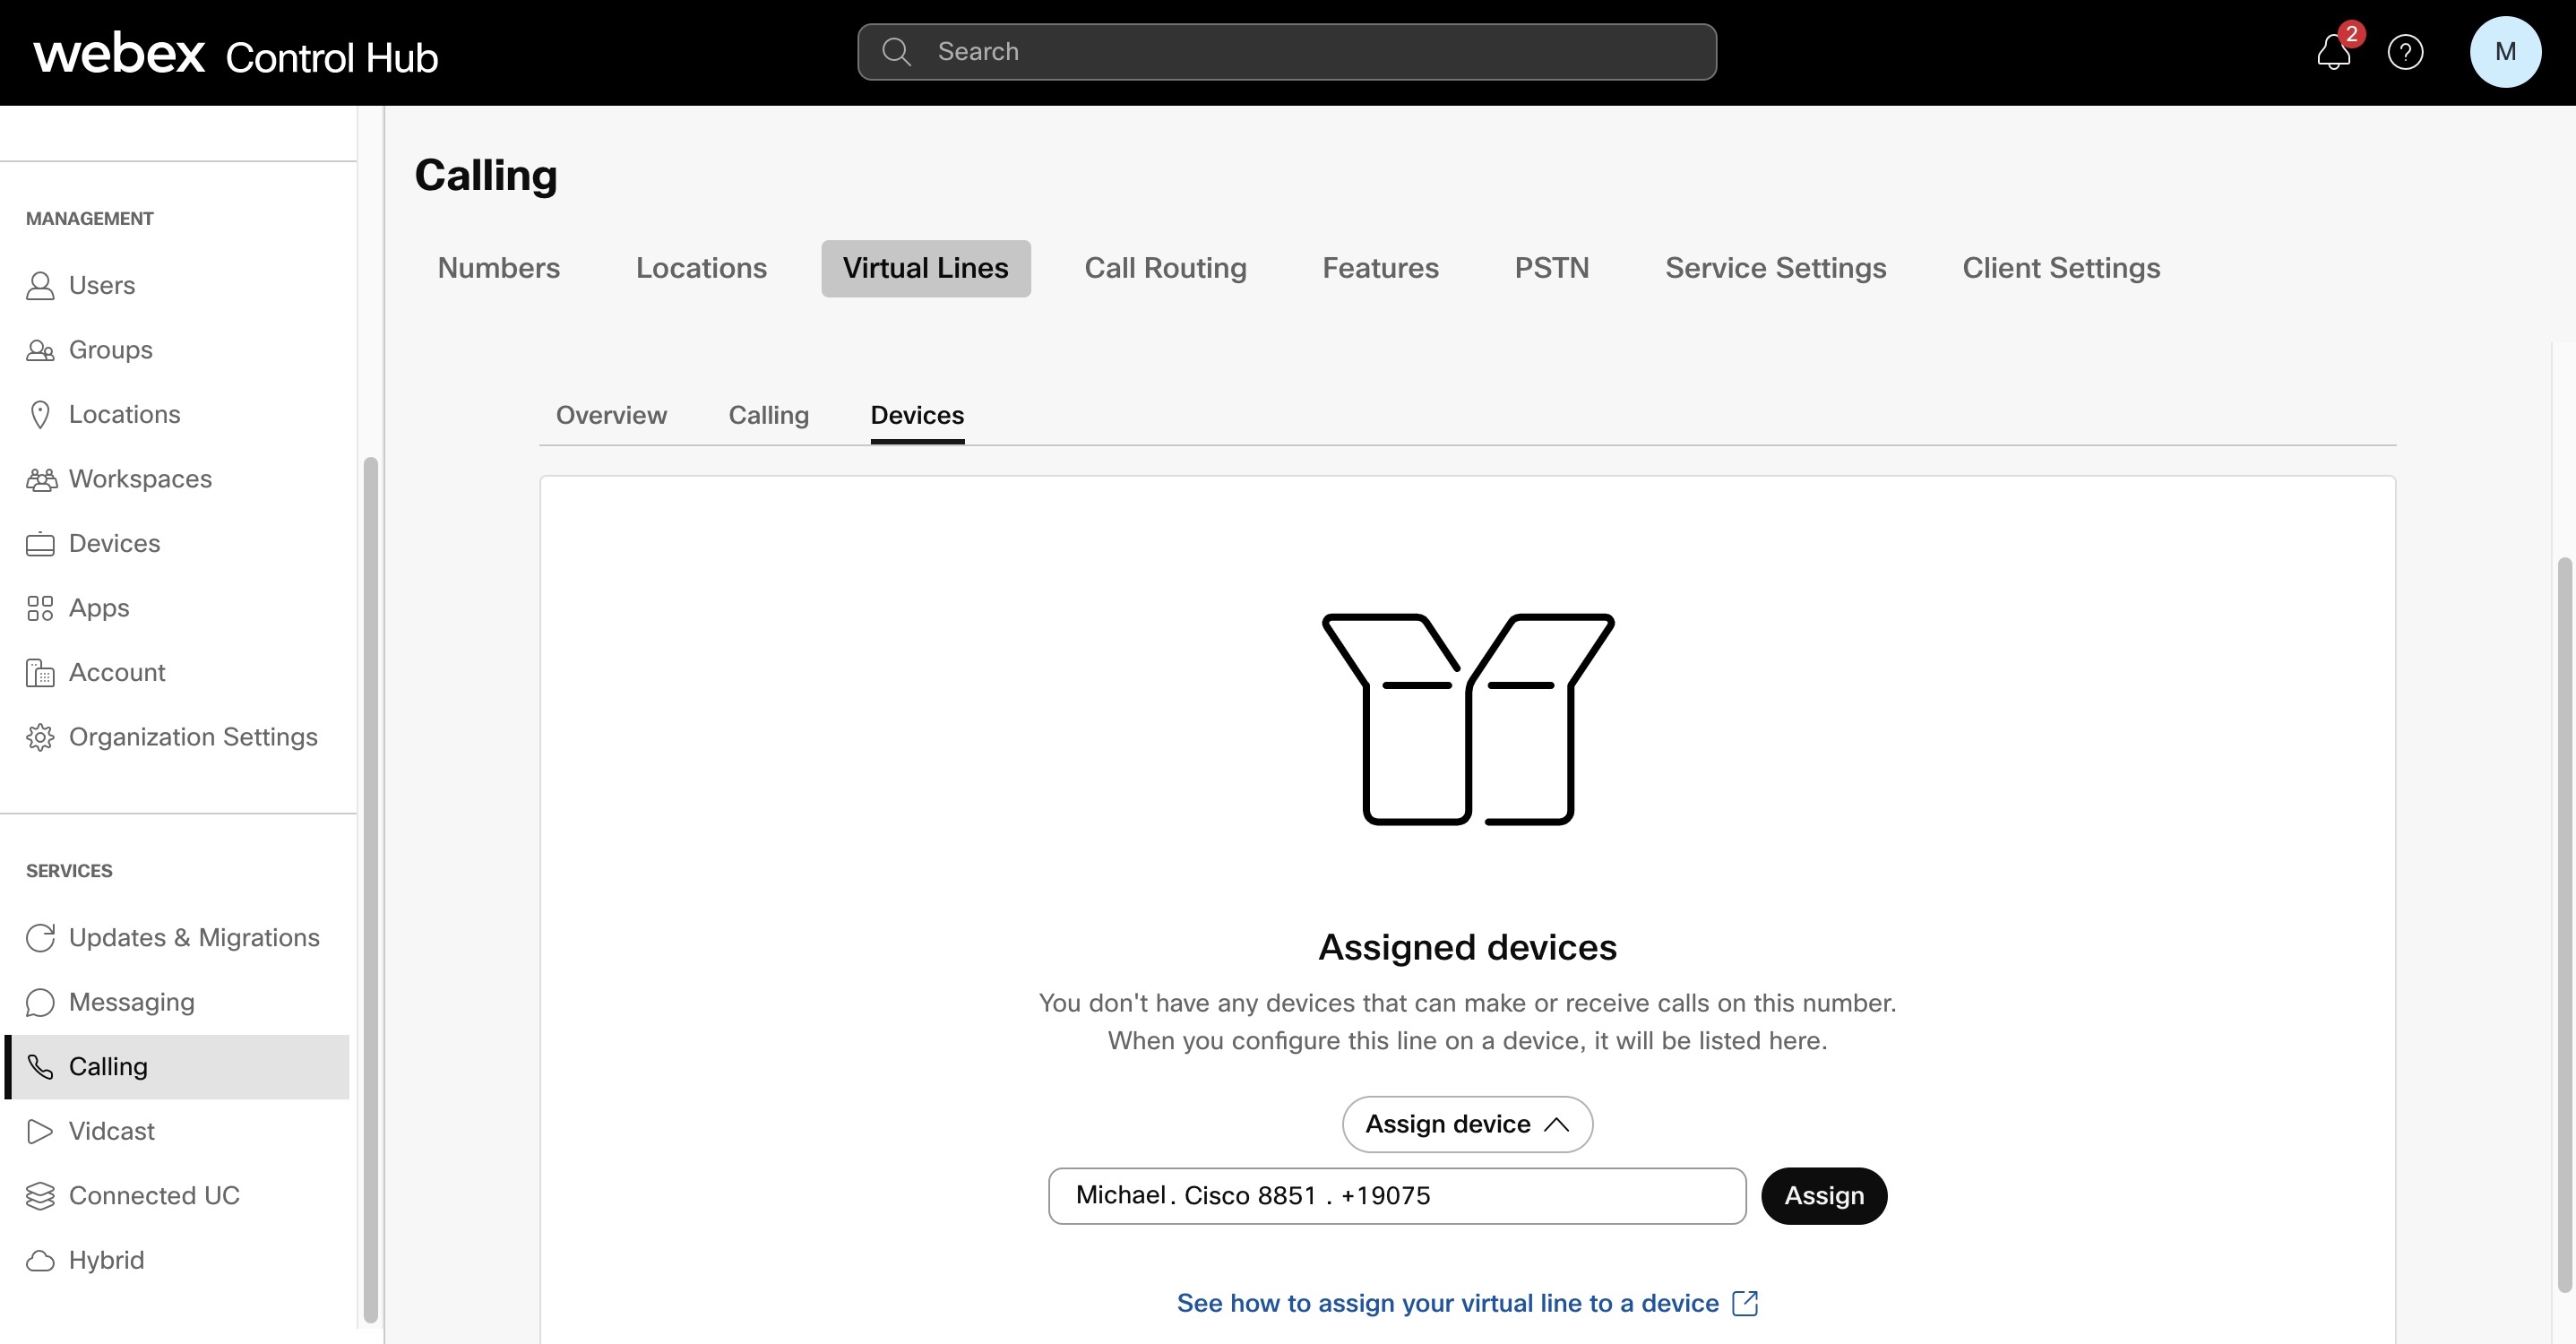
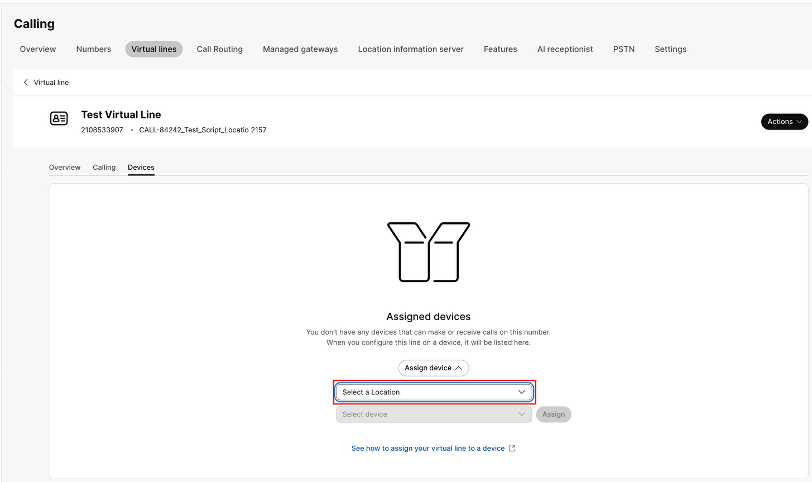
Assign virtual lines to a device from the calling section
| 1 |
Sign in to Control Hub. |
| 2 |
Go to . |
| 3 |
Choose a virtual line that you want to assign to a device. |
| 4 |
Click Devices and then click Assign device. |
| 5 |
Click the Select device field and select or search the device that you want to assign the virtual line for. You can search using the user's name to get all the devices including Webex App assigned to that specific user or you can search using the primary line number. |
| 6 |
Select the device and click Assign.
The next page displays the list of configured lines that are already assigned and the newly added virtual line for the specific device. You can also change the order of lines by simply moving the rows up and down. The line order appears in the user's device as per your changes. |
| 7 |
Click Save. The Devices tab now shows the details such as assigned to, location, device name, and device status. You can continue adding the devices by clicking the Assign Device option. A single entry is shown if you add different Webex applications (Web, Desktop, Mobile, and Tablet), as all these Webex applications are considered as a single device.
To delete the assigned device, select the line and then click . |

Once you've configured, the users can access the virtual line from the Quick Call Widget (Windows only) or separate line keys on MPP.
If you've changed or deleted the assigned virtual line, you must Apply Changes (select device > Actions > Apply Changes) for the phone to pickup the changes.
For large organizations, the administrator must select a location before listing the device to assign the virtual line. This filter enhancement in Control Hub helps reduce data processing time while improving performance and user experience for organizations with large data sets.
For a regular organization, the location filter is not available, and the administrator can directly select a device to assign a virtual line.
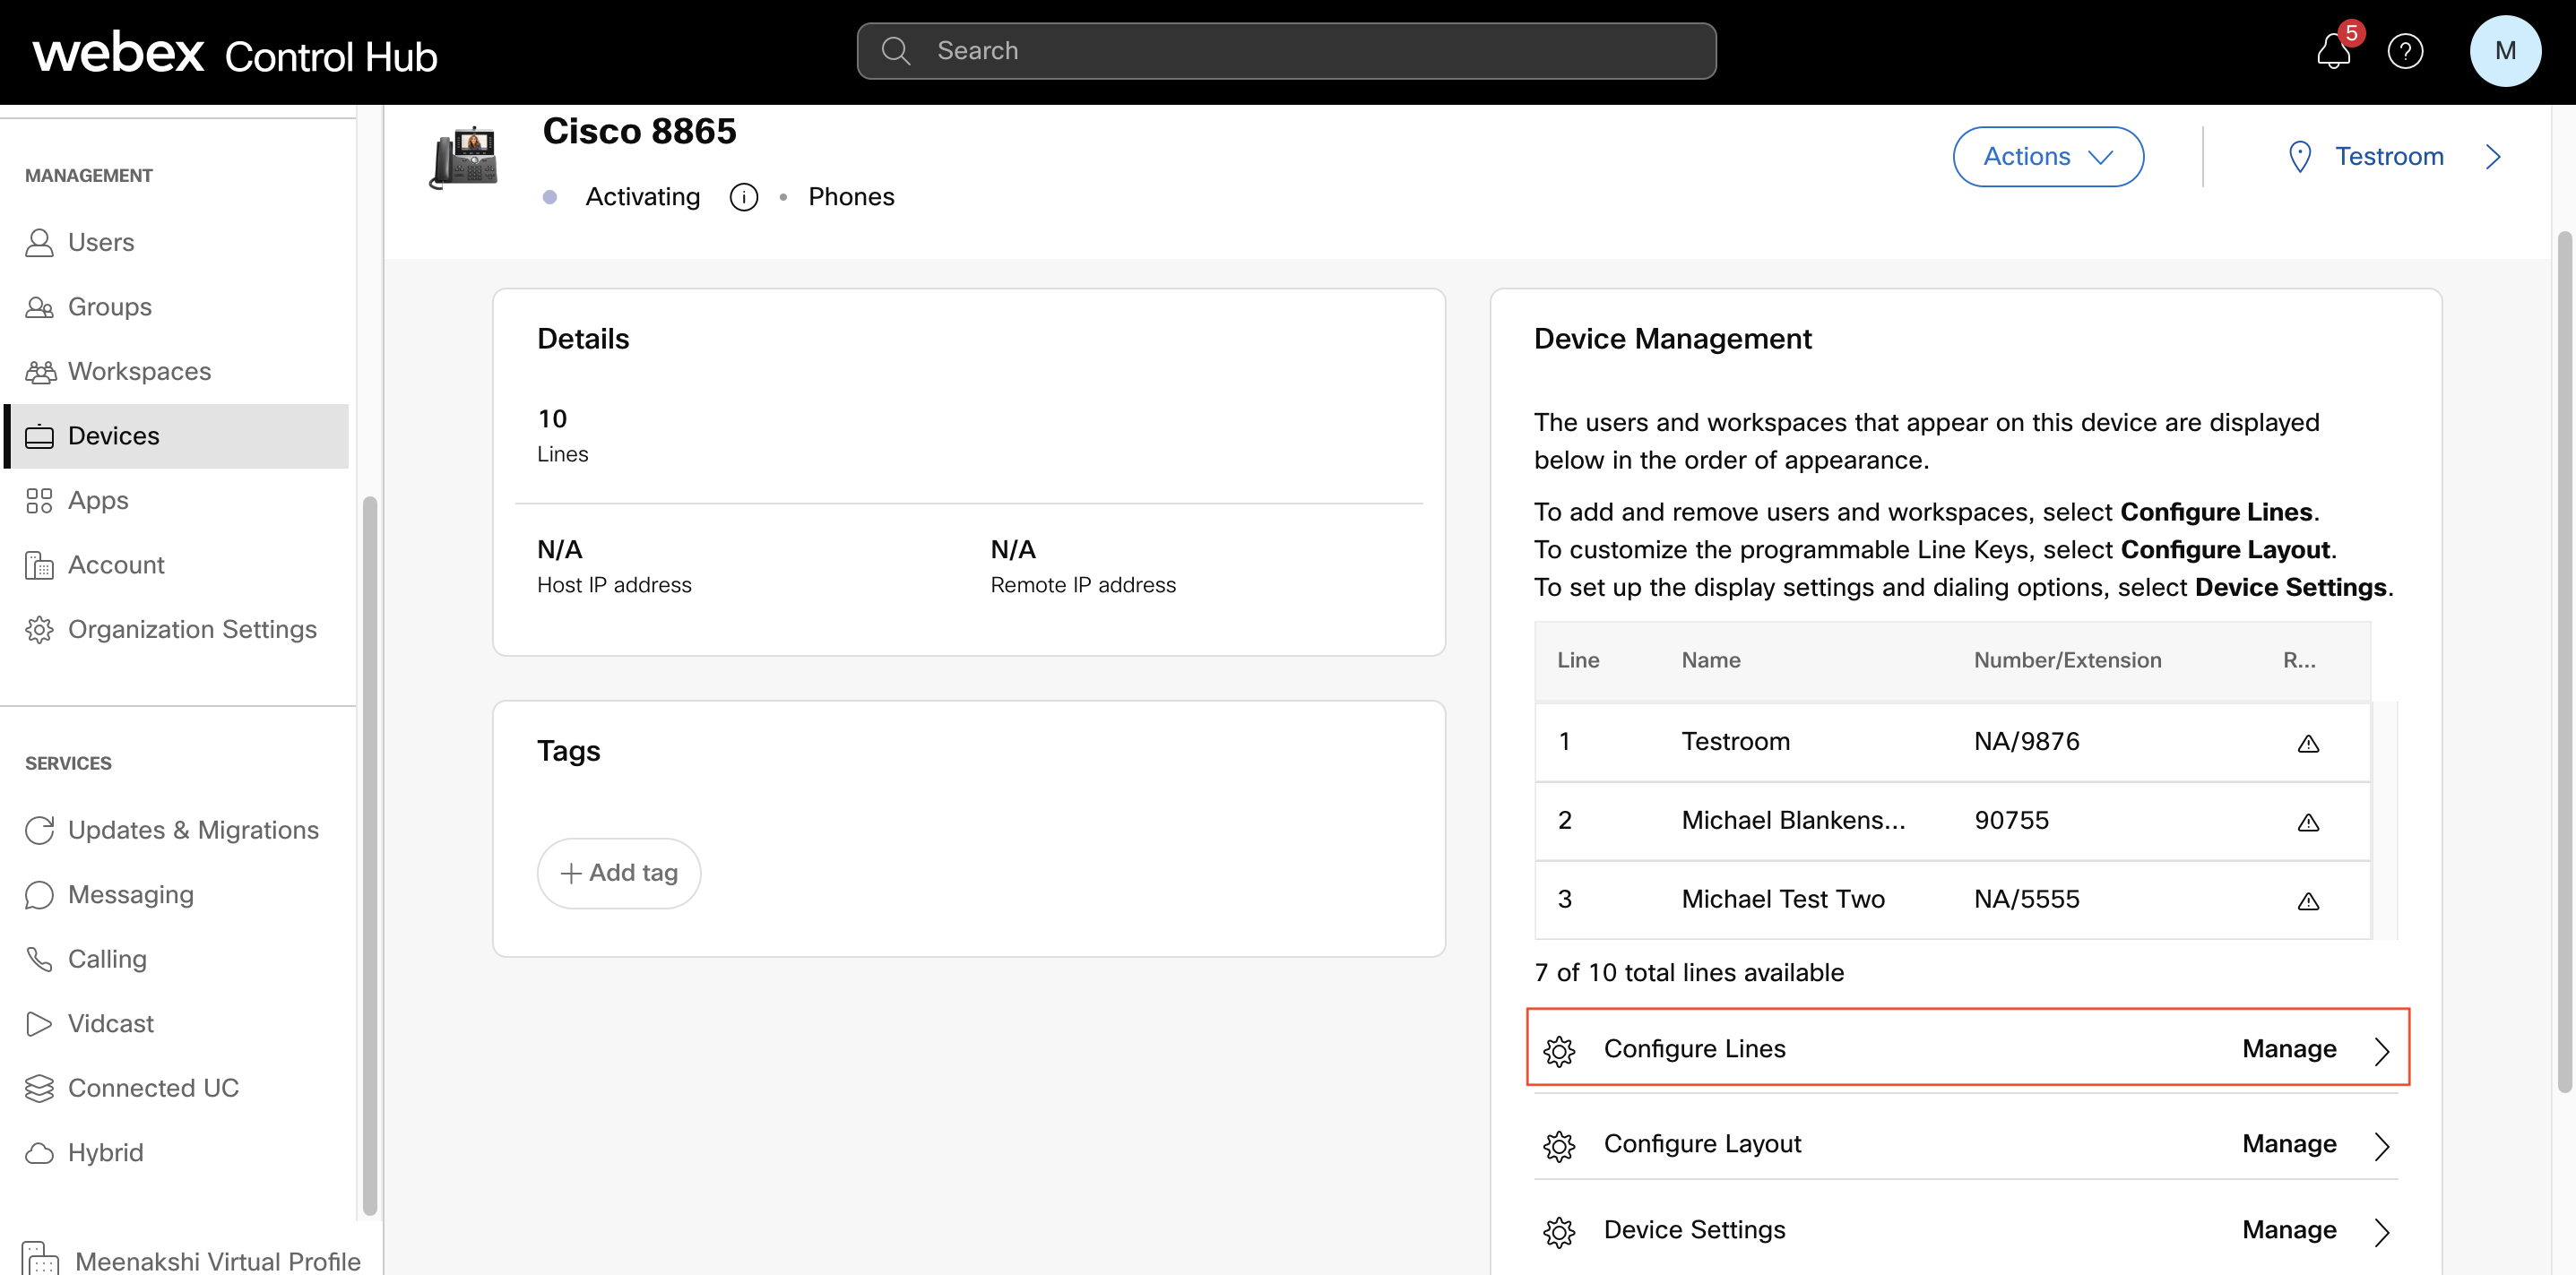
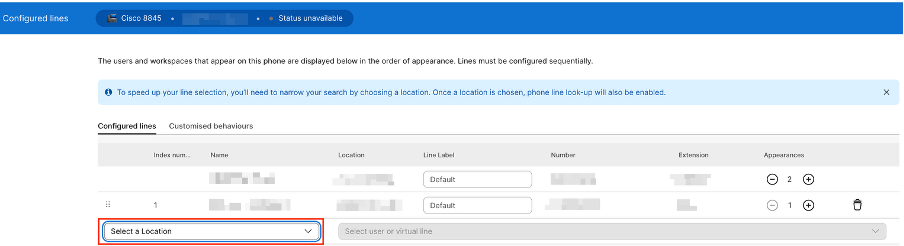
Assign virtual lines to a device from the device section
| 1 |
Sign in to Control Hub. |
| 2 |
Go to . |
| 3 |
Choose a device that you want to assign the virtual line to. |
| 4 |
Under Device Management, click the Configure Lines.
|
| 5 |
Click the row and search the virtual line number. |
| 6 |
Select the virtual line number and then click Save. The added number appears in the table under Device Management. The assigned device also appears under . |
Once you've configured, the users can access the virtual line from the Quick Call Widget (Windows only) or separate line keys on MPP.
If you've changed or deleted the assigned virtual line, you must Apply Changes (select device > Actions > Apply Changes) for the phone to pickup the changes.
For large organizations, the administrator must select a location before configuring additional calling lines.
Click the  icon, and you can see the location filter appears.
The administrator then can select the desire location and select the line.
icon, and you can see the location filter appears.
The administrator then can select the desire location and select the line.
Assign virtual lines to Webex App
| 1 |
Sign in to Control Hub. |
| 2 |
Go to . |
| 3 |
Select a user on whose Webex App you want to add the virtual lines and click Calling. |
| 4 |
Go to User call experience and click Application line assignment. |
| 5 |
Go to Configure additional lines on the Webex App and click Configure Lines. The Configure Lines option is disabled if none of the desktop, mobile, or tablet options are enabled under Webex application assignments. Assignment of multiple lines isn’t supported on the Web client. For more information on the application ringing and assignments, see: Manage application services for a Webex Calling user. |
| 6 |
To add a virtual line, click the Only virtual lines that haven’t exceeded the maximum number of assigned devices appears as assignable lines to a Webex App. Add the lines in the order in which you want them to appear on the user's Webex App. The primary line of the user is always the first line and you can't change its order. If a user has numbers from other users/groups configured on their Webex App, you can add a line label for the virtual line. This line label helps the user to identify one line appearance from the other. |
| 7 |
From the Call Decline drop-down, choose any one of the following options:
To remove a virtual line, click the |
| 8 |
Click Save. |
Once you've configured, users can access the virtual line from the footer of Webex App. If you've changed or deleted the assigned virtual line, users must restart their Webex App to see the changes.
For large organizations, the administrator must select a location before configuring additional calling lines.
Click the icon, and you can see the location filter appears. The
administrator then can select the desire location and select the line.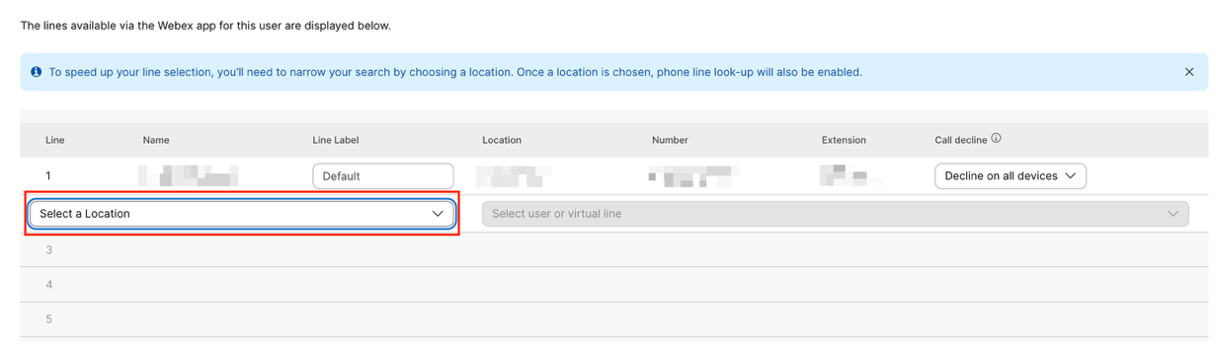
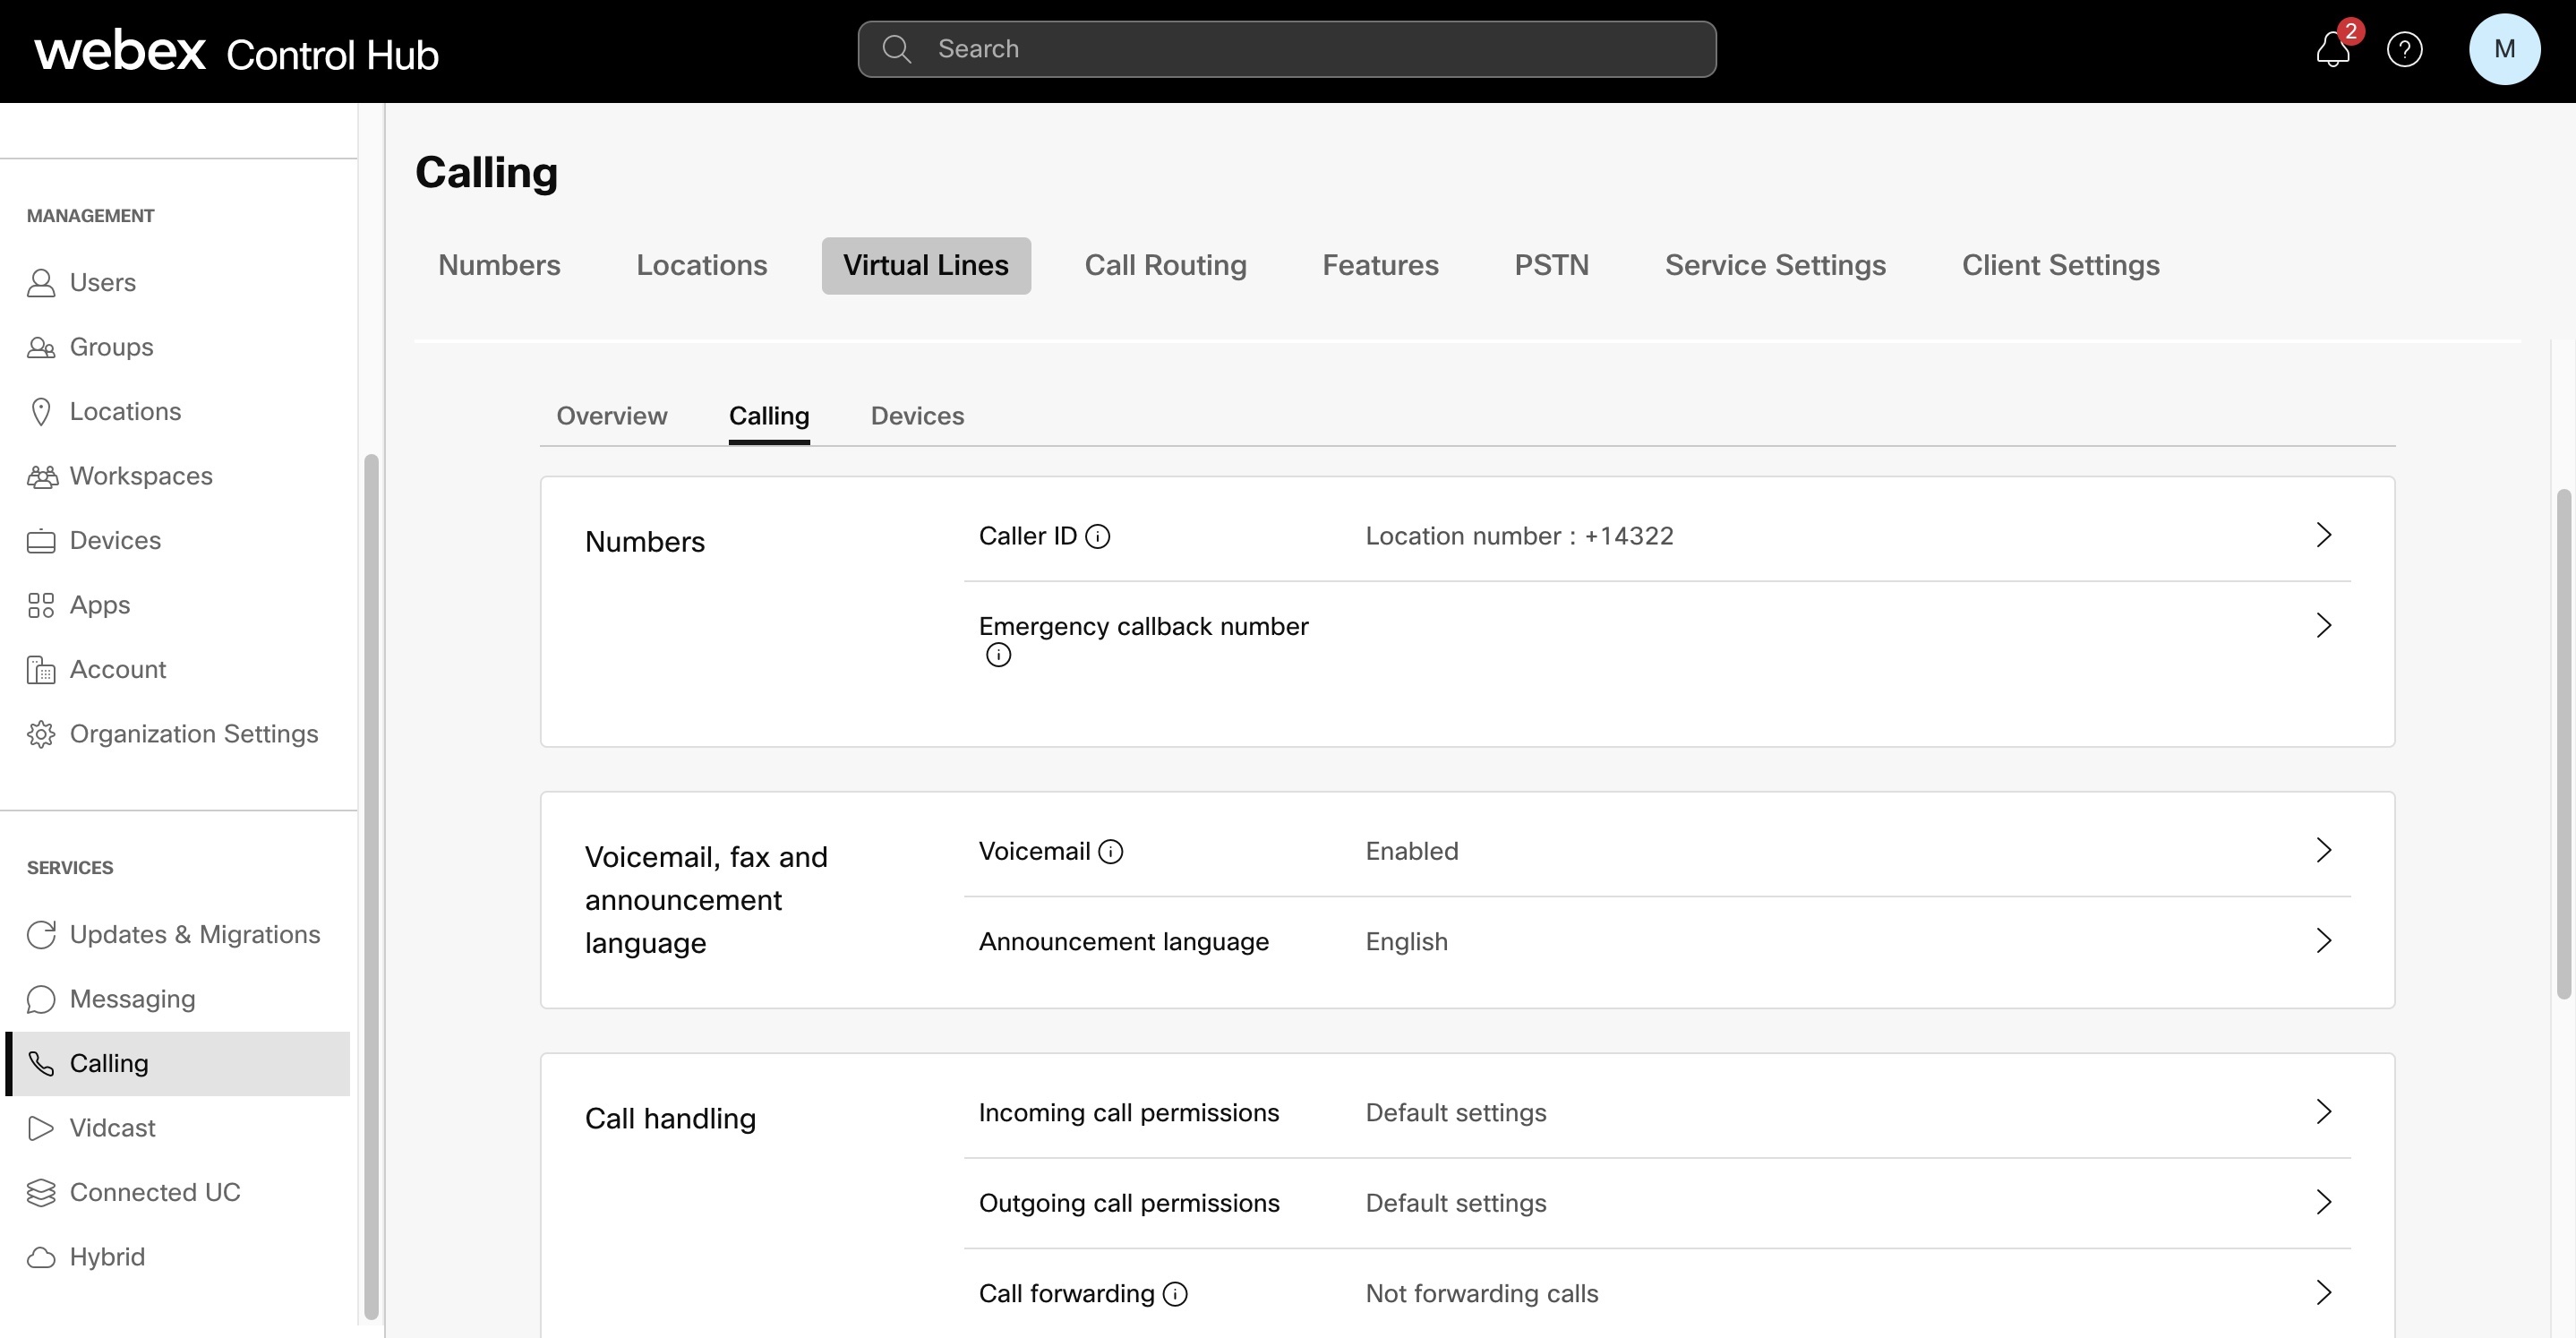
Configure call settings for a virtual line
Configuration of call settings for a virtual line is similar to the configuration of settings for a user. You can configure various call settings, such as caller ID, emergency callback number, voicemail, call forwarding, timezone, and so on.
| 1 |
Sign in to Control Hub. |
| 2 |
Go to . |
| 3 |
Choose a virtual line that you want to configure the settings for and click Calling. The next page shows the list of settings that you can configure.
From here, you can configure the settings for the line in the same way as you configure the settings for a user. |
For information on call recording for virtual lines, see Enable call recording for virtual lines.
For information on configuring caller ID for virtual lines, see Configure Caller ID for a Virtual Line
For users to configure certain call settings for the virtual line, they can use FAC or soft key from the MPP phone for the assigned corresponding line key.
Administrator and end users can't configure the settings for the virtual line in the User Hub.
Assign virtual lines to calling features
Assigning the virtual lines to calling features is no different from assigning the user primary line to calling features. You can perform the same process with only the difference of selecting or entering the virtual line number instead of a primary line number.
You can assign a virtual line as a member to the following calling features:
You can also assign the virtual line as a target to the monitoring list of other users.
To access the calling features, you can go to .
View call history for shared and virtual lines
A user can retrieve their call history for both primary line and shared lines assigned to them. When a shared or virtual line is configured on a user's client or device, and a call is made to or from the user, workspace, or virtual line profile, Webex Calling adds a record of the call to the user's call history. The system indicates which line is associated with the call. If the line exists on the client or device, the call history is displayed for that line; if the line does not exist on the device or client, the call history is not shown.
The Webex desktop, mobile, tablet Apps and MS Teams are enhanced to use the call history for shared or virtual lines on the client. This new user experience ensures that the call history for shared/virtual lines is consistent across all the clients. These clients display the Managed by field in the call history records when the call was handled by an external user other than the App user.
The MPP Phones, Phone OS devices, and Room OS devices do not display the Managed by field in the call history records
| 1 |
View Call History on Webex App-End users can access and view the Call History from the Webex App. For details, see Webex App | View call history |
| 2 |
View Call History on MS Teams-End users can access and view the Call History from teams. For details, see Webex App | View call history |
Limitations
Here are some known limitations of the virtual line:
-
You can't assign a virtual line to an Executive and use it for Executive-Assistant functions.
-
You can't associate a virtual line to a workspace device as a hoteling guest.
-
You can't configure a virtual line to monitor other numbers or call park extensions.
-
Users can't manage the call settings of virtual lines from the User Hub.
-
Call center soft keys show up only if the virtual line is part of the call queue. For more information, see Announcements for the Webex Calling Devices.
-
Users with virtual lines will not have their presence visible to others on the Webex application.


