- Página inicial
- /
- Artigo

Obrigado pelos seus comentários.

 Neste artigo
 Comentários?
Você pode gerenciar as configurações do seu correio de voz, como saudações, transcrição, armazenamento e notificações, a partir da Central do Usuário.
Antes de começar
- Seu administrador precisa ter habilitado as configurações de correio de voz para que você possa acessá-las e configurá-las. Se você não encontrar nenhuma configuração de correio de voz, verifique com o administrador.
- Opção de chamada no Hub do Usuário
Você pode configurar todas as definições de correio de voz no Hub do Usuário, navegando até .
A opção Chamada está disponível apenas para usuários com uma licença do Webex Calling. Se você não vir a opção Chamando, significa que você não tem uma licença do Webex Calling.
Se você quiser descobrir qual serviço de chamadas está configurado em sua conta, pode verificar no aplicativo Webex. Para mais detalhes, consulte Descubra qual serviço de chamadas você tem.
- Encaminhamento de correio de voz
Quando o administrador ativar essa configuração, você poderá encaminhar mensagens de voz para o número ou ramal de outro usuário. Quando desativado, você não poderá encaminhar mensagens de voz, usar uma caixa postal externa ou enviar uma cópia da mensagem de voz para um endereço de e-mail específico.
- Exclusão do correio de voz
Seu administrador pode definir o período de expiração das mensagens de voz (de 1 a 180 dias) e as condições para a exclusão de mensagens expiradas.
Após o administrador configurar as definições, as mensagens de voz com mais de 180 dias são arquivadas automaticamente. Se precisar acessar mensagens de voz arquivadas, entre em contato com o administrador.
Se o administrador não tiver configurado as definições, você precisará excluir as mensagens manualmente.
- Senha ou PIN do correio de voz
Seu administrador pode definir o número mínimo de dias (1 a 7) entre as alterações de senha e o período de expiração da senha (15 a 180 dias). Se o administrador não tiver configurado as definições, a sua senha nunca expira.
Você pode redefinir o código de acesso do seu correio de voz no Hub do Usuário, veja Definir ou redefinir seu PIN do correio de voz para mais detalhes. Para ouvir suas mensagens de voz do Hub do Usuário, consulte Ouvir suas mensagens de voz.
Caso encontre algum problema ao configurar as definições, entre em contato com o administrador. Seu administrador também pode configurar todas as definições de correio de voz em seu nome.
Artigos relacionados
Ativar correio de voz
Para receber mensagens de voz e fax, e configurar várias opções do correio de voz, como encaminhar chamadas para o correio de voz, ativar notificações e definir o armazenamento de mensagens, você precisa primeiro ativar a opção de correio de voz.
| 1 |
Faça login no Hub do Usuárioe clique em . |
| 2 |
Vá para a seção Correio de voz e ative a opção. 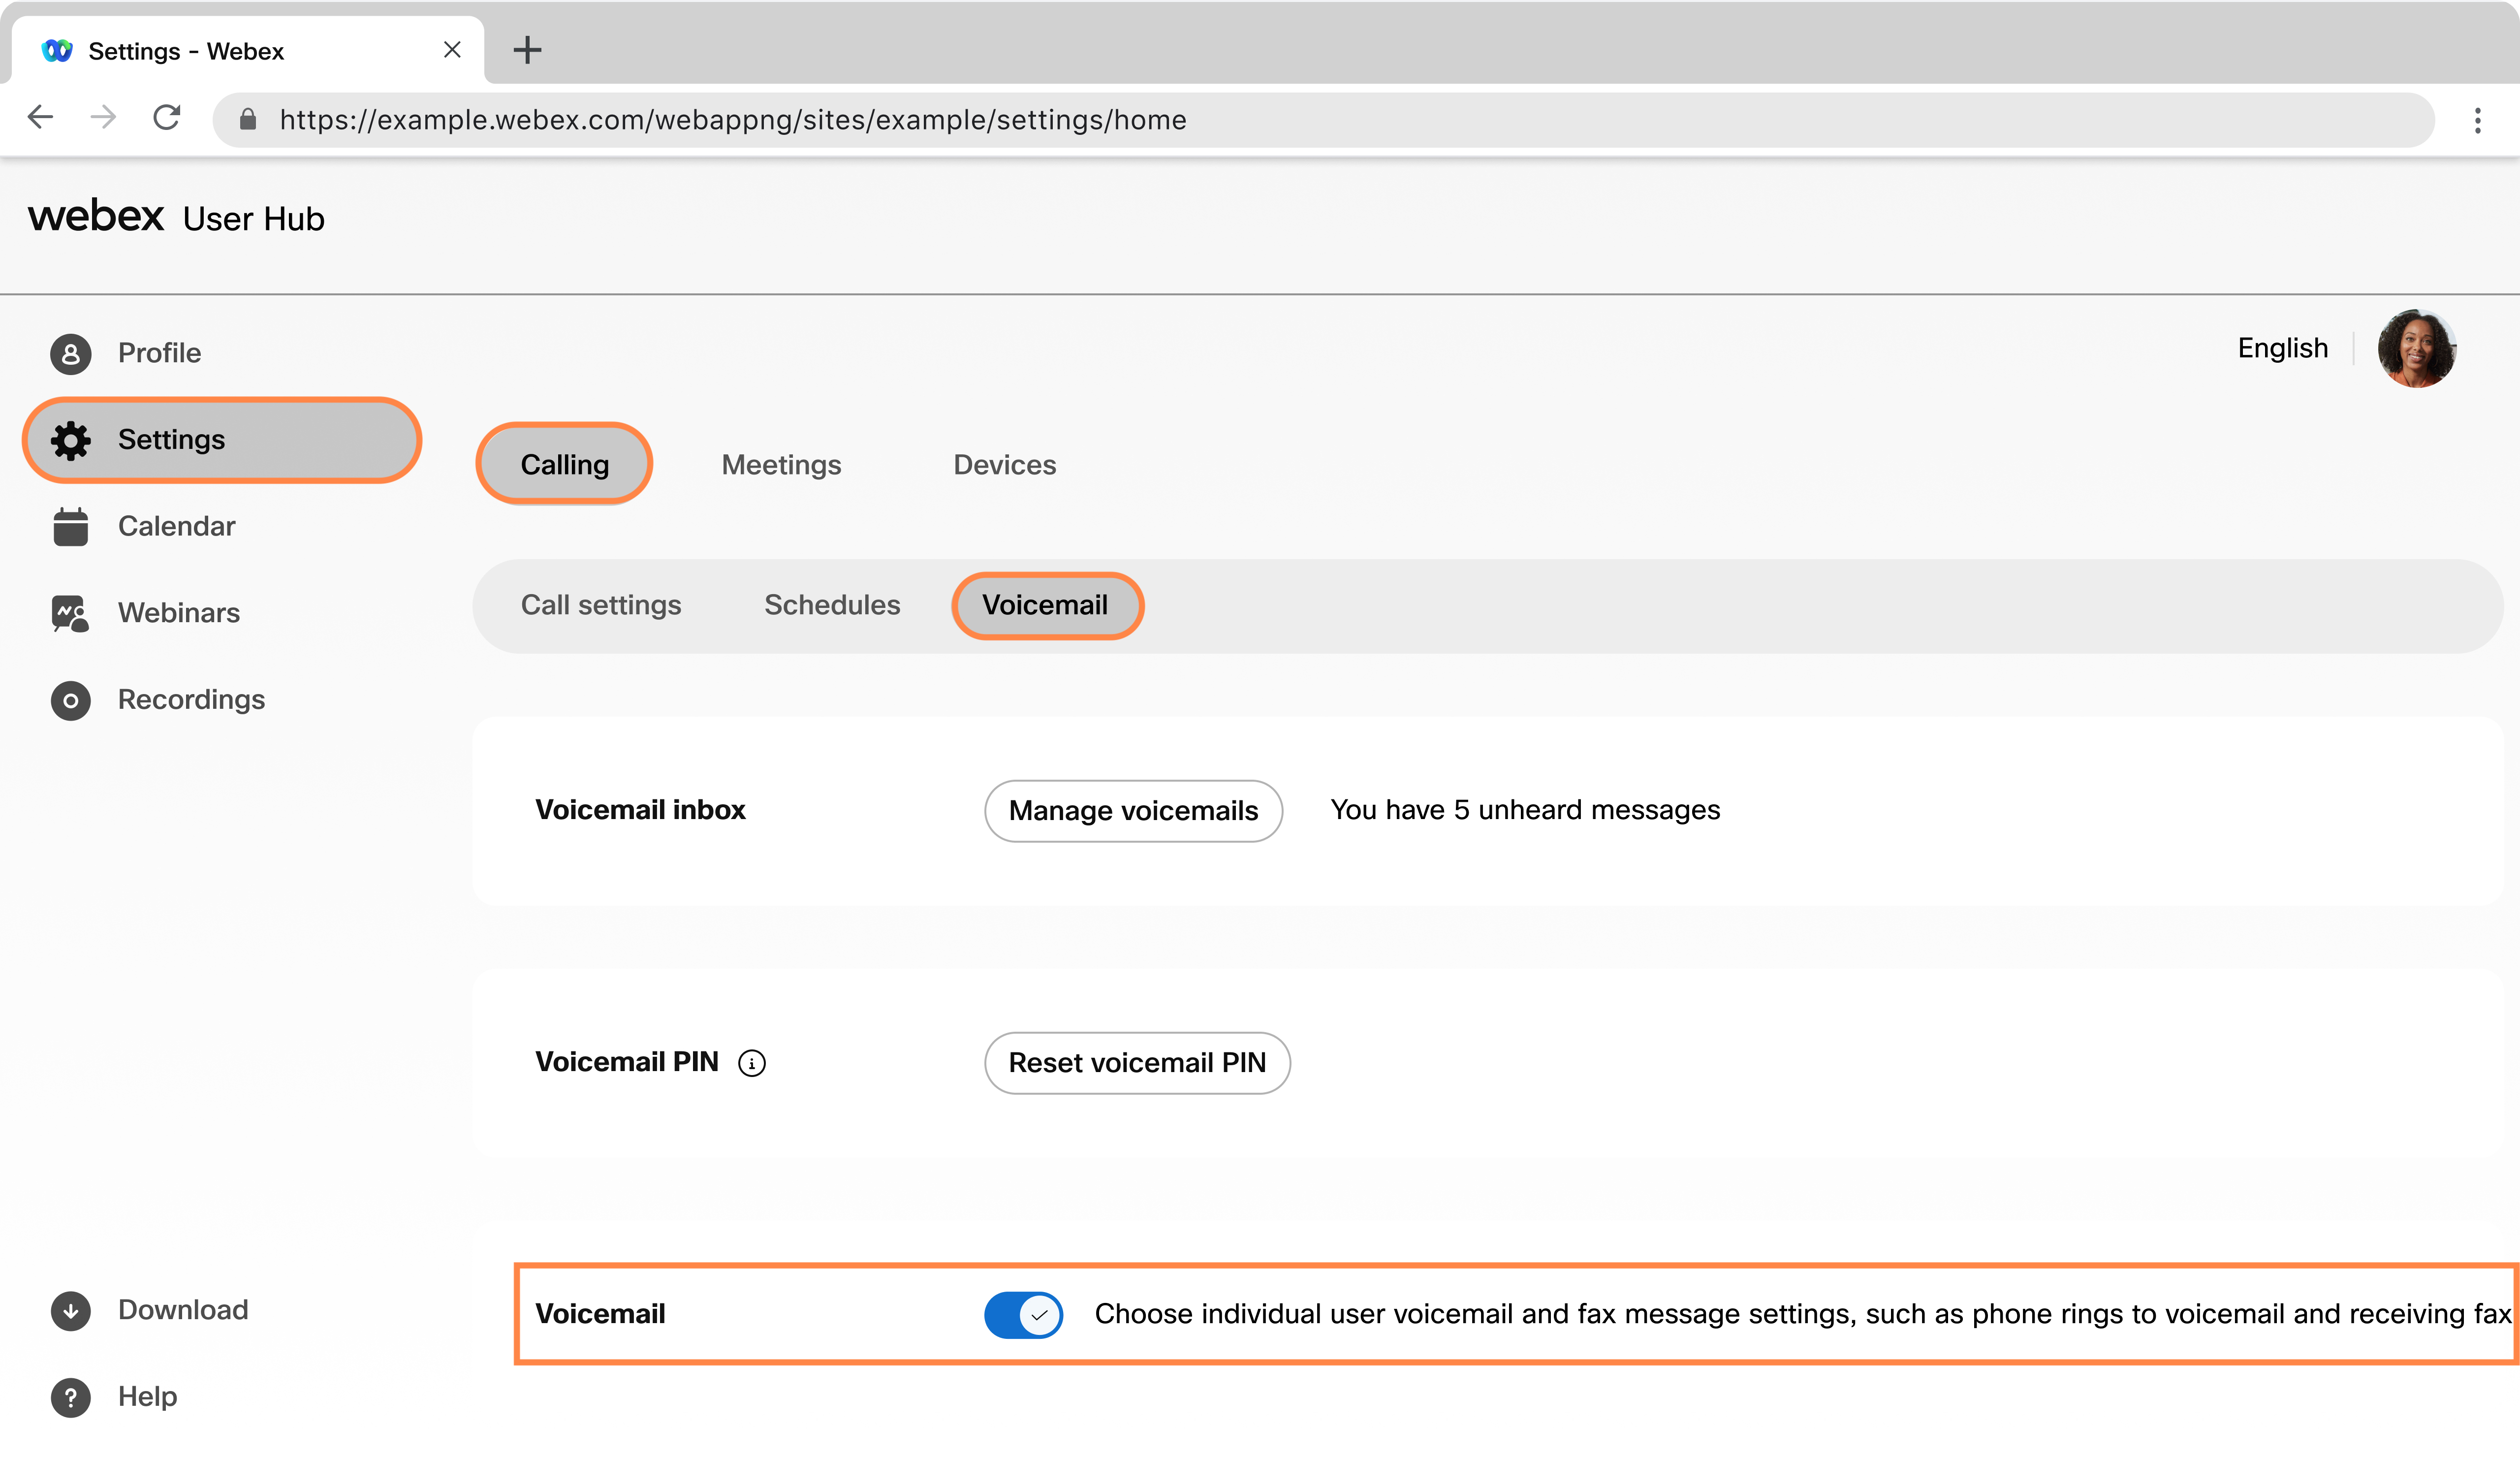 |
O que fazer em seguida
Encaminhar chamadas para a caixa postal com saudações
Você pode configurar quando deseja encaminhar as chamadas para o seu correio de voz. Por exemplo, você pode enviar todas as chamadas para o correio de voz quando você sabe que vai estar fora do escritório e não fazer chamadas telefônicas.
Você pode configurar uma saudação de correio de voz, que é a mensagem que seus chamadores ouvem quando chegam à sua caixa postal. Há dois tipos de saudações de correio de voz : Ocupado e Sem resposta. A mensagem "Ocupado" é reproduzida quando você está em outra chamada e não tem nenhuma chamada em espera, e a mensagem "Sem resposta" é reproduzida quando você não atende a chamada.
- As chamadas recebidas não são direcionadas para o correio de voz quando você ativou a chamadaem espera.
- Se você ativou o encaminhamento de chamadas, essas configurações de encaminhamento de chamadas substituem as configurações de correio de voz definidas.
| 1 |
Faça login no Hub do Usuárioe clique em . |
| 2 |
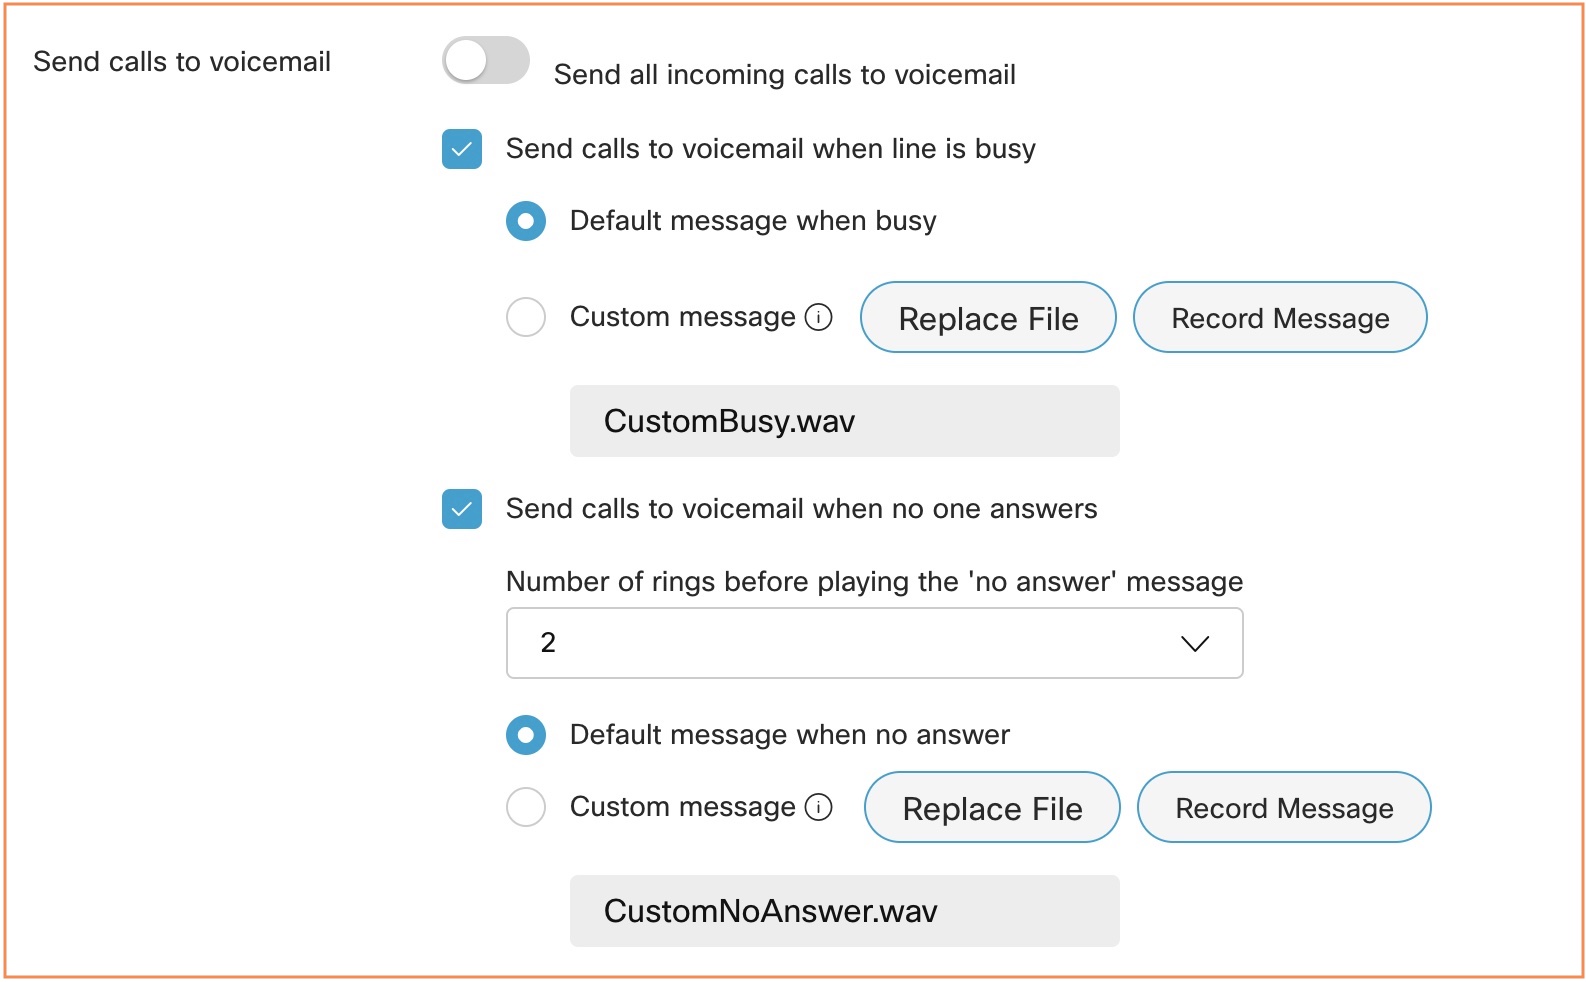
Acesse Enviar chamadas para o correio de voz e escolha uma das seguintes opções:
Depois de carregar o arquivo ou gravar a saudação, você pode alterá-la selecionando Substituir arquivo ou gravando outra saudação. Gravar uma nova saudação ou carregar um novo arquivo substitui a saudação anterior. O arquivo de áudio (WAV) deve ter 8 kHz, 8 bits mono, CCITT µ-law, no máximo 2 MB e formato .wav. O tamanho máximo do arquivo é de 960 KB para 90 segundos de reprodução. Você também pode gravar as saudações discando o Portal de Voz *62 dos seus telefones IP Cisco ou do aplicativo Webex. Se você selecionar Enviar todas as chamadas para o correio de voz, você não poderá selecionar as outras duas opções. Você pode optar por direcionar para o correio de voz, com ambos Enviar chamadas para o correio de voz quando a linha estiver ocupada e Enviar chamadas para o correio de voz quando nenhuma opção de resposta estiver selecionada em conjunto. |
| 3 |
Clique em Salvar. |
Armazene suas mensagens de voz e fax.
Você pode escolher onde deseja armazenar suas mensagens de voz e fax — na Central do Usuário ou em um endereço de e-mail específico como um arquivo .tiff.
| 1 |
Faça login no Hub do Usuárioe clique em . |
| 2 |
Acesse Armazenamento de mensagens e selecione onde deseja armazenar suas mensagens:
|
| 3 |
Clique em Salvar. 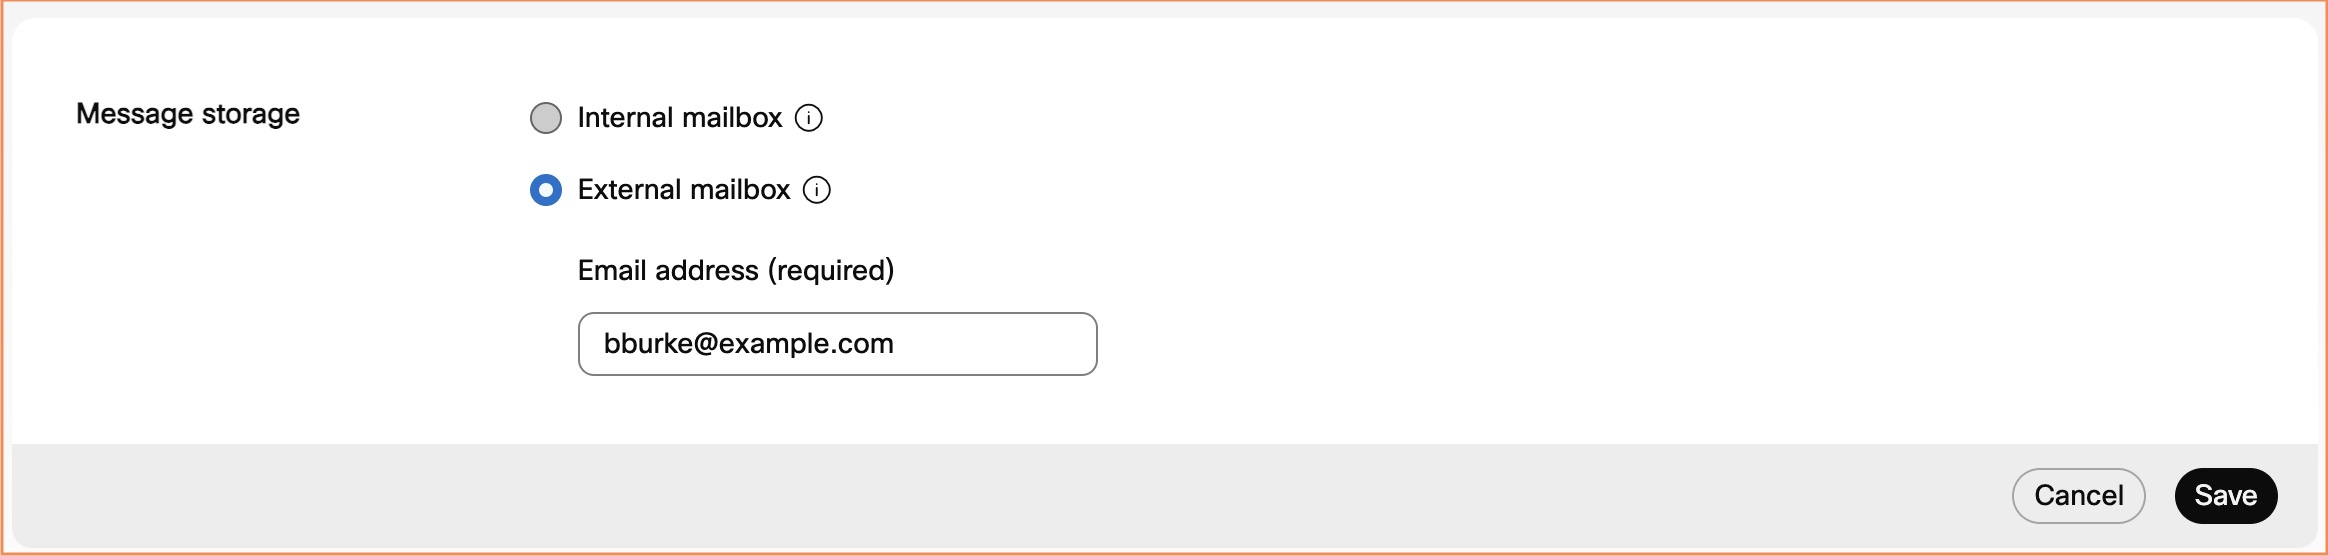 |
O que fazer em seguida
Se a transcrição de mensagens de voz estiver ativada na sua localização, a opção Usar caixa postal interna e Enviar uma cópia da mensagem de voz por e-mail deve ser selecionada para que você receba as transcrições das mensagens de voz. Para obter mais informações, consulte a seção Configurar transcrição de correio de voz.
Habilitar notificações de correio de voz
| 1 |
Faça login no Hub do Usuárioe clique em . |
| 2 |
Vá para Notificações e ative Receber notificações de correio de voz. |
| 3 |
Selecione uma ou ambas as opções a seguir:
O Webex Calling oferece suporte a notificações por mensagem de texto apenas para números de telefone dos EUA e do Canadá. O Webex para Governo suporta apenas notificações por e-mail. Ao selecionar Mensagem de texto, revise os termos da mensagem de texto e as informações de privacidade exibidas no Hub do Usuário antes de salvar. 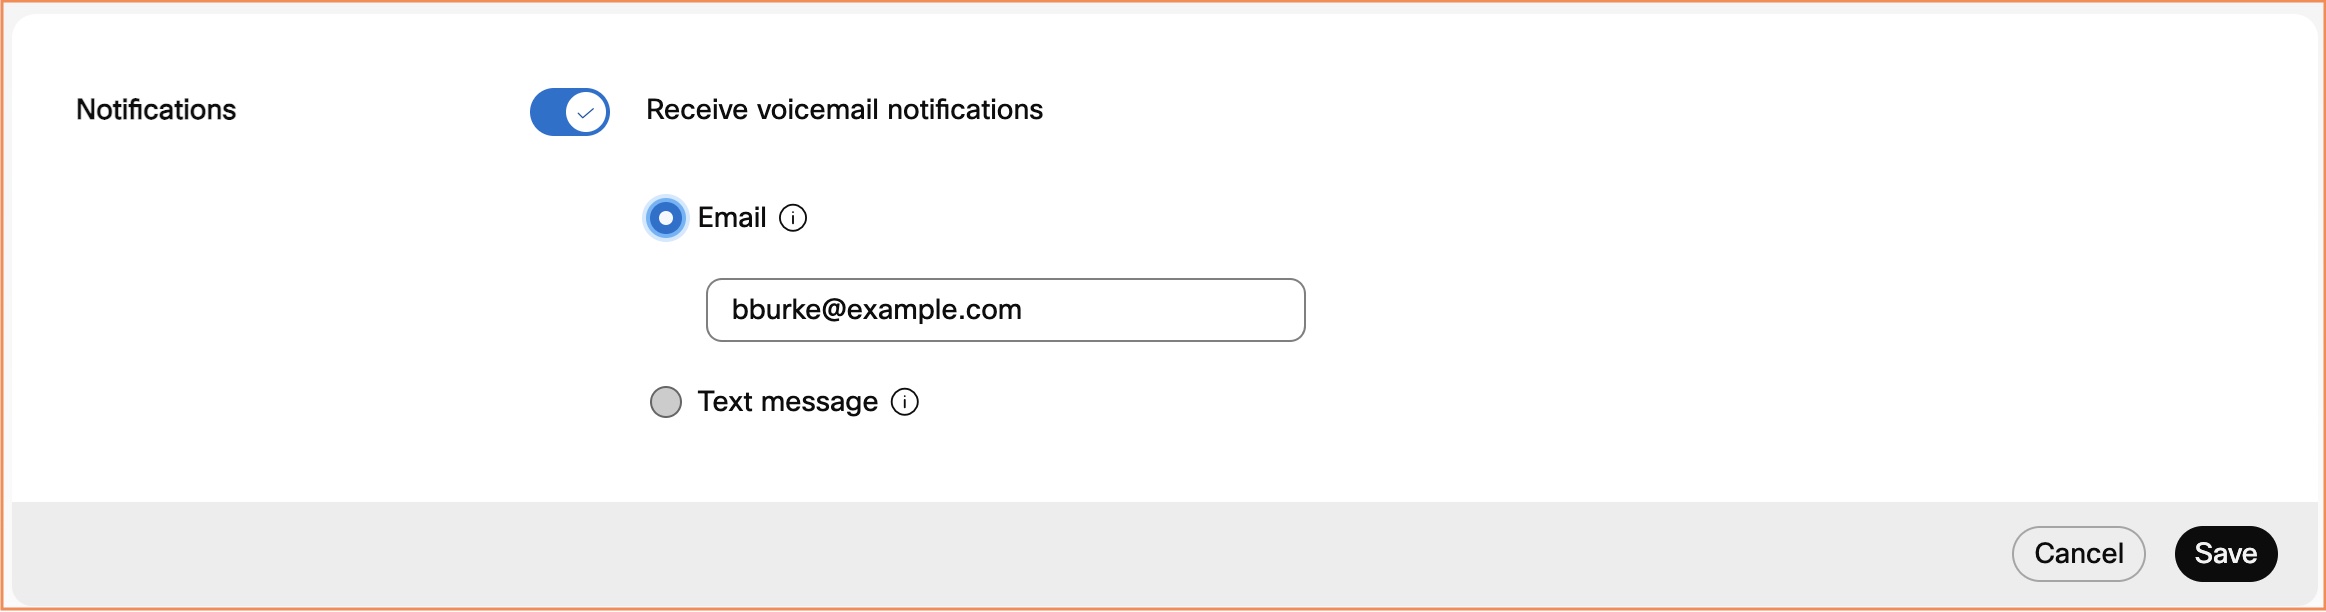 |
| 4 |
Para enviar uma mensagem de voz para um endereço de e-mail com a mensagem anexada, vá para Configurações adicionais, ative Enviar uma cópia da mensagem de voz por e-maile insira o endereço de e-mail para o qual as transcrições serão enviadas. Esta opção pode estar indisponível se o encaminhamento do correio de voz estiver desativado. 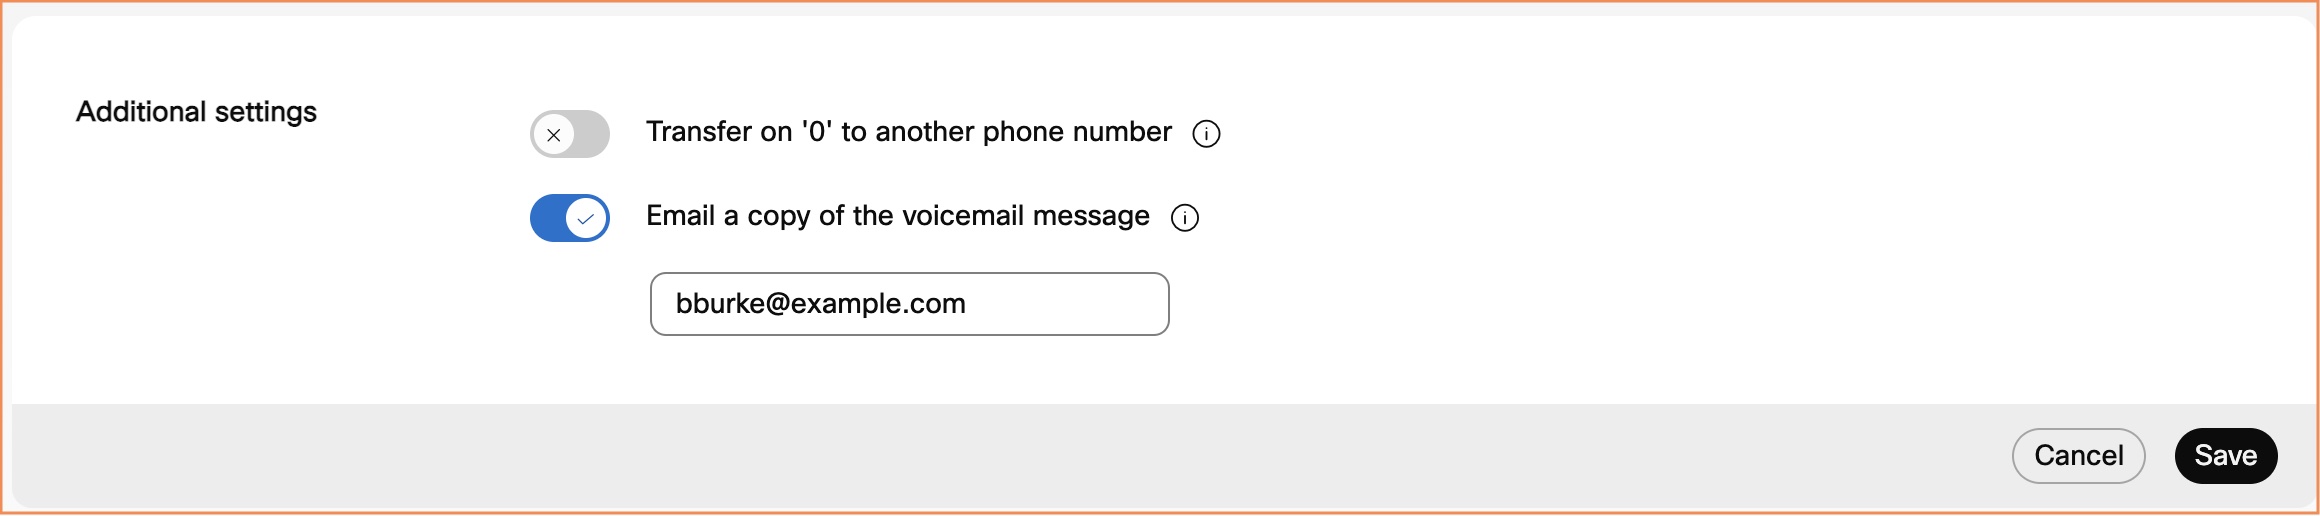 |
| 5 |
Clique em Salvar. |
O que fazer em seguida
Se a transcrição de mensagens de voz estiver ativada na sua localização, a opção Usar caixa postal interna e Enviar uma cópia da mensagem de voz por e-mail deve ser selecionada para que você receba as transcrições das mensagens de voz. Para obter ajuda, consulte a seção Configurar transcrição de correio de voz.
Configurar transcrição de mensagens de voz
Antes de começar
-
Os idiomas suportados são:
- Inglês
- Francês
- Alemão
- Italiano
- Japonês
- Espanhol
-
O administrador deve ativar a transcrição do correio de voz para a sua localização.
| 1 |
Faça login no Hub do Usuárioe clique em . |
| 2 |
Vá para Armazenamento de mensagens e selecione Usar caixa de correio interna. 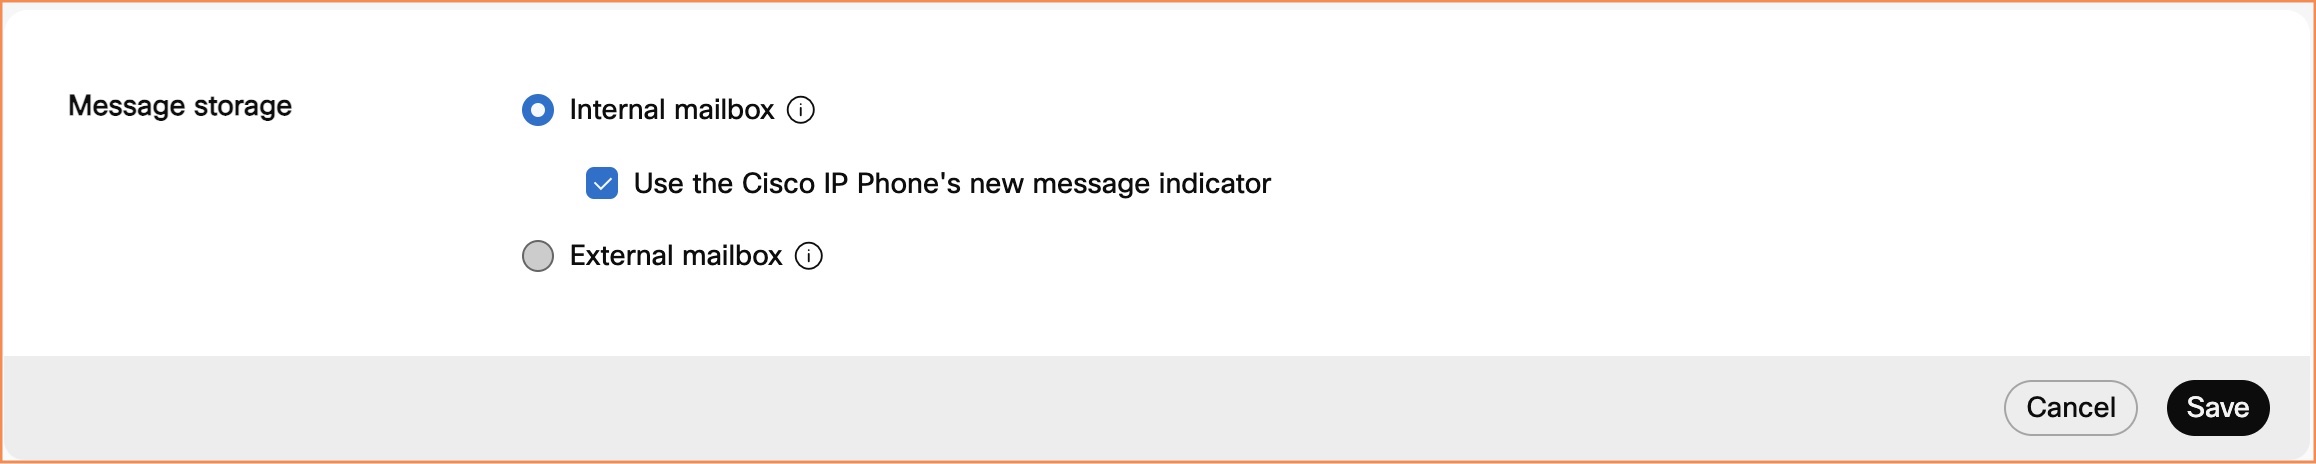 |
| 3 |
Vá para Configurações adicionais e ative Enviar uma cópia da mensagem de correio de voz por e-maile insira o endereço de e-mail para o qual as transcrições serão enviadas. Esta opção pode estar indisponível se o encaminhamento do correio de voz estiver desativado. |
| 4 |
Clique em Salvar. |
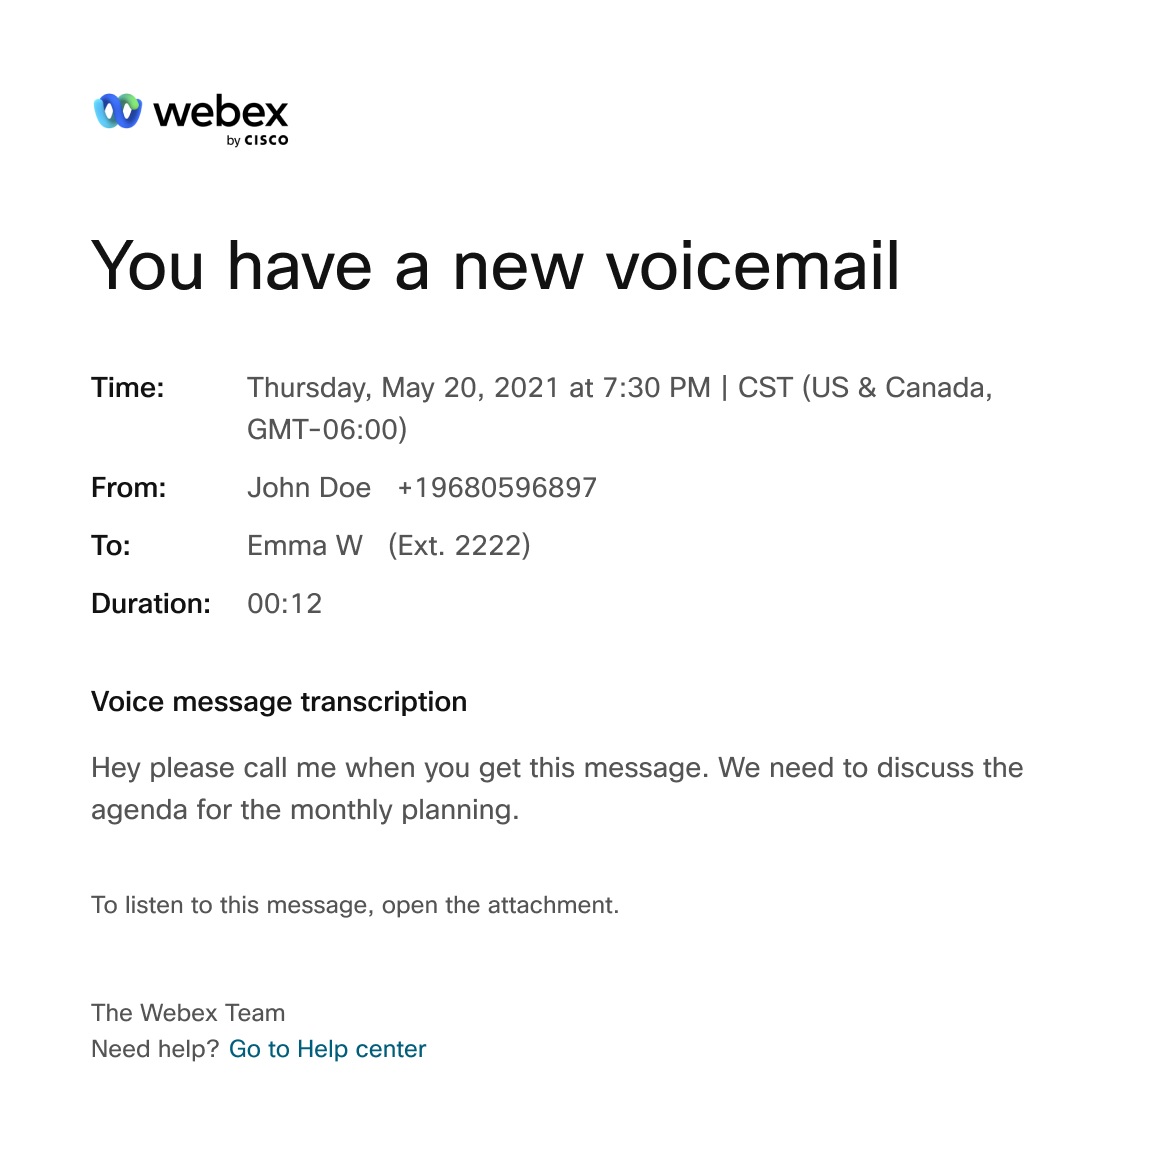
Você pode usar a seguinte imagem como uma representação visual útil de uma notificação por e -mail para transcrição de mensagens devoz .
Motivos pelos quais a transcrição do correio de voz não está disponível
O sistema não gera uma transcrição se a qualidade geral ou a precisão da transcrição for baixa. Isso pode ocorrer se a qualidade do áudio for ruim devido às seguintes limitações:
-
Plano de fundo com muito nós
-
Audbilidade ruim
-
Palavras em idiomas não suportados presentes no áudio
A transcrição de mensagens de voz está disponível apenas para mensagens deixadas nos idiomas suportados.
-
Acento forte
Limitações na transcrição de mensagens de voz
-
Ao encaminhar ou responder a uma mensagem de voz pelo portal de voz, a mensagem não é transcrita.
-
Ao compor uma mensagem de voz e enviá-la para outro usuário pelo portal de voz, a mensagem não será transcrita.
Permitir que os chamadores transfira a partir da sua saudação de correio de voz
Você pode permitir que os chamadores pressionem 0 e sejam transferidos para outro número de telefone, de sua escolha, quando alcançarem sua saudação de correio de voz.
Se este recurso estiver ativado, certifique-se de gravar sua saudação de correio de voz com a orientação apropriada para o chamador. Por exemplo, "Para alcançar o meu assistente, pressione 0".
| 1 |
Faça login no Hub do Usuárioe clique em . |
| 2 |
Vá para Configurações adicionais e ative Transferir em '0' para outro número de telefonee insira o número de telefone para o qual as chamadas serão transferidas. |
| 3 |
Clique em Salvar. 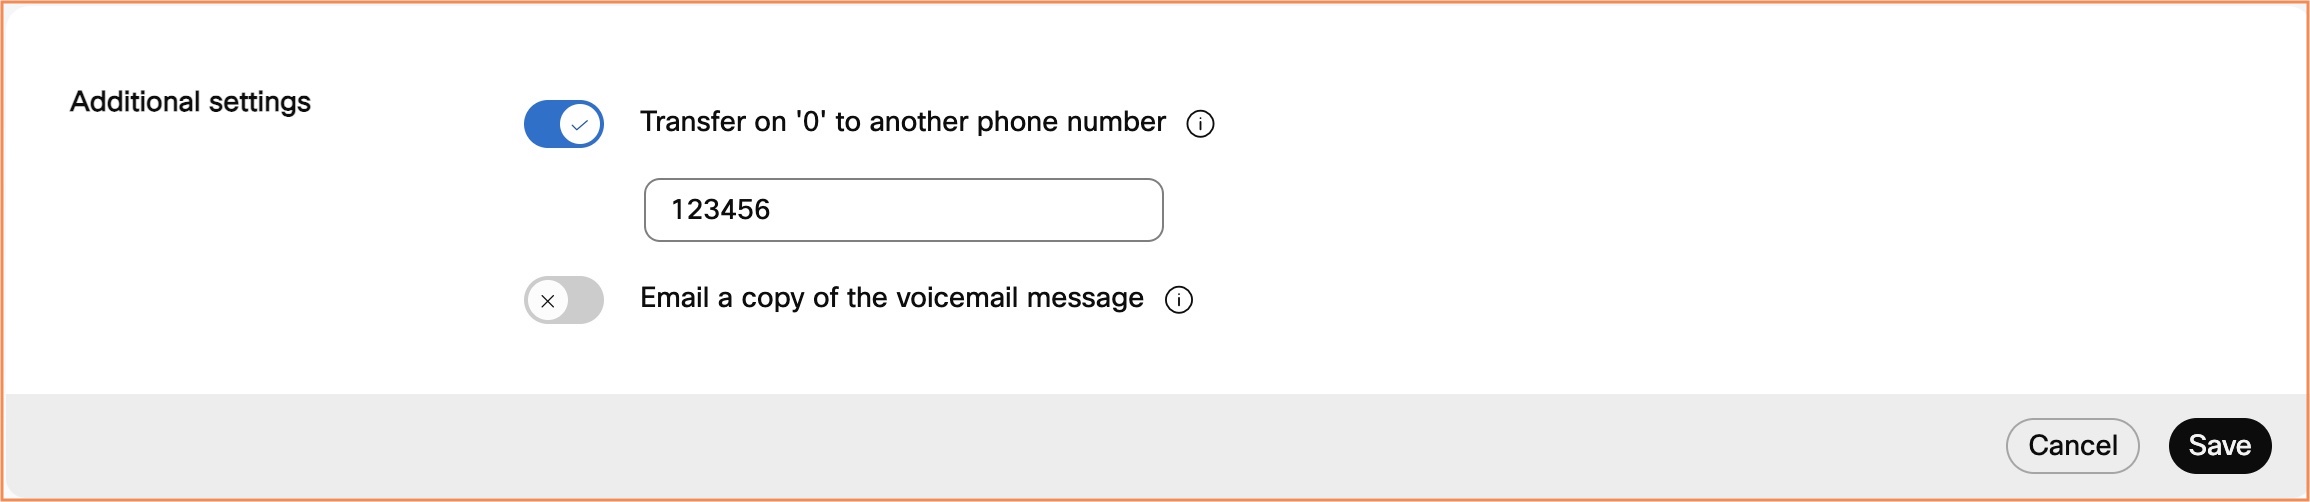 |
Configurar para receber mensagens de fax
O serviço de mensagens de fax permite receber faxes diretamente do serviço de correio de voz.
Os faxes são armazenados em uma área de armazenamento compartilhada, juntamente com as mensagens de voz. A capacidade de armazenamento é de 100 minutos de correio de voz ou 1000 páginas de mensagens de fax. Certifique-se de reservar espaço para novas mensagens de fax e arquivá-las de forma organizada.
Para obter mais detalhes sobre o recurso de mensagens de fax, consulte Configurar o recurso de mensagens de fax para usuários de chamadas do Webex.
Antes de começar
A opção Envio de fax só aparece se o seu administrador tiver ativado o recurso para você.
| 1 |
Faça login no Hub do Usuárioe clique em . |
| 2 |
Vá para Mensagens de fax e ative a opção. Se o Fax messaging estiver habilitado pelo administrador, a opção estará ativada por padrão. Seu número de fax e ramal aparecem. |
| 3 |
Clique em Salvar. |


