
Thanks for your feedback.
Understand your Agent Desktop user interface
 Feedback?
Welcome to the enhanced Agent Desktop user interface. When you sign in, the homepage displays custom or persistent widgets based on the layout configuration that is configured by your administrator. To learn more about how to sign in, see Sign in to Agent Desktop.
Agent Desktop automatically adjusts to different screen sizes but the display size must be greater than 500 x 500 pixels (width x height). Set your web browser zoom to 100% for the optimum experience. To learn more about supported browser versions, see System requirements for Webex Contact Center.
After the feature flag is enabled for the new Desktop user interface, the new UI is not enabled by default. You can turn it on by navigating to Settings → Switch to New Look. Please note, this option will only be available for 60 days. Agents may disable the new UI in Settings, but all the features listed below are only available in the new UI. Therefore, using the new UI is recommended.
- Updated Task List and Details pane
- Enhanced consult & transfer modals
- Enhanced collaboration during consult calls
- Schedule callbacks - Inbound and manual outbound
- Outbound interactions: Digital and campaign enhancements
Here is the snapshot of the new look of the Agent Desktop interface:
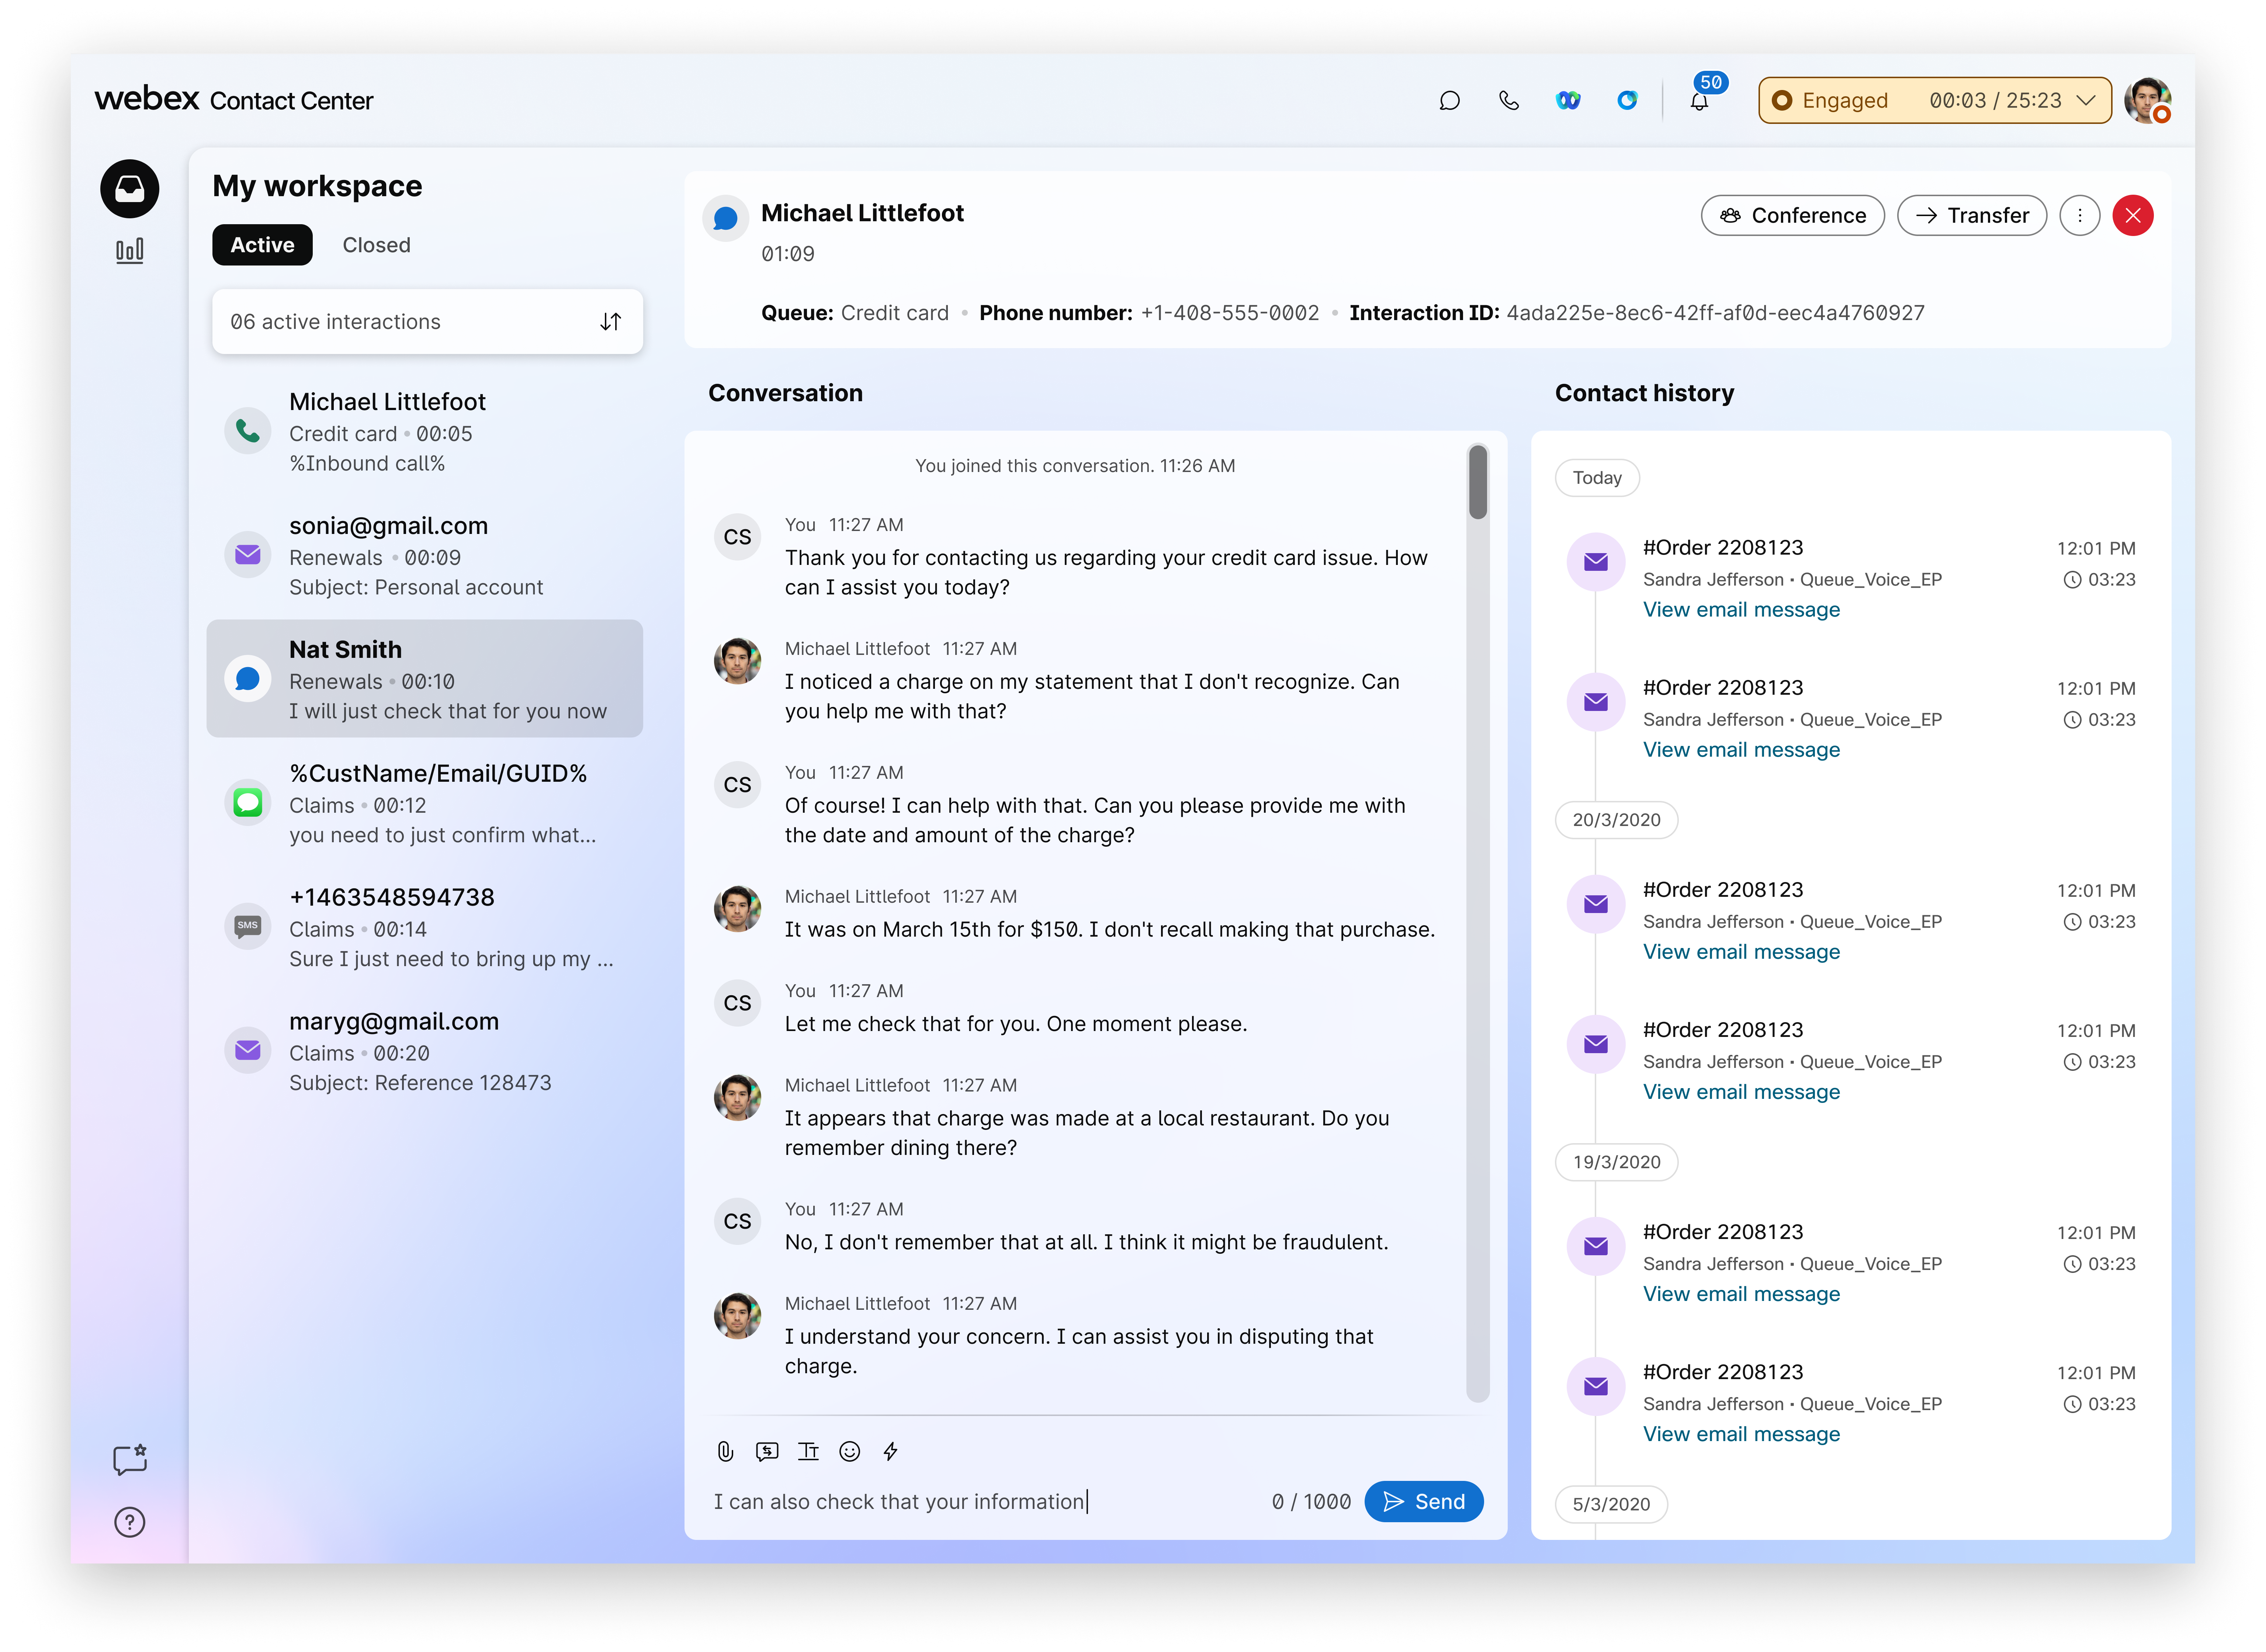
Horizontal header
In the horizontal header, you can do the following:
Navigation bar
The navigation bar is where you can access:
- My workspace: You can see the updated Task List pane that provides a single pane view of all incoming, ongoing, and completed interactions.
-
Agent Performance Statistics
 : If your profile is configured for statistics reporting, you’ll
see the Agent Performance Statistics icon, where you’ll find the historical and real-time
statistics as an agent.
: If your profile is configured for statistics reporting, you’ll
see the Agent Performance Statistics icon, where you’ll find the historical and real-time
statistics as an agent. -
Share Feedback (
 ): You can share feedback on Desktop performance.
 - Help: You can access the documentation at the Help Center.
Task List pane
The refreshed Desktop user interface features an improved Task List pane, allowing you to view all interactions through the following tabs:
-
Active: Displays all ongoing and currently active interactions. It shows key data
fields including call type, customer phone number, DNIS, queue, and elapsed time. You can
accept and view incoming requests and view the initiated outgoing requests in the Active
task list and start communicating with the customer.
- Handle interactions: Accept only one voice call at a time (excluding consult calls), but you can handle both a digital interaction and a voice call simultaneously from the Active task list.
- Sort interactions: Click the Sort icon next to search bar to organize the task list by Recently assigned, Newest message, Longest wait, or Customer name (A–Z).
-
Closed: Presents a chronological log of recently completed interactions across all
channels, with details such as customer name, email, task duration, and wrap up code.
- Sort interactions: Click the Sort icon next to search bar to organize the task list by Recently assigned, Newest message, Longest wait, or Customer name (A–Z).
- Edit customer information: Hover over and click the Edit icon to update the customer phone number associated with the task before initiating an outbound interaction with the customer.
- Initiate outbound call: Hover over the customer phone number from the Closed task list and choose Click to Call to initiate an outgoing interaction with the customer.
By default, the Task List pane is expanded. If the Task List pane is collapsed, you can see a popover at the bottom-right corner to accept the interaction request.
If sensitive data protection is enabled for your desktop, then ANIs, DNIS (for outgoing calls), email addresses will remain masked.
Details View panel
- Interaction control pane: For any task in the Active, Queued, and Closed task
list pane, the interaction control pane appears at the top center.
- During any active interaction, the interaction control pane displays customer information, connected timer, control buttons, and more.
- Schedule Callbacks: You can schedule both inbound and manual outbound callbacks
directly from the desktop during a live interaction or even in a wrap-up state. You can
configure callback details such as customer name, desired time (from 30 minutes to 30
days), time zone, callback number, and queue name. This provides greater flexibility in
managing customer follow-ups and proactive outreach.
- For any completed interaction, the interaction control pane displays customer information, queue name, and other interaction details.
-
Conversation widget: View conversation transcripts (live or IVR) for any Voice,
Email, Chat, or Social interaction selected from the Task List pane.
For any queued interaction, you can preview conversation transcripts in read-only mode before picking up a task, providing crucial context for efficient handling.
For any active voice interactions, you can see the conversations in the IVR transcript tab.
The IVR transcript tab allows you to view the conversation between the virtual assistant and the customer (caller). The widget is displayed only if your administrator has configured the widget for you.
Your user profile is where you can view the team you're assigned, channel capacity, keyboard shortcuts, and more. It’s also where you can manage your notifications. Use these articles to get acquainted with everything you can manage in profile settings.
Desktop allows you to manage voice calls and conversations through digital channels like Facebook Messenger, Livechat, email, SMS, and WhatsApp.
Visit these articles to familiarize yourself with the tools offered in Desktop and begin confidently assisting your customers when they reach out through calls and messages.
Handle calls
Handle conversations in digital channels


